Added:
23 Apr 2018
Are you looking for a new haircut? If so, consider going short with a thick side part and a shiny finish. This short and glossy asymmetrical haircut is ideally what you need to look trendy and keep things simple. It's got some excellent features that go well with this look, like natural volume, asymmetry, cut-in layers and a bit of variation here and there. You can make the shape of this hairdo by using the comb on the crown of your head or by curling it at the roots with a curling iron. The layers at the front will help you make your eyes stand out more!
This glossy auburn haircut is tapered into the nape at the back and sides, while the top is left longer on one side to achieve an asymmetric shape. The longer side is flipped over and flicked out, showing off the layers that give the overall style edge and texture. This funky asymmetrical haircut is best suited for those with fine to medium hair, and it needs product for shine and hold. Short asymmetrical haircuts are the perfect look for women with round faces, long straight hair and medium density. The best thing about this particular haircut is how easy it is to maintain with little product, like a little volume spray or gel and regular trims every 4-6 weeks.
Short And Glossy Asymmetrical Haircut
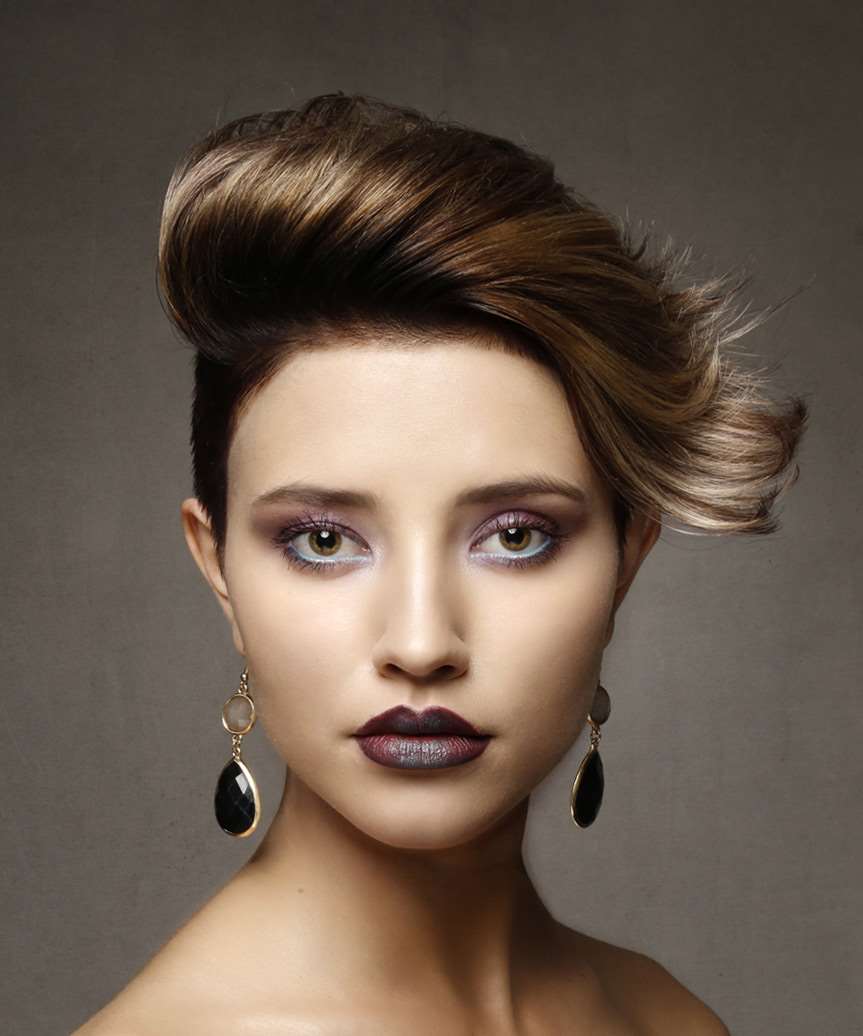
Image © TheHairStyler.com

Image © TheHairStyler.com
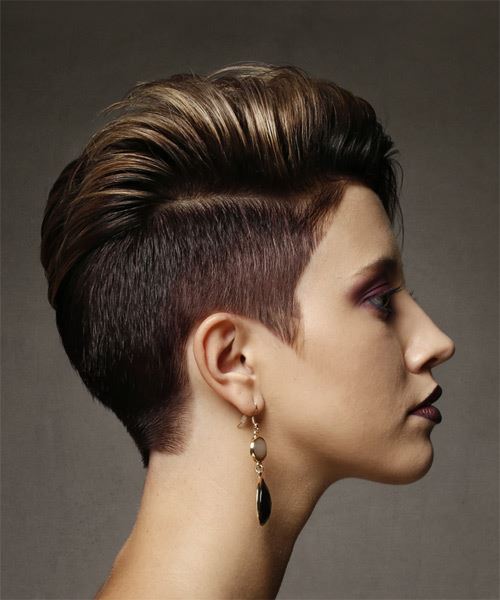
Image © TheHairStyler.com
Visual Story
Hairstyle Suitability Rating:
Hairstyle Popularity Rating: ★★★★★
Hairstyle Popularity Rating: ★★★★★
Hairstyle Type
Category
Alternative
Length
Short
Elasticity
Straight
Hair Color
Brunette
Haircut Technique
Type
Clipper Cut
Suitability
Gender
Women
Face Shape
oval,oblong,diamond,triangular
Hair Density
Medium
Hair Texture
Medium
Age
Under 21, 21 - 30, 31 - 40, and 41 - 50
Height
Any
Weight
Thin/Average/Large
Forehead Height
Short/Average
Glasses
Yes
Styling
Time
10 minutes
Tip
Style the front straight up with gel wax for lift.
Products
mousse, gel, hair spray
Tools
finger dry, blow dry

