Layered Pixie Haircut For Fine Hair


Added: 09 Dec 2010
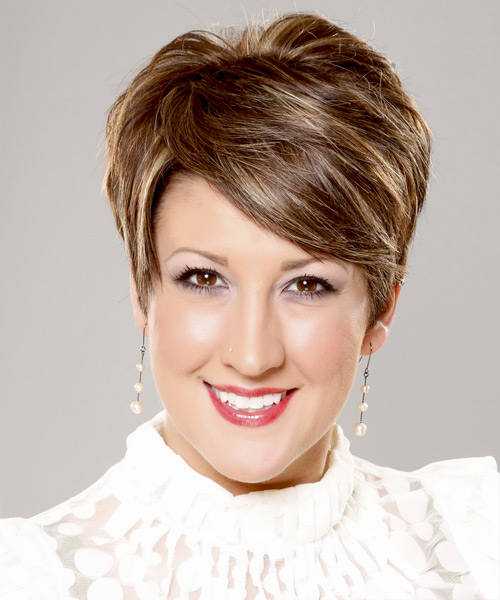
This layered brunette Pixie haircut is the latest trend in celebrity hairstyles. The layers add dimension to this style and make it look more natural. A light blonde highlight will complement the brunette's hair color well. This layered Pixie haircut is quite versatile, so if you're looking for something new, try this out on your next visit to the salon!
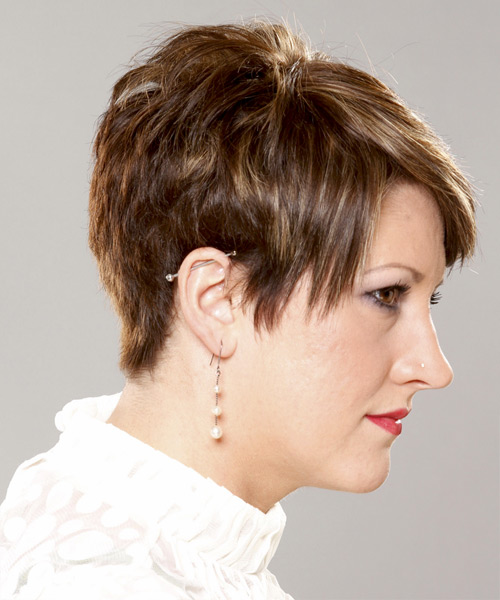
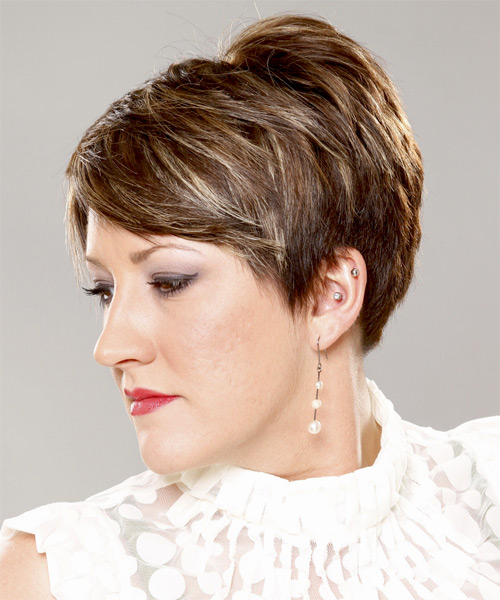
This Pixie is the perfect hairstyle for those with fine hair. If you are looking for a trendy hairstyle, this one is precisely what you need. The back of this fancy 'do is tapered into the back of the head and the side allowing them to fall flat to contour the head while the crown adds life and height to form this great shape. This smooth look is easy to re-create with a blow dry and will be perfect for any occasion. You can achieve this layered Pixie on round faces, oval, heart-shaped faces and triangular ones. It's all about understanding your face shape and finding the right haircut. Regular hair trimming will make this hairstyle last longer and also keep it in shape.


Visual Story

Layered Pixie Haircut For Fine Hair- Visual Story


Hairstyle Suitability Rating: ★★★★★
Hairstyle Popularity Rating: ★★★★★

Hairstyle Type

Category
Formal
Length
Short
Elasticity
Straight
Hair Color
Brunette with Light Blonde Highlights

Haircut Technique

Type

Suitability

Gender
Women
Face Shape
round,oval,heart,triangular
Hair Density
Medium/Thick
Hair Texture
Fine/Medium

Age
Under 21, 21 - 30, 31 - 40, 41 - 50, 51 - 60, and Over 60
Height
Any
Weight
Thin/Average/Large

Forehead Height
Short/Average
Neck Length
Short/Average
Ears
Small/Average
Nose
Small/Average
Glasses
No

Styling

Time
20 minutes
Tip
Direct your hair into position while applying the finishing products.
Products
mousse, wax, hair spray
Tools
blow dry


Similar hairstyles you may be interested in...


step 1

Apply styling mousse to damp hair, using your palm as a measuring guide, and evenly distribute it along the hair shaft. Styling mousse will add hold and can help achieve better results.


step 2

A small radial brush is used on shorter hair types to add more body or in longer hair types to create curl. When selecting a radial brush, always use one with a pure bristle as this will not tear or damage the hair.


step 3

Using your brush, blow-dry in small sections starting from the nape/back. Tilting your head forward, place the brush an inch below the roots to hold them taut and aim the dryer above the brush for a few seconds before continuing to the ends.


step 4

Using your brush, blow-dry in small sections starting from the sides. Tilting your head forward, place the brush an inch below the roots to hold them taut and aim the dryer above the brush for a few seconds before continuing to the ends. Repeat this step on a new section directly above the dry one.


step 5

To blow-dry the crown/top sections, take a section of hair no bigger than the diameter of the brush and blow-dry the hair placing the brush under the section of hair. With your blow-dryer in front of the brush, follow the brush in an upwards direction at the roots and an outwards position at the ends for volume and softness. Continue until the section is dry.


step 6

Take a section of your hair no wider than the diameter of your brush. Place your brush under and at the roots of your section. Then with your blow-dryer above, drag the brush up through the mid-lengths and ends of the hair following with your blow-dryer and pulling the hair to the left. Repeat until your hair is completely dry.


step 7

Pick up a small selection of hair from your mid section no bigger than your tail comb. Place your comb at the roots and then comb up and down until the hair is standing up by itself. Continue to the crown and finish at the sides. Repeat this step if you require more volume.


step 8

Apply some hard wax to your fingertips and then rub it into your roots while lifting your strands for soft volume.


step 9

Apply some wax to your fingertips and then pull through the ends of your hair in a downward motion to achieve a sculptured look. Pinch clumps of hair in different directions for a messier result.


step 10

Using a small amount of wax, work it through the mid-lengths and ends in a downward, pinching motion. For added texture, apply more pinching and more wax.


step 11

Apply wax to your fingertips then drag through your bangs, sweeping the hair to the left as you go. Pinching the ends will create soft texture.


step 12

To finish, apply a minimal amount of hairspray from an arms length distance to the top, sides and back. Take care not to use too much or you will end up with a white, flaky residue which looks like dandruff.


Recommended Hairstyles...