Added:
25 Jun 2018
Looking for a new way to achieve the voluminous Pixie haircut? Our model flaunts a short and funky hairstyle here with oodles of volume at the crown, up-swept bangs and layered edges that created an edgy and textured style. This light blonde look adds a new dimension to this cute voluminous pixie. It is the perfect hairstyle for ladies who have sharp complexions. This flattering Pixie cut makes the best of your face shape, highlights your cheekbones and makes your eyes pop. They say Blondes have more fun, and they are the rising stars of Hollywood and are usually considered quite sophisticated. If you love your hair color and want to try something different, then a blonde pixie might be your best choice.
This voluminous Pixie haircut can be a versatile hairstyle choice for any face shape. It works best on women with the most unique, oval, oblong and diamond-shaped face shapes. This style is ideal for women with medium to fine hair texture and density. The long bangs cascade down the sides of the head, accentuating a face frame that is unobtrusive and professional. Backcombing is essential in this style because it creates a multi-directional texture that helps hold the bangs in place. So the regular trims will help you to maintain this shape and provide you with added shine and volume to the hair. To achieve the look of this voluminous pixie with up-swept bangs, you can use volumizing hairspray and a curling iron (if needed). The icy blonde color completes this 'do nicely and will suit ladies with a cool complexion the best.
Voluminous Pixie Haircut With Up-Swept Bangs
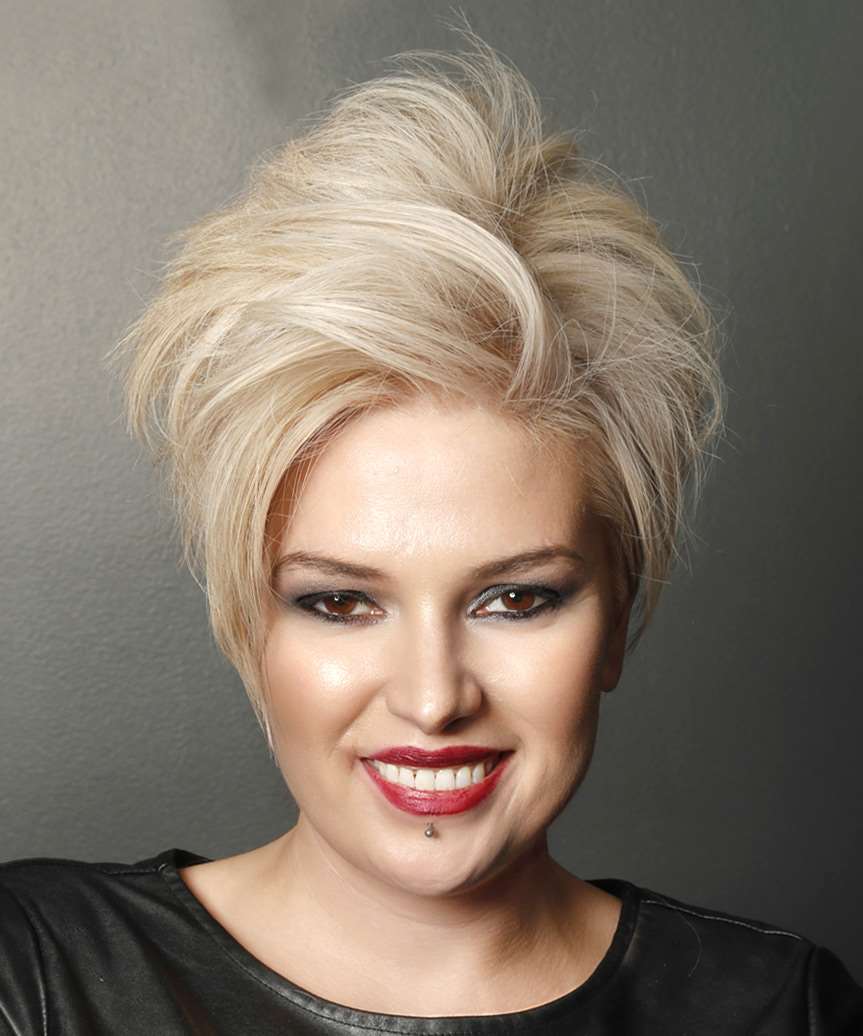
Image © TheHairStyler.com
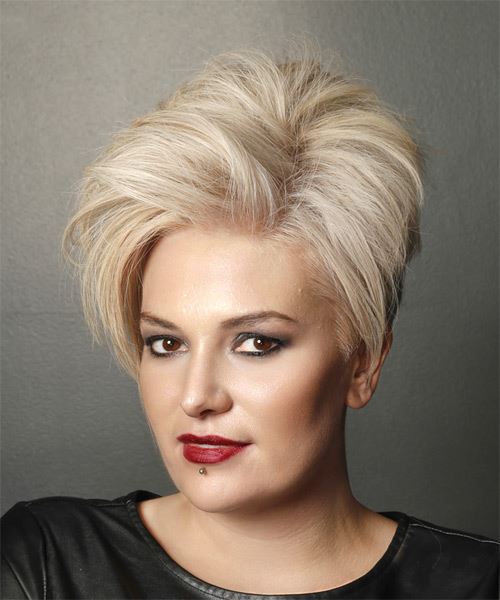
Image © TheHairStyler.com
Hairstyle Suitability Rating:
Hairstyle Popularity Rating: ★★★★★
Hairstyle Popularity Rating: ★★★★★
Hairstyle Type
Category
Casual
Length
Short
Elasticity
Straight
Hair Color
Light Blonde
Haircut Technique
Type
Clipper Cut
Suitability
Gender
Women
Face Shape
oval,oblong,diamond,triangular
Hair Density
Medium
Hair Texture
Fine
Age
Under 21, 21 - 30, 31 - 40, and 41 - 50
Height
Any
Weight
Thin/Average/Large
Forehead Height
Short/Average
Glasses
No
Styling
Time
20 minutes
Products
gel spray, wax, hair spray
Tools
finger dry, blow dry

