Added:
10 Nov 2010
This is a lovely body-boosting style, and the gorgeous look is an excellent choice if you want to add fullness, body, and texture to your hairstyle. The textured edges create a more natural style and protect the ends of your hair. Our model is wearing a hairstyle with sassy textured edges. It is a great hairstyle to boost your confidence and create an elegant look. For the hair styling, the top has been heavily layered to create these sassy textured edges and to make it much easier to flick out. The bangs have been jagged, cut, and swept to the side to shape the face. This style will work best on longer face shapes. The sides have been jagged cut to the cheekbones and layered up to create this flicked look. The back has been razor cut at the ends to create these textured edges, and short layers have been cut to add volume to the crown. This hairstyle is ideal for anyone with medium or thin hair density. It is flattering on all face shapes and suitable for oval, oblong and square face shapes. This modern hairstyle is perfect for your next night out on the town. Perfectly round and textured edges add depth and body to the look while being fun to wear.
Maintaining this hairstyle will require regular trims. After approximately 4 to 6 weeks, we recommend trimming the rough ends to prevent damage from brushing or scratching. Pinch and twist your ends with the wax to create this simple flick.
Short Body Boosting Hairstyle With Sassy Textured Edges
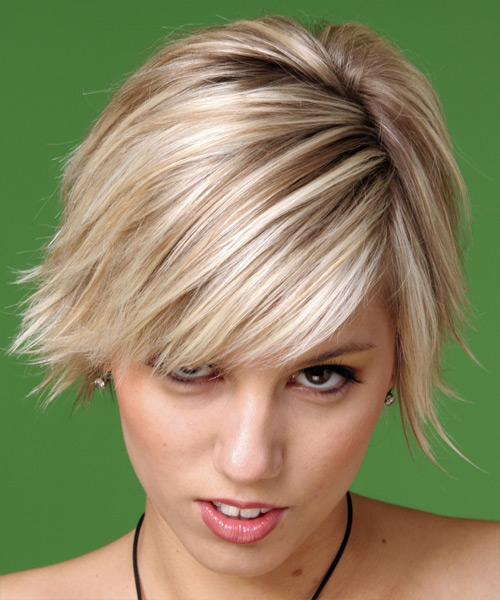
Image © TheHairStyler.com

Image © TheHairStyler.com
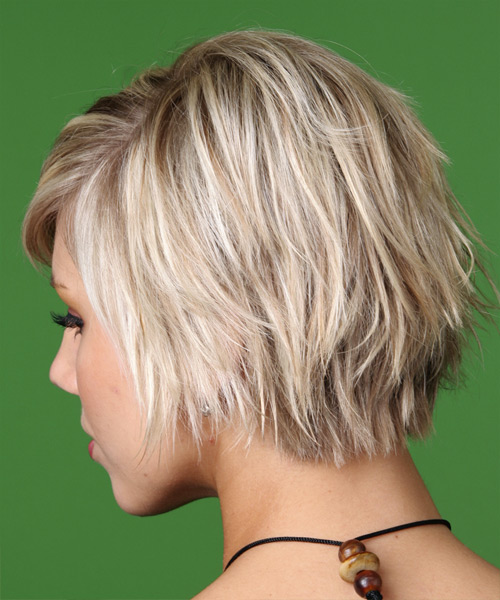
Image © TheHairStyler.com
Hairstyle Suitability Rating:
Hairstyle Popularity Rating: ★★★★★
Hairstyle Popularity Rating: ★★★★★
Hairstyle Type
Category
Casual
Length
Short
Elasticity
Straight
Hair Color
Light Blonde
Haircut Technique
Type
Suitability
Gender
Women
Face Shape
oval,oblong,square,diamond
Hair Density
Thin/Medium
Hair Texture
Fine/Medium
Age
Under 21, 21 - 30, 31 - 40, and 41 - 50
Height
Any
Weight
Thin/Average
Forehead Height
Short/Average
Neck Length
Long
Ears
Small/Average
Nose
Small/Average
Glasses
No
Styling
Time
30 minutes
Tip
Pinch and twist your ends out with the wax to create this simple flick.
Products
moisturizer, sculpture lotion, wax, smoothing shine, hair spray
Tools
blow dry

