Added:
10 Nov 2010
Have you ever wanted a wild Pixie haircut but feared it might look sloppy and messy? Now you don't need to worry about it. This Pixie haircut has "wild" written all over it and is not for the faint hearted! The sliced layers through the top add creativity to this style, and the wispy bangs are the main feature. The back has been clipper cut short to below the crown for a smooth finish. The sides have been cut around the ear for a clean finish, and wispy pieces have been used for the side burns to maintain a soft edge around the face.
This wild Pixie haircut with razor cut bangs will let your eyes wander over the top of your head and into the back of your neck. This Pixie is a contemporary short-style cut for women with an easy going attitude. The hair is cut on a sloping angle, with the bangs longer in front and slightly shorter at the back. This natural look is achieved by cutting close to the scalp from ear level to the crown of the head, creating long braids at the top while keeping straight those that fall on the sides and minimal hair around the neckline. Regular trimming after 4 to 6 weeks allows you to maintain this hairstyle into shape. If you have a busy lifestyle and need a quick visit to the salon for a haircut, this Pixie is perfect for you.
Wild Pixie Haircut With Razor Cut Bangs

Image © TheHairStyler.com
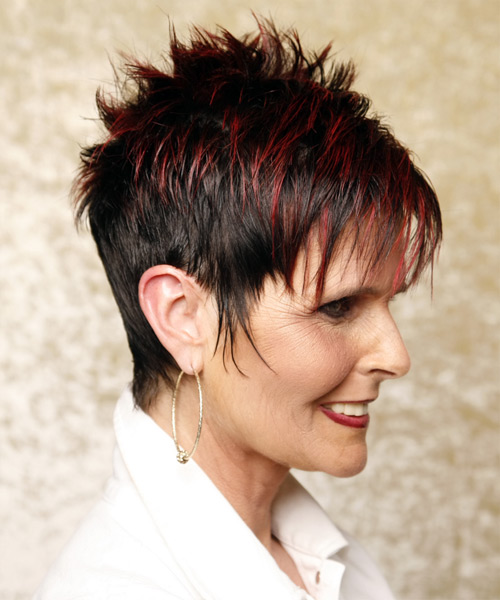
Image © TheHairStyler.com

Image © TheHairStyler.com
Hairstyle Suitability Rating:
Hairstyle Popularity Rating: ★★★★★
Hairstyle Popularity Rating: ★★★★★
Hairstyle Type
Category
Casual
Length
Short
Elasticity
Straight
Hair Color
Black Burgundy
Haircut Technique
Type
Razor Cut
Suitability
Gender
Women
Face Shape
round,oval,heart,diamond,triangular
Hair Density
Thin/Medium
Hair Texture
Fine/Medium
Age
Under 21, 21 - 30, 31 - 40, and 41 - 50
Height
Any
Weight
Thin/Average
Forehead Height
Short/Average
Neck Length
Short/Average
Ears
Small/Average
Nose
Small/Average
Glasses
No
Styling
Time
30 minutes
Tip
Direct your hair into position while applying the finishing products.
Products
gel spray, gel wax, lacquer
Tools
finger dry, blow dry

