Added:
10 Nov 2010
This short and wispy hairdo is the perfect style for a special occasion. The hairstyle has subtle layers and a touch of bluntness. Our model is perfectly captured in this wispy layered hairstyle with pink blush and glossy lips. Her smoky eyes give this look a touch of drama. It is a short haircut with fun layers cut right throughout to achieve texture and height. For the hair styling, the back has been cut at one length and textured on the ends to create wispy edges. The length of the sides has been cut the same as the back, with shorter layering cut up to blend in with the short layers through the top. This hairstyle is perfect for round, oval and diagonal face shapes. Work the sides of your hair into a low cut and leave the top of your head longer. It will work with any thickness if you have thin to medium-density hair. This hairdo is a classic look that is great for any occasion. It's ideal for school, work, or after a relaxing day out with friends.
Short and wispy layered haircuts are great for fashion-conscious women who want an edgy look without trying too hard. This hairstyle requires regular trims to maintain, and we recommend it for women who wish to take less time in the hairdressing chair. You are going to love this short, wispy haircut. It is easy to maintain with regular trims after four weeks, and it looks excellent when styled up or down for several occasions.
Short And Wispy Layered Hairstyle
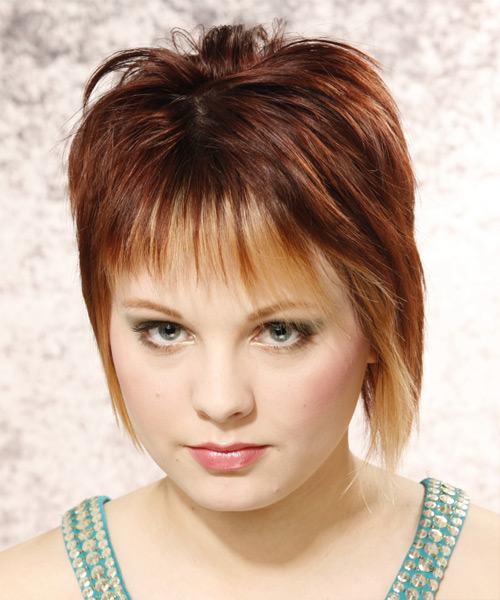
Image © TheHairStyler.com
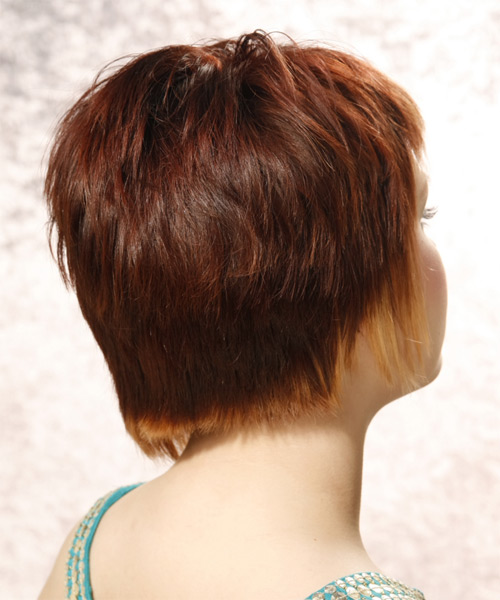
Image © TheHairStyler.com
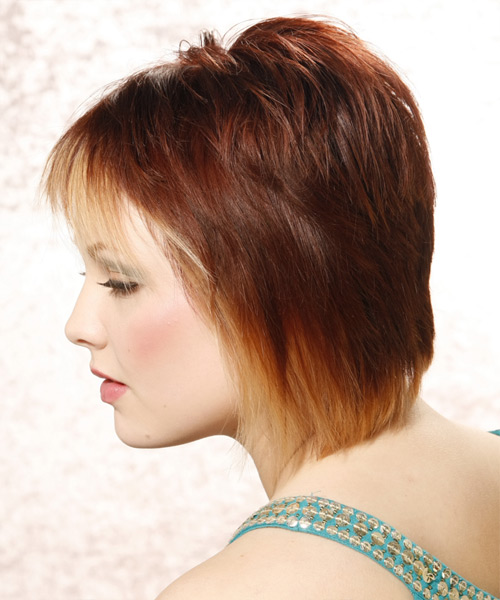
Image © TheHairStyler.com
Hairstyle Suitability Rating:
Hairstyle Popularity Rating: ★★★★★
Hairstyle Popularity Rating: ★★★★★
Hairstyle Type
Category
Casual
Length
Short
Elasticity
Straight
Hair Color
Light Brunette
Haircut Technique
Type
Suitability
Gender
Women
Face Shape
round,oval,heart,triangular
Hair Density
Thin/Medium
Hair Texture
Fine/Medium
Age
Under 21, 21 - 30, and 31 - 40
Height
Any
Weight
Thin/Average
Forehead Height
Short/Average
Neck Length
Short/Average
Ears
Small/Average
Nose
Small/Average
Glasses
No
Styling
Time
30+ minutes
Tip
Fluff the styling products into the ends of your hair and pinch as you go to create textured edges.
Products
gel spray, moulding cream, lacquer
Tools
finger dry

