Added:
06 Aug 2018
Short hairstyles are one of the most trending hairstyles these days. They are stunning and alluring at the same time. The best part about short hairstyles is that you can alter them to suit your face, personality, and style. This short face contouring light brunette hairstyle with layers is a smooth, shiny, and classy style that has stood the test of time. Short hair that has been cut with layers to contour the face is trending all over the world and after seeing this hairstyle, there is no questioning why.
Side-swept bangs with long straight hairlines make this haircut look amazing. The retro bob is perfect for anyone who wants to go bold and modern with their hairstyle procedures. The sides and back of our model's short layered 'do are tapered close to the head, while the top is left longer to add height and lift to the style. The side-swept layers in the bangs add a gorgeous face-framing effect and provide forehead coverage. It is perfect for ladies with an oblong, oval, or diamond-shaped face and with fine to medium-thick hair. The gorgeous light brunette color extenuates this hairstyle and takes it to the next level. It is ideal for women with fine to medium thick hair and suits ladies with warm complexions the best.
You do not need to be a super model or star to rock this on trend, amazing hairstyle. Find yourself a good hairstylist and you are on your way.. Do not let the word "short" fool you; the haircut is one that women of all ages and shapes can rock.
Short Face Contouring Light Brunette Hairstyle With Layers
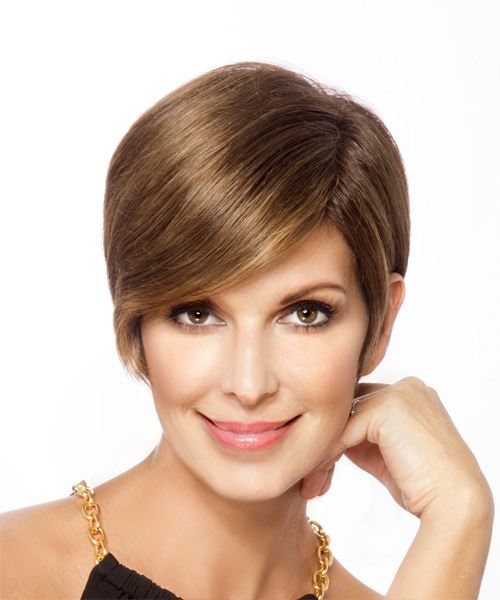
Image © TheHairStyler.com
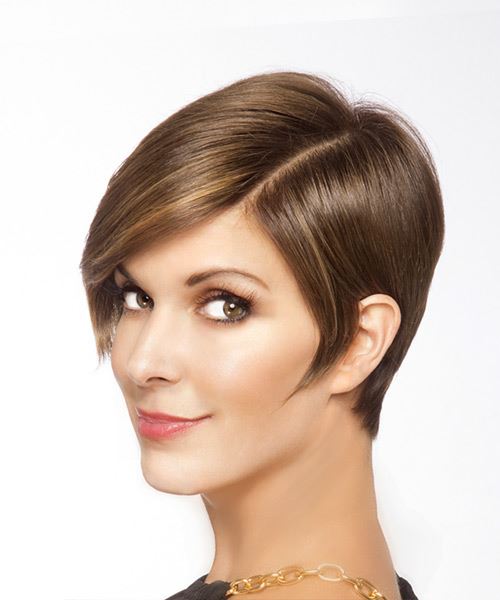
Image © TheHairStyler.com
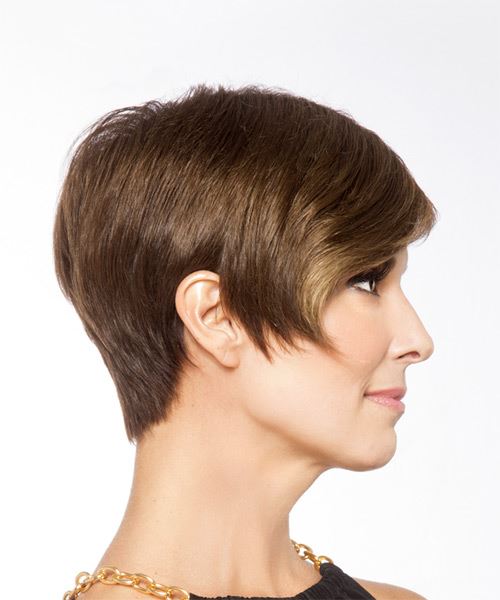
Image © TheHairStyler.com
Visual Story
Hairstyle Suitability Rating:
Hairstyle Popularity Rating: ★★★★★
Hairstyle Popularity Rating: ★★★★★
Hairstyle Type
Category
Formal
Length
Short
Elasticity
Straight
Hair Color
Light Brunette
Haircut Technique
Type
Clipper Cut
Suitability
Gender
Women
Face Shape
oval,oblong,diamond,triangular
Hair Density
Medium
Hair Texture
Medium
Age
21 - 30, 31 - 40, 41 - 50, 51 - 60, and Over 60
Height
Any
Weight
Thin/Average/Large
Forehead Height
Long
Glasses
Yes
Styling
Time
10 minutes
Products
mousse, hair spray, wax
Tools
blow dry

