Katie Aselton Medium Wavy Dark Brunette Hairstyle
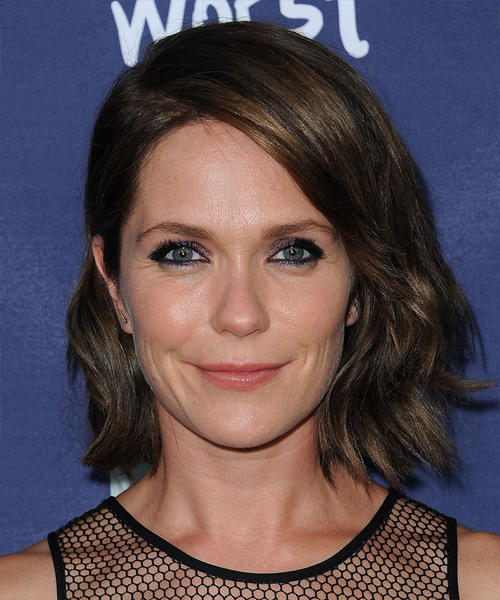

Added: 02 Oct 2015
This medium length 'do is jagged cut on the ends then dressed in loose waves to give this hairstyle movement and shape. One side is pinned behind ears leaving the opposite side out to soften the face. Product is needed to pinch through ends to give this 'do a textured finish.

Katie Aselton looks lovely here in a simple wavy bob that has been tucked behind the ear on one side. This ‘do is ideal for her oblong face shape and high forehead. The length gives her face a more oval shape while the large waves throughout add body and texture to her hair. Layering around the cheekbones and eyes bring the focus front and center, while her long side-swept fringe creates as nice frame for her eyes. Katie also has a high forehead, which looks great with a side part and grown out fringe.

Katie has a cool skin tone with pink undertones and blue-grey eyes. She is best suited to cool chocolate brown tones like the one seen here as it brings out her eye color and gives her complexion a nice glow. She has subtle golden brown highlights throughout for extra warmth and dimension.

Katie Aselton is an American film director, producer, and actress.

Hairstyle Suitability Rating: ★★★★★
Hairstyle Popularity Rating: ★★★★★

Hairstyle Type

Category
Casual
Length
Medium
Elasticity
Wavy
Hair Color
Dark Brunette

Haircut Technique

Type
Scissor Cut

Suitability

Gender
Women
Face Shape
oval,oblong,square,diamond
Hair Density
Thin/Medium
Hair Texture
Fine/Medium

Age
Under 21, 21 - 30, 31 - 40, and 41 - 50
Height
Any
Weight
Thin/Average/Large

Forehead Height
Short/Average
Neck Length
Short/Average
Ears
Small/Average
Nose
Small/Average
Glasses
Yes

Styling

Time
30 minutes
Tip
Use your smoothing shine to add a small amount of gloss and to reduce fly-aways.
Products
mousse, wax, hair spray
Tools
blow dry, curling iron


Similar hairstyles you may be interested in...


step 1

Apply styling mousse to damp hair, using your palm as a measuring guide, and evenly distribute it along the hair shaft. Styling mousse will add hold and can help achieve better results.


step 2

Using the corner of your comb and standing in front of a mirror find the middle of your right eye and then drag the comb straight up slowly until you reach your hairline and then continue back in a straight manner to achieve an even right part. A side part is great for longer face shapes because it creates the illusion of width.


step 3

A medium radial brush is used on medium to long hair types to smooth out wavy or curly hair textures or to add body to straight hair. When selecting a radial brush, always use one with a pure bristle as this will not tear or damage the hair.


step 4

To blow-dry under, start at the nape/back and place your brush under the section of hair close to the nape. With the dryer held up over the hair, pull the brush from the roots and continue to the mid length's, keeping the blow-dryer following over the top. Once you reach the ends, curve them under. Repeat this step until the section is completely dry.


step 5

Take a section of your hair from your ear to your temple that is the same diameter as the brush. Place your brush on top of the hair starting at the roots and pull the hair slowly in a backward direction with your blow-dryer following in front. Be sure the section is dry and then repeat the step on a new section of hair directly behind.


step 6

Take a section of your hair from your ear to your temple that is the same diameter as the brush. Place your brush on top of the hair starting at the roots and pull the hair slowly in a backward direction with your blow-dryer following in front. Be sure the section is dry and then repeat the step on a new section of hair directly behind.


step 7

A large curling iron is used to create large soft curls and can be used to add body.


step 8

Take a small section of hair and place the ends at the base of your curling iron barrel and then wrap the hair up around the barrel until you reach your mid-lengths. Hold the hair for 5 to 10 seconds and then release the hair by unwinding the strands backwards.


step 9

Apply a small amount of wax to your fingertips, then place it at the roots above your ear and drag it through as you pull your hair behind your ear.


step 10

Apply a small amount of wax to your fingertips and then lightly piece and pinch the ends of your hair.


step 11

To finish, apply a minimal amount of hairspray from an arms length distance to the top, sides and back. Take care not to use too much or you will end up with a white, flaky residue which looks like dandruff.


Recommended Hairstyles...