Added:
30 Jul 2018
If you love the bold personality of the sixties, there is a hairstyle to fit your personality. It is a long hairdo that is inspired from the late 1960s. Gone are the days of dowdy and dull, because the sixties are all about being bold, strong, and beautiful. This Sixties-inspired 'do here is with a long eye-skimming fringe and wispy layers throughout the lengths and ends. This hairstyle is a combination of long hair and straight hair. The hair on the top, sides, and back is cut short, while the fringe is longer and layered at the front. The crown is teased to achieve lift and height, making this hairdo perfect for formal and casual occasions. The color used for this hairdo is Brunette. This haircut will be good for a round face shape and an oval one because they are both symmetrical; hence this hairstyle will balance out their features. It suits women with straight or wavy hair, but those with curly hair may find it challenging to maintain this look unless they use heat protection products.
Regular trims are needed after four to six weeks to prevent split ends and keep this hairstyle in shape. You might need a little product to tame fly-away hair. Styling your hair can take some time, but it can be a breeze with the right products! We suggest using a moisturizer and moulding cream to style your locks. These products will help add hydration and hold to your hair, giving you the perfect style in no time.
Long Sixties-Inspired Straight Hairdo

Image © TheHairStyler.com
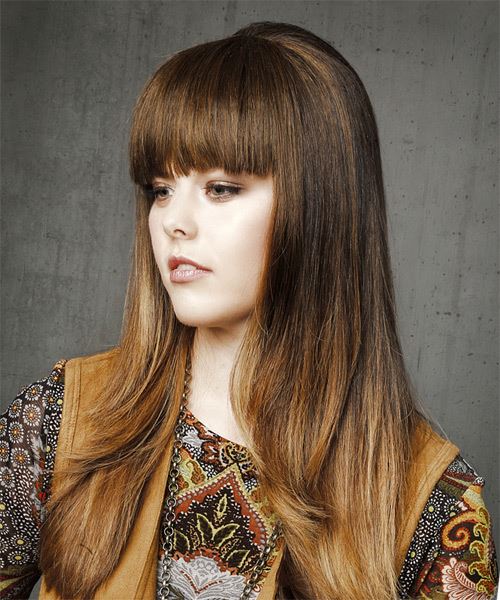
Image © TheHairStyler.com
Hairstyle Suitability Rating:
Hairstyle Popularity Rating: ★★★★★
Hairstyle Popularity Rating: ★★★★★
Hairstyle Type
Category
Casual
Length
Long
Elasticity
Straight
Hair Color
Brunette
Haircut Technique
Type
Scissor Cut
Suitability
Gender
Women
Face Shape
round,oval,square,heart,diamond,triangular
Hair Density
Medium
Hair Texture
Medium
Age
Under 21, 21 - 30, and 31 - 40
Height
Any
Weight
Thin/Average/Large
Forehead Height
Long
Glasses
No
Styling
Time
20 minutes
Products
moisturizer, moulding cream
Tools
blow dry

