Added:
05 Feb 2013
This is a perfect hairstyle idea for women. It will give you the unique look of a smart, stylish, and confident person who will stand out in any crowd. You can be creative with your hairstyles and make them look different according to the event you are attending. This is a short and straight hairstyle with deep brown highlights, the perfect hairstyle for an alternative look.
Our model is flaunting a short dark copper blonde hairstyle with light blonde highlights that contains textured layers, and it looks uplifting. Overall, the model looks gorgeous in this hairstyle! The back is tapered into the neck to contour the back of the head, blending into the textured layers through the sides and back which create height and lift. This short hairstyle is for women with oval, oblong and diamond face shapes, with hair of thin or medium density. If your hair is of fine or medium texture, you can wear this hairstyle easily. The height of the root area and jawline will also play a major role while selecting the right length. This style is a great choice for women who like their hair short and layered, but prefer a little texture to it.
This elegant hairstyle is ideal for people who want to enhance their natural beauty and create a look that compliments their face. The hair can be straightened with a hairdryer in between trimmings after 4 to 6 weeks to maintain the style. Fluff the styling products into the ends of your hair and pinch as you go to create textured edges.
Short Two-tone Hairstyle With Textured Layers And Height
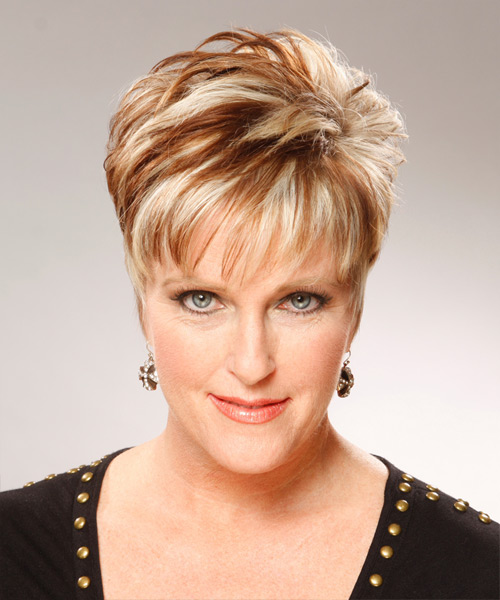
Image © TheHairStyler.com
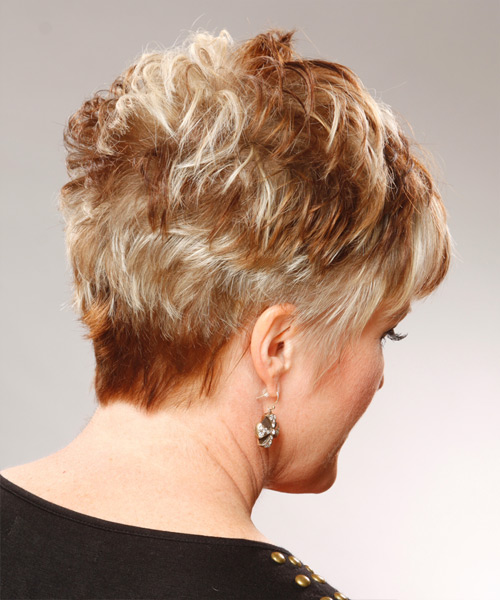
Image © TheHairStyler.com
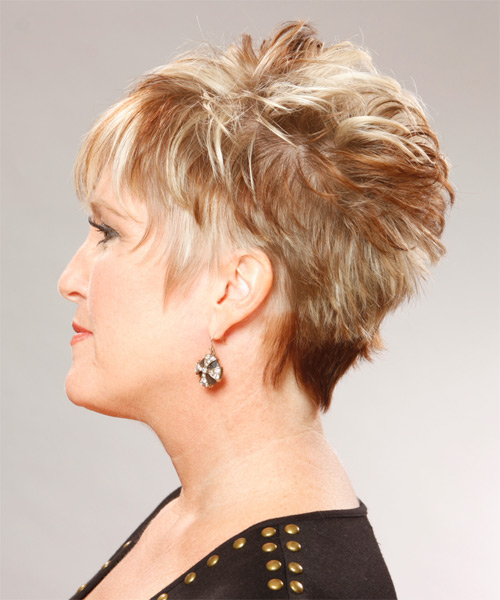
Image © TheHairStyler.com
Hairstyle Suitability Rating:
Hairstyle Popularity Rating: ★★★★★
Hairstyle Popularity Rating: ★★★★★
Hairstyle Type
Category
Formal
Length
Short
Elasticity
Straight
Hair Color
Dark Copper Blonde and Light Blonde Two-Tone
Haircut Technique
Type
Scissor Cut
Suitability
Gender
Women
Face Shape
oval,oblong,diamond
Hair Density
Thin/Medium
Hair Texture
Fine/Medium
Age
21 - 30, 31 - 40, 41 - 50, 51 - 60, and Over 60
Height
Any
Weight
Thin/Average/Large
Forehead Height
Short/Average
Neck Length
Short/Average
Ears
Small/Average
Nose
Small/Average
Glasses
No
Styling
Time
20 minutes
Tip
Fluff the styling products into the ends of your hair and pinch as you go to create textured edges.
Products
mousse, wax
Tools
blow dry

