Added:
18 May 2018
The ends and layers of this blonde mane are jagged cut to give this casual hairstyle a textured look and feel. The body and volume through the ends makes this low-fuss style great for those wanting a 'do to compliment a square face. Regular trims every 4-6 weeks is needed to prevent split ends.
Heidi Klum looks chic and sexy here in wavy layered locks that fall just past her shoulders. This hairstyle looks great with her square face shape as it camouflages her broad forehead and highlights her strong cheekbones. Heidi’s ‘do also makes the most of her fine hair type and pumps up the volume, thanks to the large waves that have been added throughout her ends. The length is also working well for her here as square-shaped faces look great with longer cuts that balance out any excess width in the face.
Heidi has a medium tanned complexion with golden undertones and green eyes. This makes her suited to wearing hair colors that have a golden base to them. Here, she goes for a light honey blonde shade that looks great with her skin tone and eye color. This sun-kissed blonde tone looks fabulous paired up with a dark honey base that can be seen in the under layers, providing the hair with a natural looking finish.
Heidi Klum Long Straight Light Honey Blonde Hairstyle
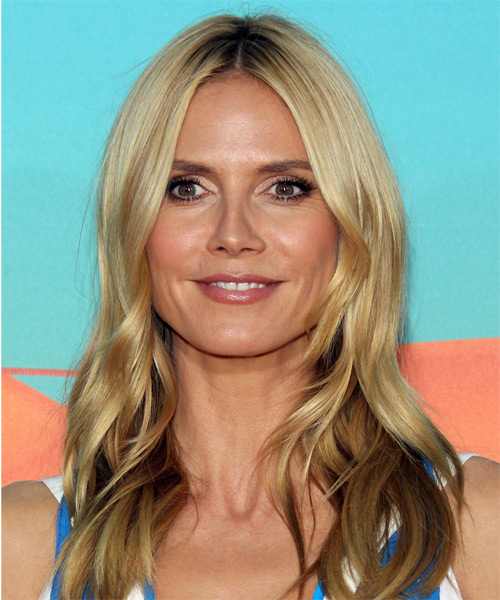
Image © MediaPunch
Hairstyle Suitability Rating:
Hairstyle Popularity Rating: ★★★★★
Hairstyle Popularity Rating: ★★★★★
Hairstyle Type
Category
Formal
Length
Long
Elasticity
Straight
Hair Color
Light Honey Blonde
Haircut Technique
Type
Scissor Cut
Suitability
Gender
Women
Face Shape
round,oval,square,heart,diamond
Hair Density
Thin/Medium
Hair Texture
Fine/Medium
Age
Under 21, 21 - 30, 31 - 40, and 41 - 50
Height
Any
Weight
Thin/Average/Large
Forehead Height
Short/Average
Glasses
Yes
Styling
Time
30 minutes
Tip
Tip your head upside down and rake your fingers through the top section of hair to create a fuller and messier style.
Products
mousse, moulding cream, smoothing shine, gel spray
Tools
blow dry, curling iron

