Added:
08 May 2017
The sides of this short no-fuss 'do are styled back towards the back of the head while the top is blow waved to the side, creating a casual style that is perfect for any occasion. Product is needed to keep this style in place and regular trims will help maintain this shape.
Our model styles her short hair into a chic 'do here with a windblown finish. This is an excellent way for her to style up her short layered hair for a night on the town or a casual day out- it's a versatile 'do. Our model styles her fringe area back off her face while the sides are also blow dried back with beautiful results. She has an oval face shape with a wide, broad forehead, which can support high volume, upswept hairstyles like this one. This is an easy and elegant way to style short hair that has an added boost of volume. Ladies with wide or square faces will look great in this 'do too, thanks to the extra volume at the crown.
Our model has a warm complexion and blue eyes. She is best suited to hair colors that are on the warm and golden side of the spectrum. Here, she opts for a natural looking dark golden blonde base that has a honey blonde and copper red highlights throughout. Overall this creates a gorgeous red-blonde shade throughout that has a brilliant shine.
Short Upswept Windblown No-fuss Style
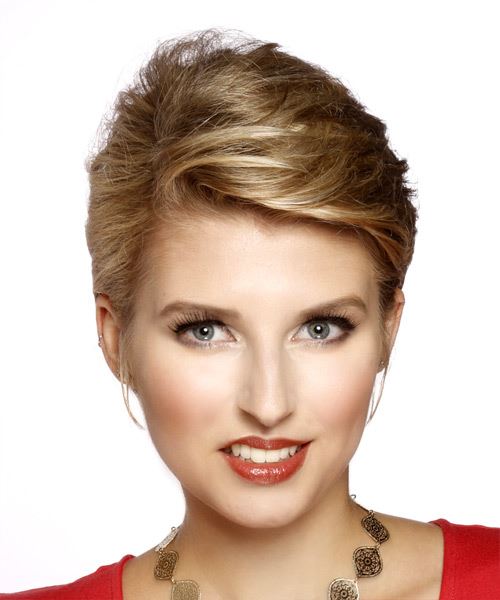
Image © TheHairStyler.com
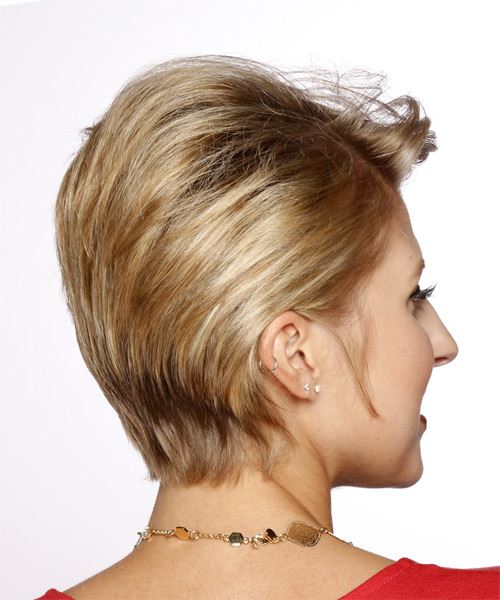
Image © TheHairStyler.com
Hairstyle Suitability Rating:
Hairstyle Popularity Rating: ★★★★★
Hairstyle Popularity Rating: ★★★★★
Hairstyle Type
Category
Casual
Length
Short
Elasticity
Straight
Hair Color
Dark Blonde with Light Red Highlights
Haircut Technique
Type
Clipper Cut
Suitability
Gender
Women
Face Shape
oval,oblong,heart,diamond,triangular
Hair Density
Medium
Hair Texture
Fine
Age
31 - 40, 41 - 50, 51 - 60, and Over 60
Height
Any
Weight
Thin/Average
Forehead Height
Long
Glasses
Yes
Styling
Time
10 minutes
Tip
Spray a small amount of hairspray at the roots and ends to keep this style full and shaped for longer.
Products
mousse, wax, hair spray
Tools
finger dry, blow dry

