Added:
11 Nov 2010
The short straight, chestnut hairstyle is a classic and beautiful 'do that has been around for decades. The side-swept bangs add natural look to this style makes it sophisticated and feminine at the same time. If you are looking for a new hairstyle, this will brighten your look!
Our model is giving us a perfect hair look with this chestnut hue and simple makeup. She is flaunting the look with glamorous goals and she gives off natural yet high-fashion vibes. It is a very sexy haircut with plenty of body and shape, and the hair color compliments her fair skin tone.. For the hair styling, the back has been cut to sit flat against the head, with textured layers blending up to the crown to achieve height and body. The sides have also been texturized to create shape and blended in with the style's main feature - the long side swept bangs. This hairstyle suits oval, oblong, square, and diamond face shapes. It gives you a neat and clean appearance, and in addition, the hairstyle will provide you with a vintage look which is also better for thick hair that requires more definition and contour. It is perfect for those with fine hair. It features slightly swept bangs, creating a trendy and stylish look that women can quickly achieve.
This hairstyle takes a little work, but it's worth it. The regular trims are necessary to maintain the style, and you can always use a blow dryer on the side-swept bangs for volume. This hairstyle is an excellent option for those who prefer an on-trend look without the commitment. Your hair will be in great shape with regular trims after 4 to 6 weeks.
Short Chestnut Hairstyle With Long Side Swept Bangs
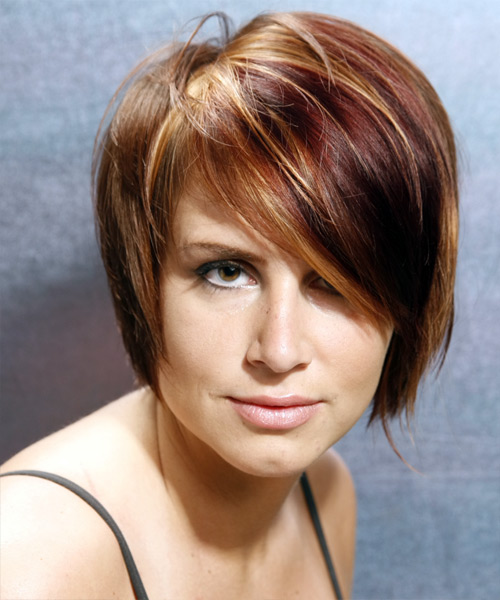
Image © TheHairStyler.com
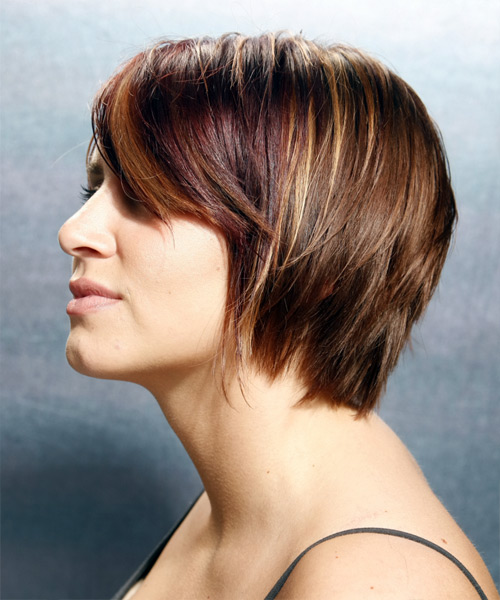
Image © TheHairStyler.com
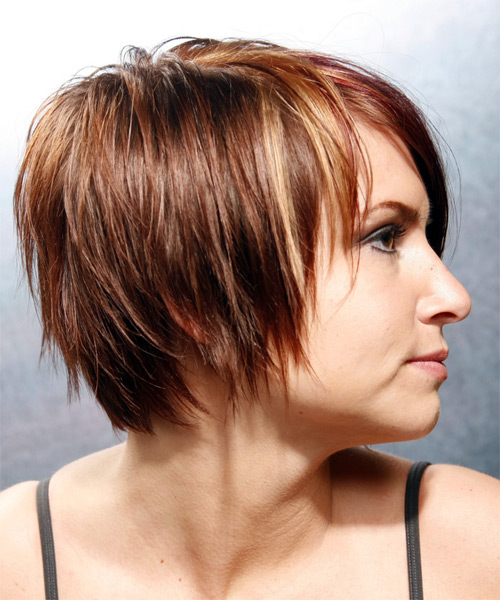
Image © TheHairStyler.com
Hairstyle Suitability Rating:
Hairstyle Popularity Rating: ★★★★★
Hairstyle Popularity Rating: ★★★★★
Hairstyle Type
Category
Casual
Length
Short
Elasticity
Straight
Hair Color
Chestnut
Haircut Technique
Type
Razor Cut
Suitability
Gender
Women
Face Shape
oval,oblong,square,diamond
Hair Density
Thin/Medium
Hair Texture
Fine/Medium
Age
Under 21, 21 - 30, 31 - 40, and 41 - 50
Height
Any
Weight
Thin/Average/Large
Forehead Height
Long
Neck Length
Short/Average
Ears
Small/Average
Nose
Small/Average
Glasses
No
Styling
Time
30+ minutes
Tip
A small amount of finishing products is all that is needed to complete this style.
Products
straightening, wax, hair spray
Tools
blow dry

