Added:
29 Nov 2021
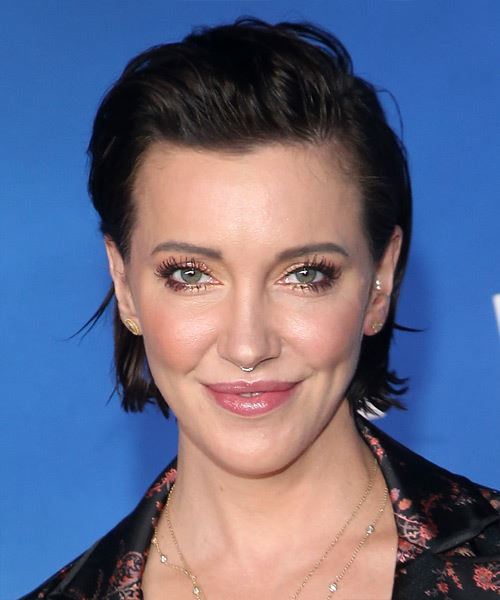
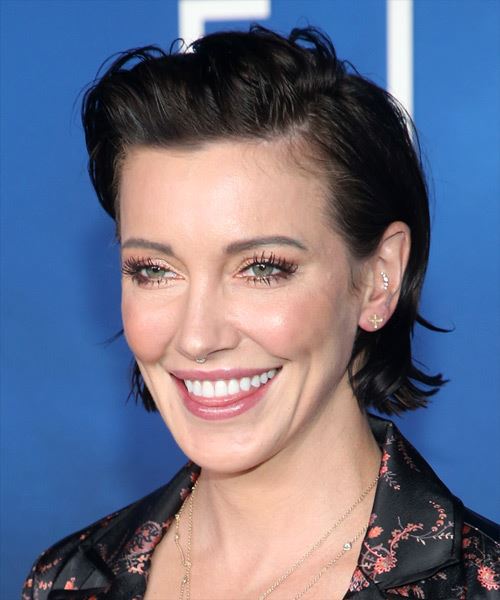
Katie Cassidy looks like a goddess with this hairstyle! She radiates confidence and so can you with this style! Pixie hairstyles are flattering on most facial shapes, including oval, square, and heart. It complements round face shapes well because the angles visually soften the roundness of the face. A cut like this can make your face look even more oblong if you have a long face. You can really make your cheekbones and jawline stand out with a side part. Since diamond face shaped ladies have smaller foreheads, shorter hairstyles work best for this look. Any hairstyle that is too long will overshadow your stunning facial features. One nice feature of this style is that the hair is positioned behind the ears. You can accentuate your prominent cheekbones by tucking your hair behind your ears! To ensure that your haircut stays in shape and that your ends remain healthy, you will need to cut your hair once every 4 weeks or so.
Short hair is always a bold choice and your makeup should be the same. For a softer glam look, do a soft brown eye with a glitter inner corner or lid, and a soft lip color. For a beautifully bold and sultry look, try doing a beautiful bold winged liner with a dark red or even purple lip. Because this hairstyle does not cover any part of your face, ensure you add blush and bronzer to your makeup routine to create even more shape and dimension to your face.
Katie Cassidy Short Straight Black Hairstyle
Hairstyle Suitability Rating:
Hairstyle Popularity Rating: ★★★★★
Hairstyle Popularity Rating: ★★★★★
Hairstyle Type
Category
Casual
Length
Short
Elasticity
Straight
Hair Color
Black
Haircut Technique
Type
Scissor Cut
Suitability
Gender
Women
Face Shape
round,oval,oblong,square,heart,diamond
Hair Density
Medium/Thick
Hair Texture
Medium/Coarse
Age
21 - 30, 31 - 40, 41 - 50, and 51 - 60
Height
Any
Weight
Thin/Average
Forehead Height
Short/Average
Neck Length
Long
Ears
Small/Average
Nose
Small/Average
Glasses
Yes
Styling
Time
20 minutes
Products
gel, gel spray
Tools
blow dry


