Josie Bissett Short Straight Hairstyle
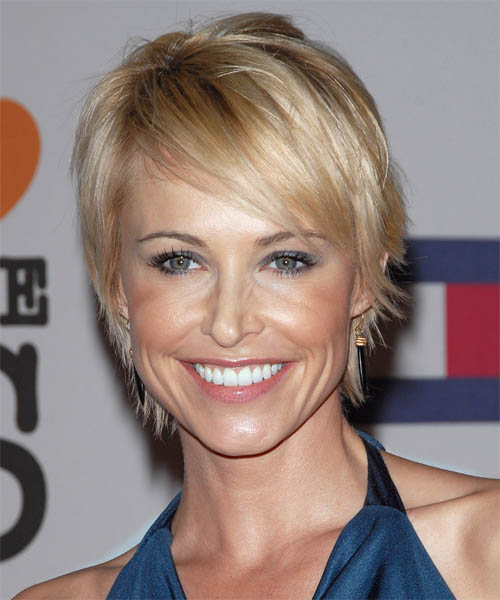

Added: 10 Nov 2010
Josie Bissett stole the spotlight at the The 15th Annual Race to Erase MS function with her magnificent hairdo. The ends of her style were jagged-cut to achieve a wispy look with great movement and attitude. Her long side-swept bangs were another great feature that completed her style perfectly.

Hairstyle Suitability Rating: ★★★★★
Hairstyle Popularity Rating: ★★★★★

Hairstyle Type

Category
Casual
Length
Short
Elasticity
Straight

Haircut Technique

Type

Suitability

Gender
Women
Face Shape
oval,oblong,heart,diamond
Hair Density
Thin/Medium
Hair Texture
Fine/Medium

Age
Under 21, 21 - 30, 31 - 40, 41 - 50, and 51 - 60
Height
Any
Weight
Thin/Average/Large

Forehead Height
Short/Average
Neck Length
Short/Average
Ears
Small/Average
Nose
Small/Average
Glasses
No

Styling

Time
30 minutes
Tip
Using the wax, piece out sections with your fingertips to achieve this look.
Products
straightening, wax, smoothing shine, lacquer
Tools
finger dry, blow dry


Similar hairstyles you may be interested in...


step 1

Squeeze a small amount of straightening balm into your palms and then rub your hands together before smoothing the product evenly through damp hair.


step 2

Using your blow-dryer, dry your hair using your fingers, separating the hair and allowing it to dry at the roots first then the mid lengths and then the ends. Making sure the roots are dry first will ensure that your hairstyle does not fall flat.


step 3

A medium radial brush is used on medium to long hair types to smooth out wavy or curly hair textures or to add body to straight hair. When selecting a radial brush, always use one with a pure bristle as this will not tear or damage the hair.


step 4

To blow-dry your bangs to the side, clip the back and side sections up, leaving just your bangs out. Place your brush beneath your bangs, holding your hair to the side and remembering to hold the tension between your hair and brush. With your blow-dryer on a low setting, apply heat by starting at the roots and make sure to stretch your hair out to the ends. Repeat until your hair is dry.


step 5

To blow-dry the crown/top sections, take a section of hair no bigger than the diameter of the brush and blow-dry the hair placing the brush under the section of hair. With your blow-dryer in front of the brush, follow the brush in an upwards direction at the roots and an outwards position at the ends for volume and softness. Continue until the section is dry.


step 6

Take a section of your hair no wider than the diameter of your brush. Place your brush under and at the roots of your section. Then with your blow-dryer above, drag the brush up through the mid-lengths and ends of the hair following with your blow-dryer and pulling the hair to the left. Repeat until your hair is completely dry.


step 7

Take a section of your hair no wider than the diameter of your brush. Place your brush under and at the roots of your section. Then with your blow-dryer above, drag the brush up through the mid-lengths and ends of the hair following with your blow-dryer and pulling the hair to the right. Repeat until your hair is completely dry.


step 8

Using wax and your fingers grab the mid-lengths of your hair and then drag it out and upwards for a full and messy result. Remember not to overdo the wax or your result will be a flat and greasy style.


step 9

Using a small amount of wax, work it through the mid-lengths and ends in a downward, pinching motion. For added texture, apply more pinching and more wax.


step 10

Apply wax to your fingertips then drag through your bangs, sweeping the hair to the left as you go. Pinching the ends will create soft texture.


step 11

To finish the look, apply wax to your fingertips, making sure to smooth the wax over all of your fingers, then simply pinch the wax onto the ends of your hair, applying as much or as little as needed.


step 12

Apply some hard wax to your fingertips and then rub it into your roots while lifting your strands for soft volume.


step 13

Apply a very small amount of smoothing shine to the palms of your hands and then run it through the mid-lengths and ends of your hair. Be careful not to add any to the roots or a large amount to any section of the hair as smoothing shine can be very heavy on the hair, weighing it down and making it appear oily.


step 14

Lacquer is great for strong hold. A small amount is all that is required to finish and should be applied from an arms length distance to the entire style.


Recommended Hairstyles...