Eliza Coupe Medium Straight Light Platinum Blonde Hairstyle
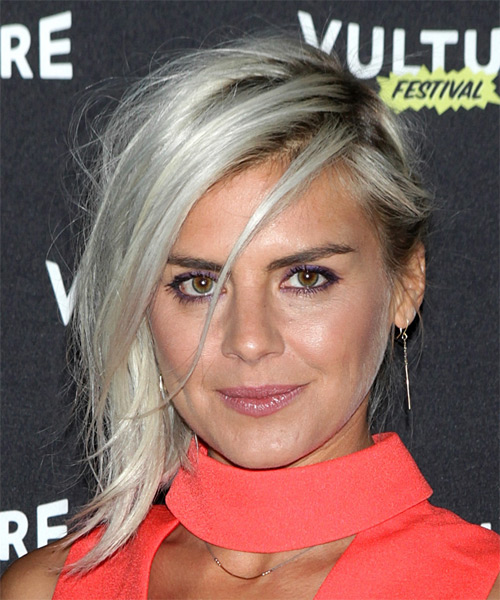

Added: 13 Jun 2016
This edgy 'do is cut shorter through the sides and back with one side pulled behind one ear, leaving the opposite side out showing off the textured cut ends. The top is smoothed over to one side allowing the front to fall on the face to soften the over-all look. This versatile hairstyle needs product for shine and hold.

Eliza Coupe looks gorgeous here in a unique up-do that makes the most of her hair type and facial features. Having an oval face shape that is wider at the top than it is at the bottom, Eliza looks best in styles that have a heavy fringe and ones that frame the eyes. This short ‘do does just that, with the fringe worn forward across the forehead and bulked up with some backcombing. Eliza has tucked the other side behind one ear for a chic finish to this funky ‘do. Ladies with fine hair will especially enjoy this short hairstyle that adds maximum volume and body.

Having a tanned complexion and light green eyes, Eliza looks best in icy white and golden shades of blonde. This platinum tone is ideal for her complexion and makes her eyes pop even more. No highlights are needed here as this ultra light blonde looks radiant on its own.

Eliza Coupe is an American actress and comedian, most widely known for starring as Jane Kerkovich-Williams in the ABC comedy series Happy Endings and as Denise "Jo" Mahoney in the final two seasons of the medical comedy-drama Scrubs.

Hairstyle Suitability Rating: ★★★★★
Hairstyle Popularity Rating: ★★★★★

Hairstyle Type

Category
Casual
Length
Medium
Elasticity
Straight
Hair Color
Light Platinum Blonde

Haircut Technique

Type
Scissor Cut

Suitability

Gender
Women
Face Shape
round,oval,square,heart,diamond
Hair Density
Medium
Hair Texture
Fine

Age
Under 21, 21 - 30, and 31 - 40
Height
Any
Weight
Thin/Average/Large

Forehead Height
Long
Glasses
Yes

Styling

Time
30 minutes
Tip
Pinch and twist your ends out with the wax to create the flick in the bangs.
Products
gel spray, wax, hair spray
Tools
blow dry


Similar hairstyles you may be interested in...


step 1

Evenly mist gel spray around the top and sides to create a soft hold style. Gel spray will hold well and will not look wet or weigh the hair down.


step 2

Using the corner of your comb and standing in front of a mirror find the middle of your left eye and then drag the comb straight up slowly until you reach your hairline and then continue back in a straight manner to achieve an even left part. A side part is great for longer face shapes because it creates the illusion of width.


step 3

A large radial brush is usually used on long straight hair types or to smooth out wavy or curly hair textures. When selecting a radial brush, always use one with a pure bristle as this will not tear or damage the hair.


step 4

To blow-dry under, start at the nape/back and place your brush under the section of hair close to the nape. With the dryer held up over the hair, pull the brush from the roots and continue to the mid length's, keeping the blow-dryer following over the top. Once you reach the ends, curve them under. Repeat this step until the section is completely dry.


step 5

To blow-dry the sides, take out a small section of hair from the front and clip the rest of the hair away. Next, place the brush under the section and then pull the brush and hair forward around your face (this curving motion creates body). Place the hair-dryer on top of the brush until you reach the ends and then turn the ends under. Repeat until dry.


step 6

To blow-dry the crown/top sections, take a section of hair no bigger than the diameter of the brush and blow-dry the hair placing the brush under the section of hair. With your blow-dryer in front of the brush, follow the brush in an upwards direction at the roots and an outwards position at the ends for volume and softness. Continue until the section is dry.


step 7

When blow-drying your bangs to the side, section your hair up and clip your hair back to leave only your bangs out. Remember to make sure that your bangs are damp to make blow-drying more effective. Next, take your brush and place it underneath the hair and then blow-dry starting from the roots, adding tension to the hair as you go. Slowly pull your section down to the ends and continue until dry.


step 8

Pick up a small selection of hair from your mid section no bigger than your tail comb. Place your comb at the roots and then comb up and down until the hair is standing up by itself. Continue to the crown and finish at the sides. Repeat this step if you require more volume.


step 9

To finish the look, apply wax to your fingertips, making sure to smooth the wax over all of your fingers, then simply pinch the wax onto the ends of your hair, applying as much or as little as needed.


step 10

Apply wax to your fingertips then drag through your bangs, sweeping the hair to the right as you go. Pinching the ends will create soft texture.


step 11

To get your sides to sit out, apply a small amount of wax to your fingertips and then working mainly on the ends, pinch them while dragging the hair in an out and upwards motion. Be careful not to overdo that wax or your result will be a flat and limp style.


step 12

Apply a small amount of wax to your fingertips, then place it at the roots above your ear and drag it through as you pull your hair behind your ear.


step 13

To finish, apply a minimal amount of hairspray from an arms length distance to the top, sides and back. Take care not to use too much or you will end up with a white, flaky residue which looks like dandruff.


Recommended Hairstyles...