Sophisticated Mid-Length Face Framing Honey Blonde Hairdo
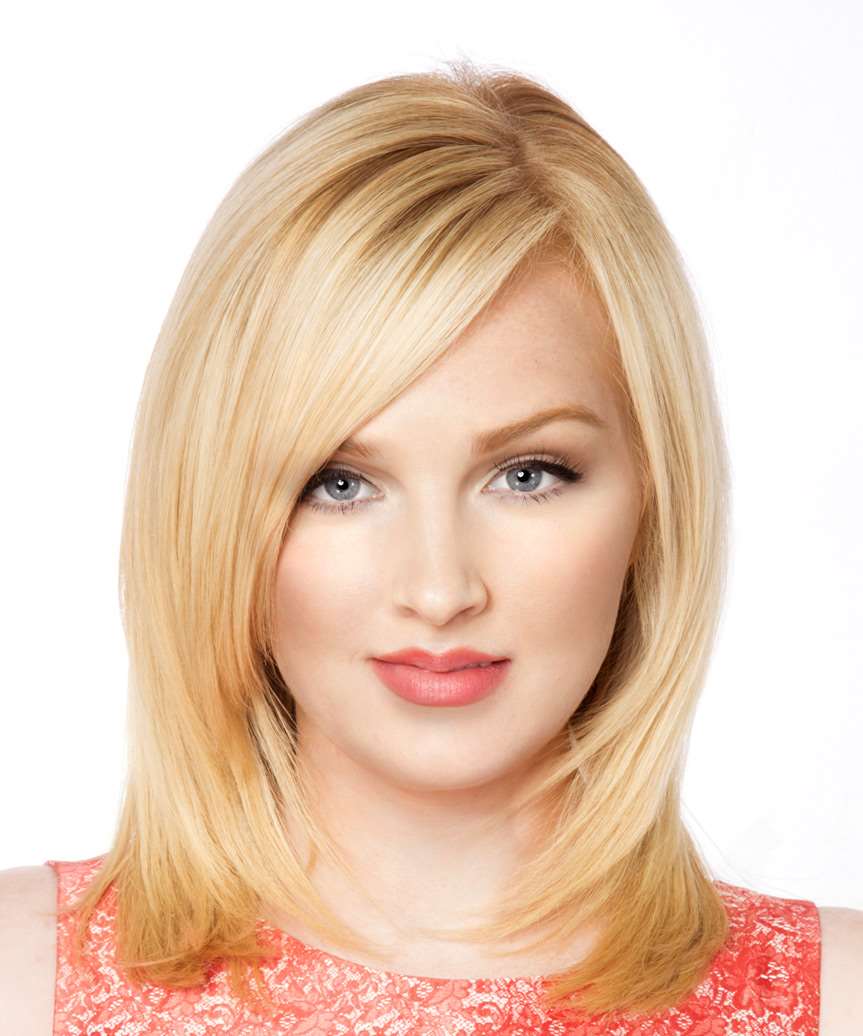

Added: 30 Jul 2018
If you are tired of long-length hair, you should change your look. It is time to try this beautiful mid-length face-framing honey-blonde hairdo which matches any outfit or idea of your dream outfit. It can help you with your summer season, vacation, and party. Smooth and sophisticated is the main idea for this look. Our model flaunts a layered style that sculpts around her face and shows off her honey blonde tresses beautifully. The ends have been heavily layered for a smooth and streamlined shape. This 'do will work best on straight hair textures. A Mid-length face-framing hairdo is a beautiful hairstyle that can help you look youthful, elegant, and young again.

You should choose the right hairstyle depending on your face shape.The curly side swept style suits you if you have round or square-shaped faces. The long layers framing your face in every direction and with a relaxed, parted, upswept style look will give you that pulled-back yet still bold look you need. But if your face is long and slender, then mid-length face-framing hairdos should be your choice. Mid-length hair that has been colored will inevitably look a bit messy, which may not be the case with your hair if it is natural. These colors tend to wash off in a few washes, so keeping up with regular trims is required for healthy and fresh-looking ends. Periodic touch-ups are also needed to preserve the color's vibrancy for as long as possible. These few tips on maintaining your light blonde hairdo will help keep the hair color looking fresh without visiting the salon every few days.

Hairstyle Suitability Rating: ★★★★★
Hairstyle Popularity Rating: ★★★★★

Hairstyle Type

Category
Casual
Length
Medium
Elasticity
Straight
Hair Color
Light Blonde

Haircut Technique

Type
Scissor Cut

Suitability

Gender
Women
Face Shape
round,oval,oblong,square,heart,diamond,triangular
Hair Density
Medium
Hair Texture
Medium

Age
Under 21, 21 - 30, 31 - 40, and 41 - 50
Height
Any
Weight
Thin/Average/Large

Forehead Height
Short/Average
Glasses
Yes

Styling

Time
20 minutes
Products
mousse, hair spray
Tools
blow dry


Similar hairstyles you may be interested in...


step 1

Apply styling mousse to damp hair, using your palm as a measuring guide, and evenly distribute it along the hair shaft. Styling mousse will add hold and can help achieve better results.


step 2

Using the corner of your comb and standing in front of a mirror find the middle of your left eye and then drag the comb straight up slowly until you reach your hairline and then continue back in a straight manner to achieve an even left part. A side part is great for longer face shapes because it creates the illusion of width.


step 3

A medium radial brush is used on medium to long hair types to smooth out wavy or curly hair textures or to add body to straight hair. When selecting a radial brush, always use one with a pure bristle as this will not tear or damage the hair.


step 4

Starting at the nape/back of the hair, place your brush on top of the section and blow-dryer down starting from the roots and using tension as you go. Next, place the blow-dryer underneath the hair and continue to blow-dry the ends out. Make sure to follow the brush with the blow-dryer in an outwards direction. If you like fuller flicks, hold the ends out and roll them up into the brush and apply the heat for longer.


step 5

To blow-dry the sides, take out your first sections from the front and clip the rest of the hair up. Place your brush on top of the section, and starting from the roots, blow-dry down using tension as you go. Next, place the blow-dryer underneath the hair and continue to blow-dry the ends out. Continue this step until the hair is dry.


step 6

To blow-dry the crown/top sections, take a section of hair no bigger than the diameter of the brush and blow-dry the hair placing the brush under the section of hair. With your blow-dryer in front of the brush, follow the brush in an upwards direction at the roots and an outwards position at the ends for volume and softness. Continue until the section is dry.


step 7

Take a section of your hair no wider than the diameter of your brush. Place your brush under and at the roots of your section. Then with your blow-dryer above, drag the brush up through the mid-lengths and ends of the hair following with your blow-dryer and pulling the hair to the left. Repeat until your hair is completely dry.


step 8

Take a section of your hair from your ear to your temple the same diameter as the brush. Place your brush underneath the hair starting at the roots and pull the hair slowly in a forward and downward direction with your blow-dryer above. Be sure the section is dry and then repeat the step on a new section of hair directly above.


step 9

Take a section of your hair no wider than the diameter of your brush. Place your brush under and at the roots of your section. Then with your blow-dryer above, drag the brush up through the mid-lengths and ends of the hair following with your blow-dryer and pulling the hair to the right. Repeat until your hair is completely dry.


step 10

Take a section of your hair from your ear to your temple that is the same diameter as the brush. Place your brush underneath the hair starting at the roots and pull the hair slowly in a forward and downward direction with your blow-dryer above. Be sure the section is dry and then repeat the step on a new section of hair directly above.


step 11

When blow-drying your bangs to the side, section your hair up and clip your hair back to leave only your bangs out. Remember to make sure that your bangs are damp to make blow-drying more effective. Next, take your brush and place it underneath the hair and then blow-dry starting from the roots, adding tension to the hair as you go. Slowly pull your section down to the ends and continue until dry.


step 12

To finish, apply a minimal amount of hairspray from an arms length distance to the top, sides and back. Take care not to use too much or you will end up with a white, flaky residue which looks like dandruff.


Recommended Hairstyles...