Added:
29 Oct 2018
Fine layers are sliced through the bangs, sides and back of these light blonde tresses to lighten the length and to add texture to the ends. This simple 'do is great to complement a triangular face and is best suited for those with fine to medium hair. A little product is needed through the ends to tame fly-away hair.
Rosanna Arquette looks gorgeous here in a long layered cut with an eye skimming fringe. Rosanna has a triangular face with a high hairline. She looks best in longer cuts with some layering to balance out the width of her cheekbones, and bangs to cover her high forehead. Ladies with this face shape should avoid super short bangs and opt for some volume at the roots as well. Rosanna is wearing her blonde locks loose and long with a center part and flicked ends throughout. This works well with her face shape and the layerss create some movement at the ends giving her a chic, effortless look.
Rosanna has a fair complexion and light blue eyes. She has warm undertones to her skin and is best suited to golden, beige and champagne blonde. Here she lightens her naturally dark blonde hair with buttery blonde and champagne colored highlights. This gives her great results making her hair look like it was lightened naturally from the sun. This hair color highlights her blue eyes while brightening up her complexion for a sun-kissed look.
Rosanna Arquette Long Straight Light Blonde Hairstyle with Layered Bangs
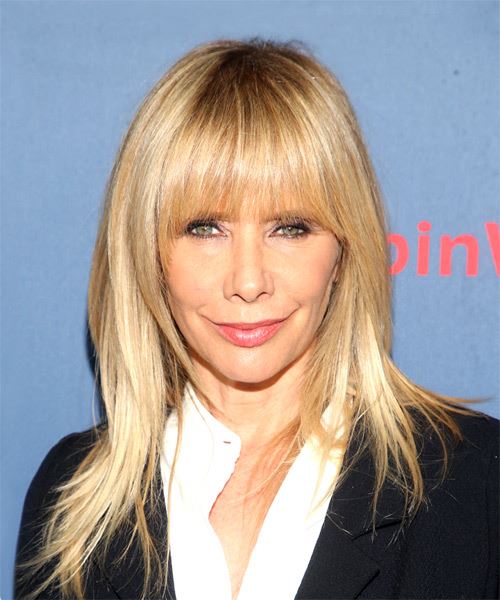
Image © MediaPunch
Hairstyle Suitability Rating:
Hairstyle Popularity Rating: ★★★★★
Hairstyle Popularity Rating: ★★★★★
Hairstyle Type
Category
Casual
Length
Long
Elasticity
Straight
Hair Color
Light Blonde
Haircut Technique
Type
Scissor Cut
Suitability
Gender
Women
Face Shape
round,oval,oblong,square,heart,diamond,triangular
Hair Density
Medium
Hair Texture
Fine
Age
Under 21, 21 - 30, 31 - 40, 41 - 50, 51 - 60, and Over 60
Height
Any
Weight
Thin/Average/Large
Forehead Height
Long
Glasses
No
Styling
Time
20 minutes
Products
moisturizer, moulding cream, hair spray
Tools
blow dry

