Camilla Luddington Long Straight Dark Blonde Hairstyle
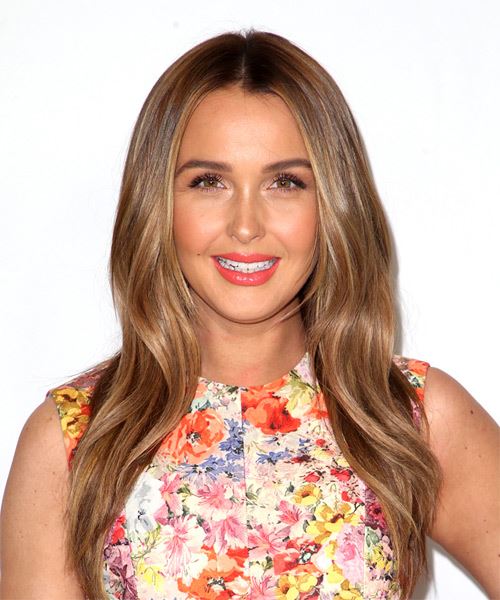

Added: 29 Oct 2018
These glossy light brunette tresses are left out to fall over the shoulders showing off the loose waves added to the mid-lengths to ends. This lovely 'do is easy to re-create at home with the right tools and perfect for any occasion. Product is needed to tame fly-away hair and regular trims will help prevent split ends.

Camilla Luddington looks lovely here in waved glossy locks that fall past her shoulder. This simple hairstyle is ideal for showing off her gorgeous hair color and framing her oblong face shape. The center part lets her grown out fringe cascade nicely around her face while the layers give her locks body and bounce. Camilla has chosen to go for a cool and casual look, and lets her hair's natural texture work to her advantage. The shorter layers near the chin and neck balance out her oblong face shape nicely.

As for her color, Camila has chosen a soft chestnut base tone that is perfect for her complexion and eye color. Having a neutral skin tone and amber brown eyes, she is best suited to hair colors that have a yellow or golden base to them. This multidimensional chestnut brown color with sunkissed highlights makes a nice contrast with her complexion and brings the focus to her eyes. It also gives her locks a subtle sun-kissed glow.

Camilla Luddington is an English actress, known for her roles as Kate Middleton in the Lifetime TV film William & Kate: The Movie and as Jo Wilson in the ABC medical drama Grey's Anatomy.

Hairstyle Suitability Rating: ★★★★★
Hairstyle Popularity Rating: ★★★★★

Hairstyle Type

Category
Casual
Length
Long
Elasticity
Straight
Hair Color
Dark Blonde

Haircut Technique

Type
Scissor Cut

Suitability

Gender
Women
Face Shape
round,oval,oblong,diamond,triangular
Hair Density
Medium
Hair Texture
Medium

Age
Under 21, 21 - 30, 31 - 40, and 41 - 50
Height
Any
Weight
Thin/Average/Large

Forehead Height
Short/Average
Glasses
Yes

Styling

Time
20 minutes
Products
moulding cream, hair spray
Tools
blow dry, velcro rollers


Similar hairstyles you may be interested in...


step 1

Using the corner of your comb and standing in front of a mirror find the middle of your nose and then drag the comb straight up slowly until you reach your hairline and then continue back in a straight manner to achieve an even middle part. A middle part is a great way to make small, round face shapes appear longer and thinner.


step 2

A large radial brush is usually used on long straight hair types or to smooth out wavy or curly hair textures. When selecting a radial brush, always use one with a pure bristle as this will not tear or damage the hair.


step 3

To blow-dry under, start at the nape/back and place your brush under the section of hair close to the nape. With the dryer held up over the hair, pull the brush from the roots and continue to the mid length's, keeping the blow-dryer following over the top. Once you reach the ends, curve them under. Repeat this step until the section is completely dry.


step 4

To blow-dry the crown/top sections, take a section of hair no bigger than the diameter of the brush and blow-dry the hair placing the brush under the section of hair. With your blow-dryer in front of the brush, follow the brush in an upwards direction at the roots and an outwards position at the ends for volume and softness. Continue until the section is dry.


step 5

To blow-dry the sides, take out a small section of hair from the front and clip the rest of the hair away. Next, place the brush under the section and then pull the brush and hair forward around your face (this curving motion creates body). Place the hair-dryer on top of the brush until you reach the ends and then turn the ends under. Repeat until dry.


step 6

Take a section of your hair from your ear to your temple the same diameter as the brush. Place your brush underneath the hair starting at the roots and pull the hair slowly in a forward and downward direction with your blow-dryer above. Be sure the section is dry and then repeat the step on a new section of hair directly above.


step 7

Take a section of your hair from your ear to your temple that is the same diameter as the brush. Place your brush underneath the hair starting at the roots and pull the hair slowly in a forward and downward direction with your blow-dryer above. Be sure the section is dry and then repeat the step on a new section of hair directly above.


step 8

Take a section of hair no wider than the diameter of the velcro roller and comb it through to ensure there are no knots. Place the roller at the ends of the section of hair, being sure to smooth the ends under, and then twist the roller down the hair shaft to the roots. Continue applying the velcro rollers all the way through the entire hair for a full volume finish throughout the sides. Keep the rollers in your hair for approximately 20 minutes.


step 9

Using a small amount of moulding cream, work it through the mid-lengths and ends in a downward motion. For added texture, pinch the ends as you go sparingly.


step 10

Apply some moulding cream to your fingertips and then pull it through the ends of your hair in a downward motion to achieve a textured look.


step 11

To finish, apply a minimal amount of hairspray from an arms length distance to the top, sides and back. Take care not to use too much or you will end up with a white, flaky residue which looks like dandruff.


Recommended Hairstyles...