Added:
24 Mar 2011
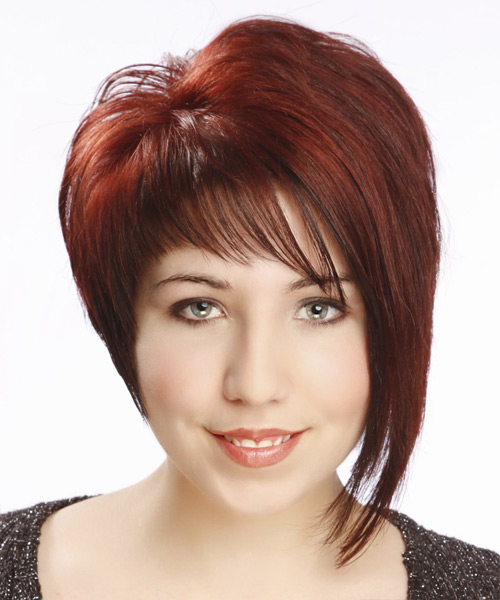
This dramatic red asymmetrical haircut is perfect for the daring woman who wants to make a statement. This style is sure to turn heads with its sleek, angled lines and asymmetrical bangs. Whether you are going for a night out on the town or a day at the office, this 'do will always make a bold statement. This asymmetrical haircut is best suited for the brave and those who like being the center of attention.
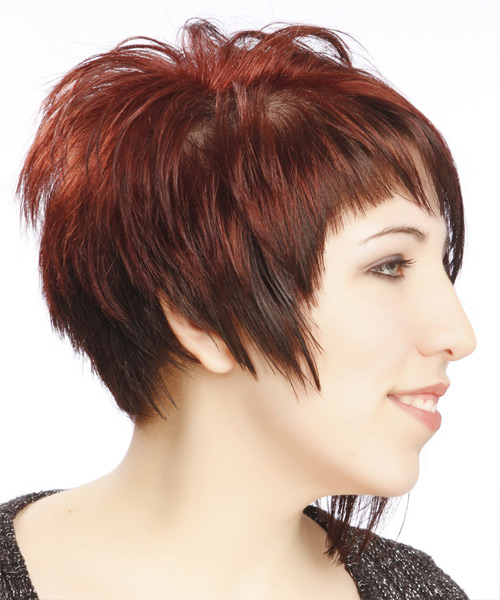
Our model shows how great this look can be and we know you will love it too. The back is tapered into the neck with layers cut up to the sides, leaving one side longer than the other to form this bold do. It allows the two-tone color to be more evident for a striking finish. The hair is cut at an angle, usually with a razor, so that one side is significantly shorter than the other. This hairstyle is perfect for those who want a modern, edgy look. Asymmetrical bangs are a great way to add interest to a hairstyle. This haircut suits women with an oval, oblong, square, or diamond face shape. It is also suitable for women with thin to medium hair density and fine to medium hair texture.
You can maintain this hairstyle with regular trims after 4 to 6 weeks. Toning treatments are recommended if you see your roots turning grey to maintain your red color. The 'do is great for all occasions, and is easy to finish with product for hold and shine.
Asymmetrical Red Haircut With Asymmetrical Bangs
Images © MediaPunch/TheHairStyler.com
Images © MediaPunch/TheHairStyler.com

Images © MediaPunch/TheHairStyler.com
Hairstyle Suitability Rating:
Hairstyle Popularity Rating: ★★★★★
Hairstyle Popularity Rating: ★★★★★
Hairstyle Type
Category
Alternative
Length
Short
Elasticity
Straight
Hair Color
Red
Haircut Technique
Type
Razor Cut
Suitability
Gender
Women
Face Shape
oval,oblong,square,diamond
Hair Density
Thin/Medium
Hair Texture
Fine/Medium
Age
Under 21, 21 - 30, and 31 - 40
Height
Any
Weight
Thin
Forehead Height
Short/Average
Neck Length
Short/Average
Ears
Small/Average
Nose
Small/Average
Glasses
No
Styling
Time
20 minutes
Tip
Use a small amount of the wax to piece out the ends.
Products
mousse, wax, smoothing shine, hair spray
Tools
finger dry

