Classic Chin-Length Bob Haircut


Added: 10 Nov 2010
The classic chin-length bob is the perfect hairstyle for anyone looking to add some texture and length to their hair. This style works best on shorter hair, as it skims around the face while leaving plenty of room for styling versatility. This haircut is best for those who want a classy look without having to spend hours on the styling chair.

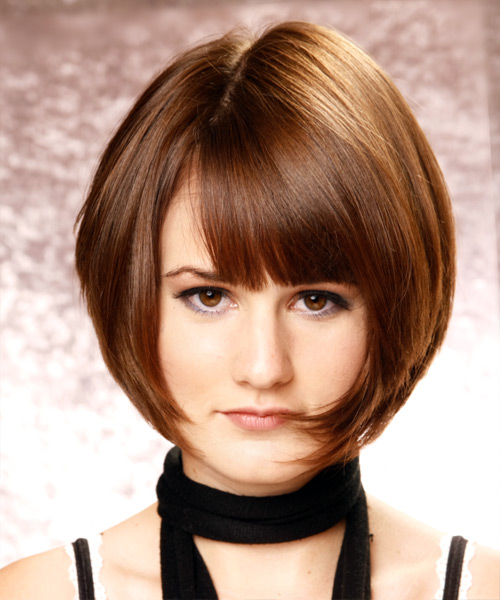
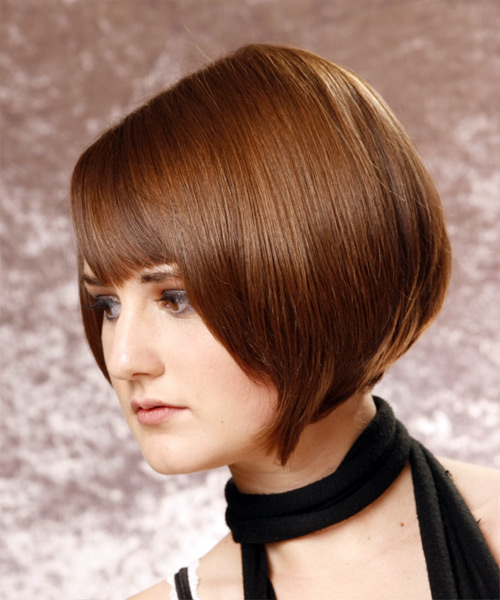
Our gorgeous model is effortlessly flaunting this elegant and classic chin-length bob haircut with blunt-cut bangs. With chestnut hair color and attractive brown colored eyes, the model is looking gorgeous! Her beautiful face is perfectly framed by her bangs, leaving that part of her hair so sleek and straight. This is a classic bob haircut spiced up with an edgy finish to the front, and blunt-cut bangs. For the hair styling, the back has been cut down to the nape of the neck to achieve the body at the crown with the edges angled down to sit at chin level. The sides have been cut to sit longer than the back to show an angle and feature minimal layering to maintain the "bob" shape. The haircut is a versatile style that works well on women of all ages. This cut is popular with both face shapes and hair textures. It's ideal for people with thin or medium-density hair, as well as those who have oval and oblong faces (that is, the cheeks are broader than the chin).

The classic chin-length bob haircut is versatile and flattering, with a soft shoulder-grazing style. You can maintain this elegant hairstyle with regular trims and low-maintenance styling products, or just for a simple straight-down version. We love both!


Visual Story

Classic Chin-Length Bob Haircut- Visual Story


Hairstyle Suitability Rating: ★★★★★
Hairstyle Popularity Rating: ★★★★★

Hairstyle Type

Category
Formal
Length
Short
Elasticity
Straight
Hair Color
Chestnut

Haircut Technique

Type
Scissor Cut

Suitability

Gender
Women
Face Shape
oval,oblong,square,diamond
Hair Density
Thin/Medium
Hair Texture
Fine/Medium

Age
Under 21, 21 - 30, 31 - 40, 41 - 50, 51 - 60, and Over 60
Height
Any
Weight
Thin/Average

Forehead Height
Long
Neck Length
Short/Average
Ears
Small/Average
Nose
Small/Average
Glasses
No

Styling

Time
30+ minutes
Tip
Use your smoothing shine to add a small amount of gloss and to reduce fly-aways.
Products
mousse, wax, smoothing shine, hair spray
Tools
blow dry


Similar hairstyles you may be interested in...


step 1

Apply styling mousse to damp hair, using your palm as a measuring guide, and evenly distribute it along the hair shaft. Styling mousse will add hold and can help achieve better results.


step 2

Using the corner of your comb and standing in front of a mirror find the middle of your right eye and then drag the comb straight up slowly until you reach your hairline and then continue back in a straight manner to achieve an even right part. A side part is great for longer face shapes because it creates the illusion of width.


step 3

A large radial brush is usually used on long straight hair types or to smooth out wavy or curly hair textures. When selecting a radial brush, always use one with a pure bristle as this will not tear or damage the hair.


step 4

To blow-dry under, start at the nape/back and place your brush under the section of hair close to the nape. With the dryer held up over the hair, pull the brush from the roots and continue to the mid length's, keeping the blow-dryer following over the top. Once you reach the ends, curve them under. Repeat this step until the section is completely dry.


step 5

To blow-dry the sides, take out a small section of hair from the front and clip the rest of the hair away. Next, place the brush under the section and then pull the brush and hair forward around your face (this curving motion creates body). Place the hair-dryer on top of the brush until you reach the ends and then turn the ends under. Repeat until dry.


step 6

When blow-drying your bangs forward, clip your hair back leaving only your bangs out. Position your bangs evenly in your brush, taking the hair in a forward direction. Blow-dry from roots to ends, keeping the tension consistent, and evenly distribute heat over the whole section of hair that you are working on. Repeat until the hair is dry. This will stop any frizz that may occur.


step 7

Take a section of your hair no wider than the diameter of your brush. Place your brush under and at the roots of your section. Then with your blow-dryer above, drag the brush up through the mid-lengths and ends of the hair following with your blow-dryer and pulling the hair to the left. Repeat until your hair is completely dry.


step 8

Take a section of your hair no wider than the diameter of your brush. Place your brush under and at the roots of your section. Then with your blow-dryer above, drag the brush up through the mid-lengths and ends of the hair following with your blow-dryer and pulling the hair to the right. Repeat until your hair is completely dry.


step 9

Apply some wax to your fingertips and then pull through the ends of your hair in a downward motion to achieve a sculptured look. Pinch clumps of hair in different directions for a messier result.


step 10

Using a small amount of wax, work it through the mid-lengths and ends in a downward, pinching motion. For added texture, apply more pinching and more wax.


step 11

Apply a small amount of wax to your fingertips, and then using your fingers, rake through your bangs pinching the ends as you go to create a feathered, textured effect.


step 12

Apply a very small amount of smoothing shine to the palms of your hands and then run it through the mid-lengths and ends of your hair. Be careful not to add any to the roots or a large amount to any section of the hair as smoothing shine can be very heavy on the hair, weighing it down and making it appear oily.


step 13

To finish, apply a minimal amount of hairspray from an arms length distance to the top, sides and back. Take care not to use too much or you will end up with a white, flaky residue which looks like dandruff.


Recommended Hairstyles...