Medium Straight Chestnut Brunette Hairstyle


Added: 10 Nov 2010
This medium straight chestnut brunette hairstyle is the perfect choice for you if you want to add some volume and body to your hair. This flattering cut features a faded look, creating a warm look that's perfect for summer weather. The hairstyle is easy to maintain, because of its versatility.

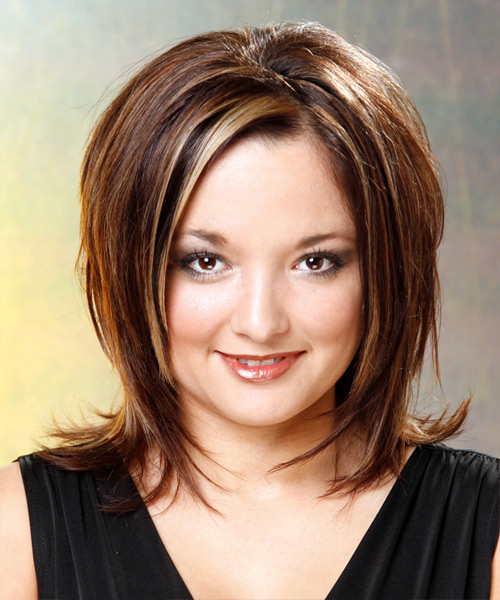
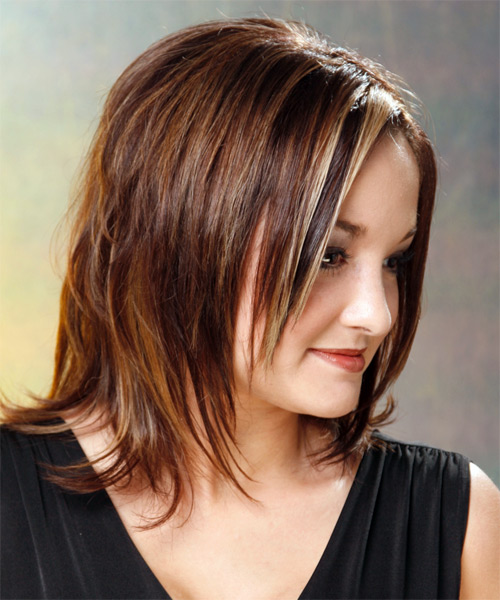
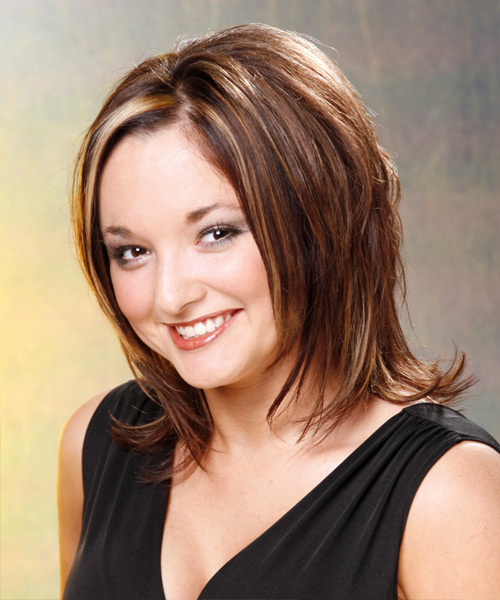
Our model shows off a medium-length chestnut brunette hairstyle with a glossy smile on her beautiful face. The model wears a black V-shape deep neck gown. This hairstyle is complimented by the model's easygoing personality! For this hair styling, textured ends and layers make this look divine and drop-dead gorgeous. The back is jagged cut at the nape, blending up to the funky layers through the crown, which creates lift and body. The sides are also layered, creating a sexy shape to the side of the face and a weightless finish. The Medium Chestnut hair is a flattering hairstyle that works well with oval, oblong and square faces. This straight hairdo features a soft and natural-looking texture that can be worn on any occasion, whether going out with friends or at home. A sleek, flattering asymmetrical style with a soft finish that can be worn long or layered up to add length.

This straight hair with a brunette colour will add charm to your appearance. The length is medium, and you can maintain this haircut with regular trims after 3 months to maintain the hairstyle in shape and avoid split ends. Direct your hair into position while applying the finishing products.


Visual Story

Medium Straight    Chestnut Brunette   Hairstyle- Visual Story


Hairstyle Suitability Rating: ★★★★★
Hairstyle Popularity Rating: ★★★★★

Hairstyle Type

Category
Formal
Length
Medium
Elasticity
Straight
Hair Color
Chestnut Brunette

Haircut Technique

Type
Scissor Cut

Suitability

Gender
Women
Face Shape
oval,oblong,square,heart,diamond
Hair Density
Thin/Medium
Hair Texture
Fine/Medium

Age
Under 21, 21 - 30, 31 - 40, and 41 - 50
Height
Any
Weight
Thin/Average

Forehead Height
Short/Average
Neck Length
Short/Average
Ears
Small/Average
Nose
Small/Average
Glasses
Yes

Styling

Time
30+ minutes
Tip
Direct your hair into position while applying the finishing products.
Products
mousse, wax, smoothing shine, hair spray
Tools
blow dry


Similar hairstyles you may be interested in...


step 1

Apply styling mousse to damp hair, using your palm as a measuring guide, and evenly distribute it along the hair shaft. Styling mousse will add hold and can help achieve better results.


step 2

Using the corner of your comb and standing in front of a mirror find the middle of your nose and then drag the comb straight up slowly until you reach your hairline and then continue back in a straight manner to achieve an even middle part. A middle part is a great way to make small, round face shapes appear longer and thinner.


step 3

A medium radial brush is used on medium to long hair types to smooth out wavy or curly hair textures or to add body to straight hair. When selecting a radial brush, always use one with a pure bristle as this will not tear or damage the hair.


step 4

Starting at the nape/back of the hair, place your brush on top of the section and blow-dryer down starting from the roots and using tension as you go. Next, place the blow-dryer underneath the hair and continue to blow-dry the ends out. Make sure to follow the brush with the blow-dryer in an outwards direction. If you like fuller flicks, hold the ends out and roll them up into the brush and apply the heat for longer.


step 5

To blow-dry the sides, take out a small section of hair from the front and clip the rest of the hair away. Next, place the brush under the section and then pull the brush and hair forward around your face (this curving motion creates body). Place the hair-dryer on top of the brush until you reach the ends and then turn the ends under. Repeat until dry.


step 6

Take a section of your hair no wider than the diameter of your brush. Place your brush under and at the roots of your section. Then with your blow-dryer above, drag the brush up through the mid-lengths and ends of the hair following with your blow-dryer and pulling the hair to the right. Repeat until your hair is completely dry.


step 7

Take a section of your hair no wider than the diameter of your brush. Place your brush under and at the roots of your section. Then with your blow-dryer above, drag the brush up through the mid-lengths and ends of the hair following with your blow-dryer and pulling the hair to the left. Repeat until your hair is completely dry.


step 8

Using wax and your fingers grab the mid-lengths of your hair and then drag it out and upwards for a full and messy result. Remember not to overdo the wax or your result will be a flat and greasy style.


step 9

Apply wax to your fingertips and then grip the right section of your hair from the mid-lengths and drag it in a forward and down direction for a wispy and textured result.


step 10

Apply wax to your fingertips and then grip the left section of your hair from the mid-lengths and drag it in a forward and down direction for a wispy and textured result.


step 11

Apply some hard wax to your fingertips and then rub it into your roots while lifting your strands for soft volume.


step 12

Apply a very small amount of smoothing shine to the palms of your hands and then run it through the mid-lengths and ends of your hair. Be careful not to add any to the roots or a large amount to any section of the hair as smoothing shine can be very heavy on the hair, weighing it down and making it appear oily.


step 13

To finish, apply a minimal amount of hairspray from an arms length distance to the top, sides and back. Take care not to use too much or you will end up with a white, flaky residue which looks like dandruff.


Recommended Hairstyles...