Added:
03 Dec 2017
Loose waves are dressed through the sides and back of these blonde locks to give the over-all style subtle movement and bounce. This casual style is easy to re-create at home with the right tools and needs a little product to tame fly-away hair. Regular trims are needed to prevent split ends.
Margot Robbie looks lovely here in a casual wavy do that works for both day and night looks. Margot's thick tresses look fabulous with silky smooth waves throughout and a messy center part to finish the look off. Her hair has been cut blunt which gives her tresses a thick, healthy appearance. Having a square face shape, styles like this one that end past the shoulders are ideal for her, as it adds length and balances out any excess width. She gets away with a center part nicely but most square faces would do better with a deep side part instead.
This Australian beauty is a natural blonde and loves to experiment with different tones from platinum to dark honey. Here she goes for a medium honey blonde shade overall that was created with a dark blonde base and lighter beige highlights throughout. The result is a soft blonde tone that looks fabulous with her blue eyes and warm complexion.
Margot Robbie Long Wavy Honey Blonde Hairstyle
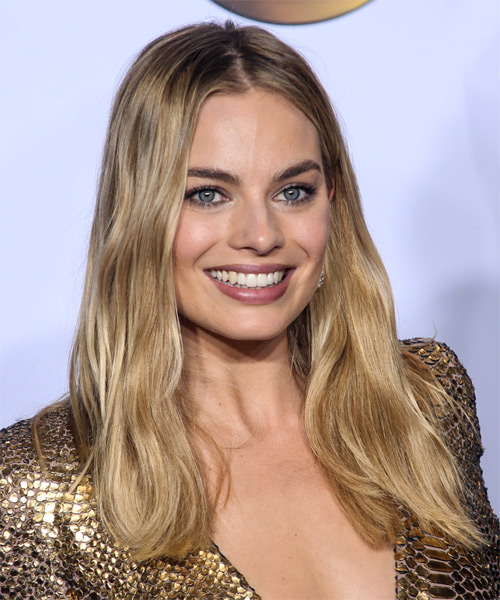
Image © MediaPunch
Hairstyle Suitability Rating:
Hairstyle Popularity Rating: ★★★★★
Hairstyle Popularity Rating: ★★★★★
Hairstyle Type
Category
Formal
Length
Long
Elasticity
Wavy
Hair Color
Honey Blonde
Haircut Technique
Type
Scissor Cut
Suitability
Gender
Women
Face Shape
round,oval,square,diamond
Hair Density
Medium
Hair Texture
Medium
Age
Under 21, 21 - 30, 31 - 40, and 41 - 50
Height
Any
Weight
Thin/Average/Large
Forehead Height
Short/Average
Neck Length
Short/Average
Ears
Small/Average
Nose
Small/Average
Glasses
Yes
Styling
Time
10 minutes
Tip
This style is best achieved on naturally wavy hair.
Products
mousse, moulding cream
Tools
finger dry

