Rihanna Long Chocolate Brown 50s Inspired Curls


Added: 07 Jul 2006
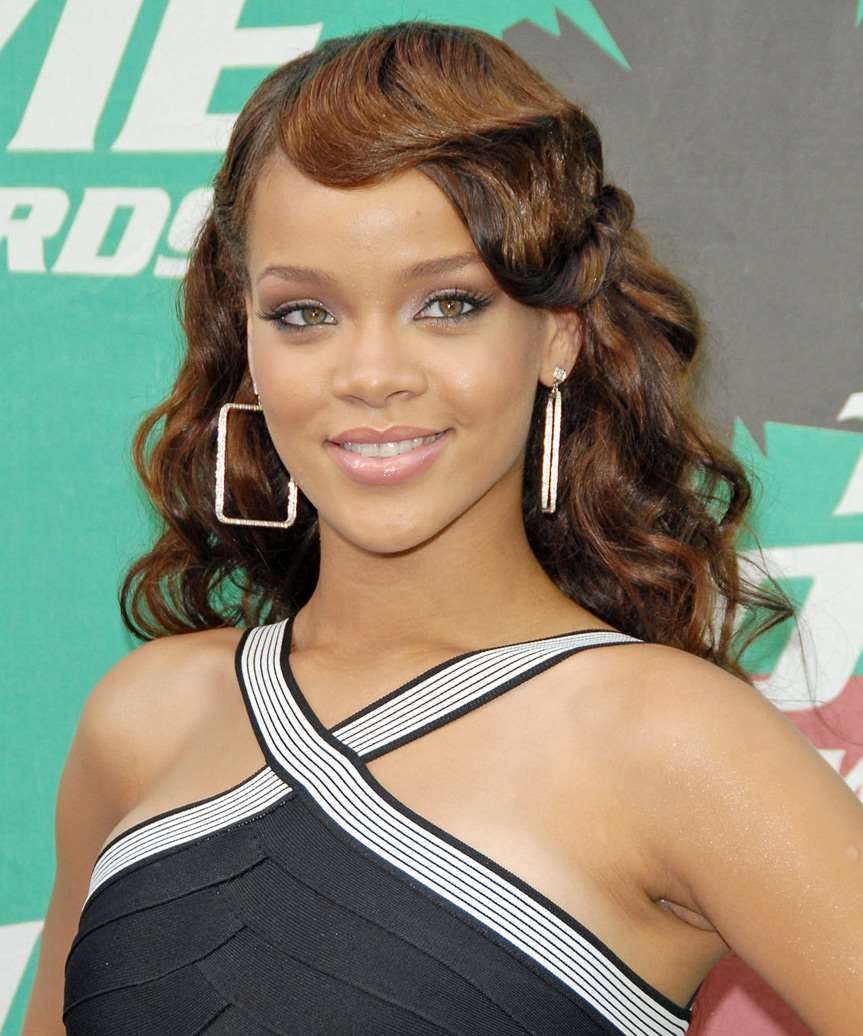
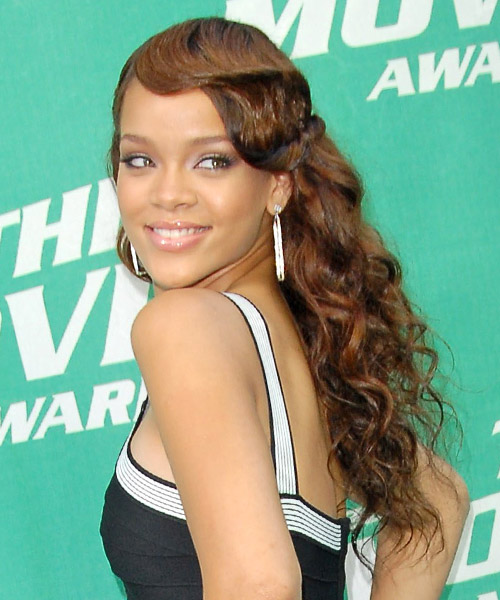
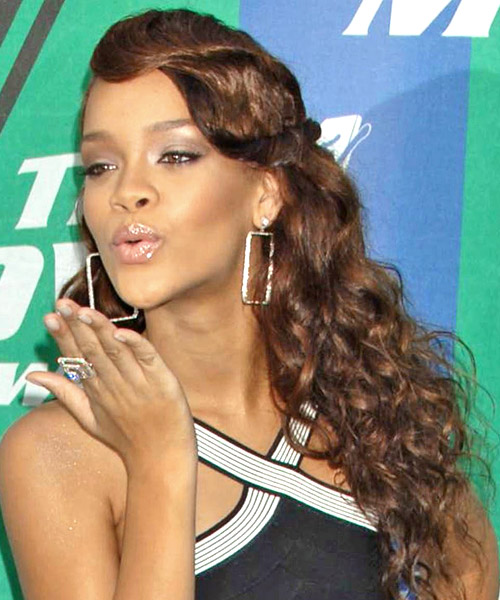
Rihanna looked gorgeous at the 2006 MTV Movie Awards with this look. Rihanna colored her trendy tresses a deep chocolate brown and full shaped layers were cut around her top, sides, and bangs to create this '50s inspired 'do. Her hair has been parted to the right side, which allows you to see the formal curls better and it helps to open up her face as well. This style is going to take time for you to style, especially around your forehead area but once you get it right, you are going to love it! Rihanna has added lighter highlights to this look which lightens this look and is great for those summer seasons. This hairstyle is going to suit those with a high forehead, and people who have an oval, square, oblong, triangle, and diamond face shape. Medium to thick hair is going to suit this look the most.

When it comes to your makeup application, you want to keep it simple as this style packs a huge punch. Do not forget to add some blush to your checks for some color, contour and highlight your face and neck areas and finish off with your favorite lipstick color.


Visual Story

Rihanna Long Chocolate Brown 50s Inspired Curls- Visual Story


Hairstyle Suitability Rating: ★★★★★
Hairstyle Popularity Rating: ★★★★★

Hairstyle Type

Category
Formal
Length
Long
Elasticity
Curly
Hair Color
Light Brunette

Haircut Technique

Type
Scissor Cut

Suitability

Gender
Women
Face Shape
round,oval,heart,diamond
Hair Density
Medium/Thick
Hair Texture
Medium/Coarse

Age
21 - 30, 31 - 40, and 41 - 50
Height
Tall
Weight
Thin/Average

Forehead Height
Short/Average
Neck Length
Long
Ears
Small/Average
Nose
Small/Average
Glasses
No

Styling

Time
30 minutes
Tip
Pinch the mid-lengths and ends with your wax to define the wave.
Products
moisturizer, sculpture lotion, wax, hair spray
Tools
blow dry, curling iron


Similar hairstyles you may be interested in...


step 1

Apply a small amount of hair moisturizer to the palm of your hand and distribute it evenly through the mid-lengths and the ends. Moisturizer will help your hair to maintain good condition and protect your strands from heat as you style.


step 2

Apply sculpture lotion to the palm of the hand and then place it evenly throughout the hair. Sculpture lotion can be used as an alternative to mousse for messy hair, as a styling aid when blow-drying for volume, and for a stronger hold.


step 3

Using the corner of your comb and standing in front of a mirror find the middle of your right eye and then drag the comb straight up slowly until you reach your hairline and then continue back in a straight manner to achieve an even right part. A side part is great for longer face shapes because it creates the illusion of width.


step 4

It is always a good idea to work in sections. This will help to make your hair styling quicker, easier to follow and more orderly. Comb your hair out and place your hair up into four equal sections, two in front and two in back, starting from ear to ear.


step 5

A medium radial brush is used on medium to long hair types to smooth out wavy or curly hair textures or to add body to straight hair. When selecting a radial brush, always use one with a pure bristle as this will not tear or damage the hair.


step 6

To blow-dry under, start at the nape/back and place your brush under the section of hair close to the nape. With the dryer held up over the hair, pull the brush from the roots and continue to the mid length's, keeping the blow-dryer following over the top. Once you reach the ends, curve them under. Repeat this step until the section is completely dry.


step 7

To blow-dry the sides, take out a small section of hair from the front and clip the rest of the hair away. Next, place the brush under the section and then pull the brush and hair forward around your face (this curving motion creates body). Place the hair-dryer on top of the brush until you reach the ends and then turn the ends under. Repeat until dry.


step 8

A large curling iron is used to create large soft curls and can be used to add body.


step 9

Starting from the back, take a small section of hair and place the ends at the base of your curling iron barrel and then wrap the hair up around the barrel until you reach your roots. Hold the hair for 5 to 10 seconds and then release the hair by unwinding the strands backwards. Continue this step until the entire back section of your hair is completed.


step 10

Take a small section of hair and place the ends at the base of your curling iron barrel and then wrap the hair up around the barrel until you reach your mid-lengths. Hold the hair for 5 to 10 seconds and then release the hair by unwinding the strands backwards.


step 11

Pick up a small selection of hair from your mid section no bigger than your tail comb. Place your comb at the roots and then comb up and down until the hair is standing up by itself. Continue to the crown and finish at the sides. Repeat this step if you require more volume.


step 12

Apply a small amount of wax to your fingertips and then lightly piece and pinch the ends of your hair.


step 13

Apply wax to your fingertips then drag through your bangs, sweeping the hair to the left as you go. Pinching the ends will create soft texture.


step 14

Apply some hard wax to your fingertips and then rub it into your roots while lifting your strands for soft volume.


step 15

To finish, apply a minimal amount of hairspray from an arms length distance to the top, sides and back. Take care not to use too much or you will end up with a white, flaky residue which looks like dandruff.


Recommended Hairstyles...