Susan Yeagley Medium Wavy Blonde Hairstyle
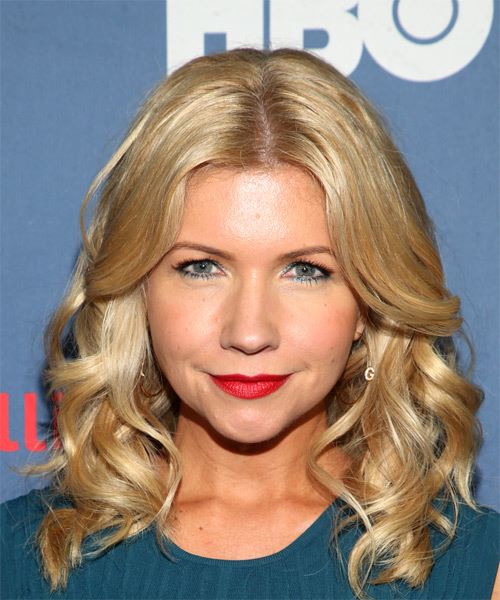

Added: 06 Aug 2018
Can we please just admire how drop dead gorgeous Susan looks with this hairstyle? This is a very polished look with layers throughout her hair as well as coiffed curls from her eye level down to the tips of her hair. You can place light foils or colored foils at the tips of your hair to create an ombre effect. The curls will make the ombre look stunning! Her tresses, (long locks of her hair), are left sitting on her shoulders whilst longer curls are placed all over to give the look volume and shape. The shape of this 'do is perfect to complement an oblong face shape. The centre of her hair is parted which puts the highlight of her look on her forehead and eyes which allows you to create the perfect face shape which is oval.

You are going to need a bit of hairspray to lock in those locks and curls but if you do it correctly, this look can stay in for the whole day. It is ideal that you start off with straight hair so that you can control how any curls you put in and how big the curls are. With a hairstyle this look, you are going to need a make-up look that is natural and yet highlighted on your forehead, nose, chin and cheeks to bring your face forward and your hairline and edge of your face backwards. Finish off this look with a bold red, dark purple or pink lip.

Hairstyle Suitability Rating: ★★★★★
Hairstyle Popularity Rating: ★★★★★

Hairstyle Type

Category
Casual
Length
Medium
Elasticity
Wavy
Hair Color
Blonde

Haircut Technique

Type
Scissor Cut

Suitability

Gender
Women
Face Shape
round,oval,diamond,triangular
Hair Density
Medium
Hair Texture
Medium

Age
Under 21, 21 - 30, 31 - 40, 41 - 50, and 51 - 60
Height
Any
Weight
Thin/Average/Large

Forehead Height
Short/Average
Glasses
No

Styling

Time
20 minutes
Products
moulding cream, hair spray
Tools
blow dry, hot rollers


Similar hairstyles you may be interested in...


step 1

Using the corner of your comb and standing in front of a mirror find the middle of your nose and then drag the comb straight up slowly until you reach your hairline and then continue back in a straight manner to achieve an even middle part. A middle part is a great way to make small, round face shapes appear longer and thinner.


step 2

A large radial brush is usually used on long straight hair types or to smooth out wavy or curly hair textures. When selecting a radial brush, always use one with a pure bristle as this will not tear or damage the hair.


step 3

Using your brush, blow-dry in small sections starting from the nape/back. Tilting your head forward, place the brush an inch below the roots to hold them taut and aim the dryer above the brush for a few seconds before continuing to the ends.


step 4

Using your brush, blow-dry in small sections starting from the sides. Tilting your head forward, place the brush an inch below the roots to hold them taut and aim the dryer above the brush for a few seconds before continuing to the ends. Repeat this step on a new section directly above the dry one.


step 5

To blow-dry the crown/top sections, take a section of hair no bigger than the diameter of the brush and blow-dry the hair placing the brush under the section of hair. With your blow-dryer in front of the brush, follow the brush in an upwards direction at the roots and an outwards position at the ends for volume and softness. Continue until the section is dry.


step 6

A large hot roller is used to give your hair a larger curl and to add lots of body.


step 7

Take a section of hair no wider than the diameter of the hot roller and comb it through to ensure there are no knots. Place the roller at the ends of the section of hair, being sure to smooth the ends under, and then twist the roller vertically, making sure to roll it backwards, along the hair shaft to the roots and secure it with a pin or clip. Keep the rollers in your hair until they cool.


step 8

Take a section of hair from the nape no wider than the diameter of the hot roller and comb it through to ensure there are no knots. Place the roller at the ends of the section of hair, being sure to smooth the ends under, and then twist the roller vertically down the hair shaft to the roots and secure it with a pin or clip. Continue this step until the entire back section of your hair is completed. Keep the rollers in your hair until they cool.


step 9

Apply your moulding cream to the ends of your hair and then lightly pinch and scrunch the hair before allowing your moulding cream to set.


step 10

To finish, apply a minimal amount of hairspray from an arms length distance to the top, sides and back. Take care not to use too much or you will end up with a white, flaky residue which looks like dandruff.


Recommended Hairstyles...