Two-Tone Platinum Blonde And Purple Bob Haircut


Added: 27 Mar 2018
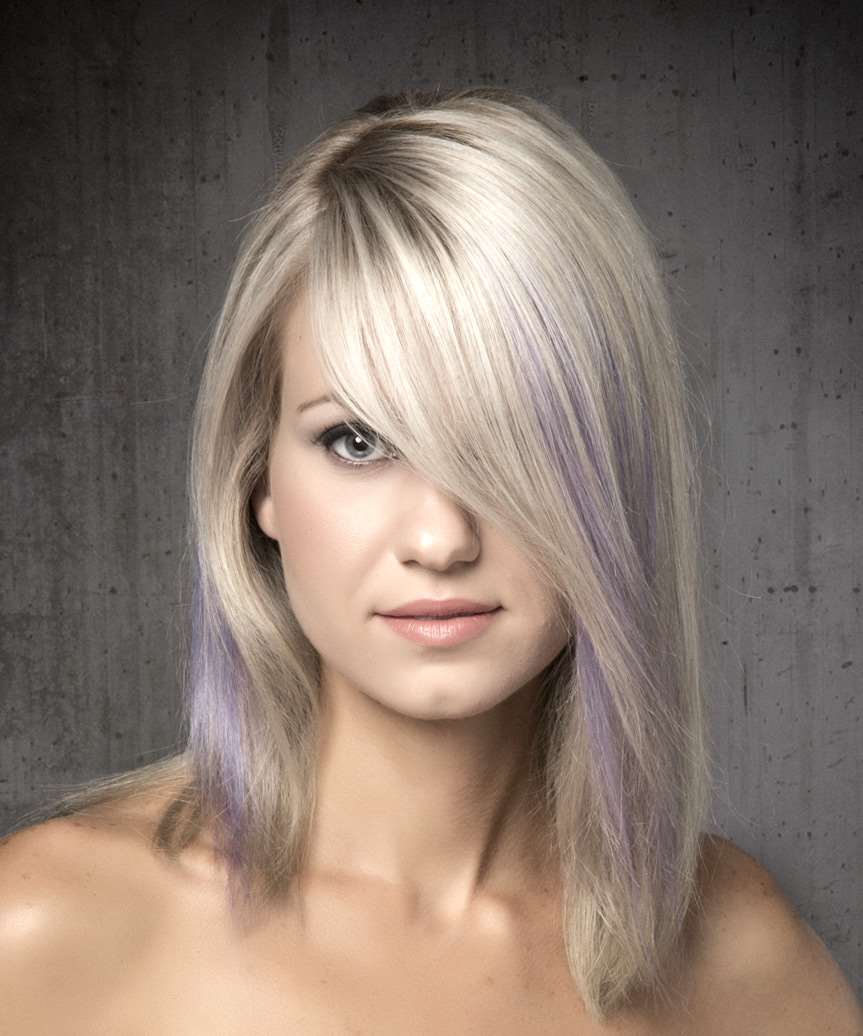
Looking for a daring new hair color to make you stand out from the crowd? Then look no further than this two-tone platinum blonde and purple bob haircut! This fun and funky style is perfect for those who want to add a bit of personality to their look, and it's sure to turn heads wherever you go.This two-tone bob is the perfect way to add a touch of fun and personality to your look. The platinum blonde base is offset with a vivid purple hue that will turn heads.

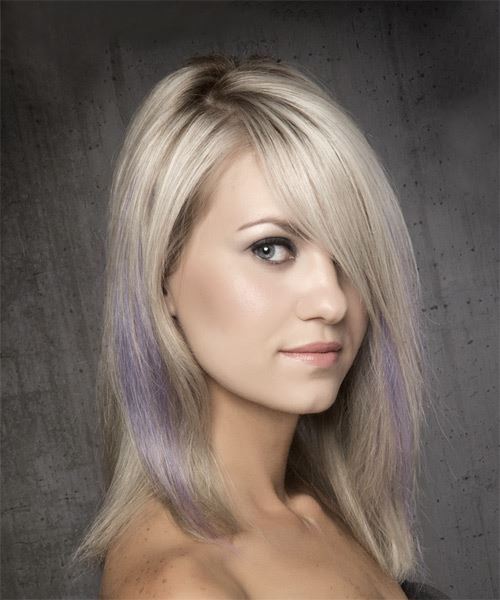
Our model is flaunting a gorgeous bob that features graduated ends and a side-sweeping fringe that frames the face beautifully. This hairstyle is ideal for ladies who want some forehead coverage but don't want to commit to full-on bangs. Regular trims are needed to maintain this style. As for the color, this beautiful ash platinum blonde tone looks stunning with violet highlights added throughout the ends. This hair color will work best on naturally light blonde hair.

This fab two-tone bob is ideal for those who want to make a statement! The platinum blonde shade is contrasted with a vibrant purple hue, making for a truly eye-catching look. The sleek bob cut is easy to style and maintain, making it the ideal choice for busy ladies on the go.The best thing about this style is that it's surprisingly versatile - you can dress it up or down, depending on your mood. Rock it with a sleek outfit and heels for a night out, or keep it casual with jeans and a t-shirt during the day. No matter how you wear it, you're guaranteed to look fabulous.

Hairstyle Suitability Rating: ★★★★★
Hairstyle Popularity Rating: ★★★★★

Hairstyle Type

Category
Alternative
Length
Medium
Elasticity
Straight
Hair Color
Platinum and Purple Two-Tone

Haircut Technique

Type
Scissor Cut

Suitability

Gender
Women
Face Shape
round,oval,oblong,square,heart,diamond,triangular
Hair Density
Medium
Hair Texture
Fine

Age
Under 21, 21 - 30, 31 - 40, and 41 - 50
Height
Any
Weight
Thin/Average/Large

Forehead Height
Short/Average
Glasses
No

Styling

Time
20 minutes
Tip
Use a round brush to style the bangs across the face.
Products
moulding cream, hair spray
Tools
blow dry


Similar hairstyles you may be interested in...


step 1

Using the corner of your comb and standing in front of a mirror find the middle of your right eye and then drag the comb straight up slowly until you reach your hairline and then continue back in a straight manner to achieve an even right part. A side part is great for longer face shapes because it creates the illusion of width.


step 2

A medium radial brush is used on medium to long hair types to smooth out wavy or curly hair textures or to add body to straight hair. When selecting a radial brush, always use one with a pure bristle as this will not tear or damage the hair.


step 3

Using your brush, blow-dry in small sections starting from the nape/back. Tilting your head forward, place the brush an inch below the roots to hold them taut and aim the dryer above the brush for a few seconds before continuing to the ends.


step 4

Using your brush, blow-dry in small sections starting from the sides. Tilting your head forward, place the brush an inch below the roots to hold them taut and aim the dryer above the brush for a few seconds before continuing to the ends. Repeat this step on a new section directly above the dry one.


step 5

To blow-dry the crown/top sections, take a section of hair no bigger than the diameter of the brush and blow-dry the hair placing the brush under the section of hair. With your blow-dryer in front of the brush, follow the brush in an upwards direction at the roots and an outwards position at the ends for volume and softness. Continue until the section is dry.


step 6

To blow-dry your bangs to the side, clip the back and side sections up, leaving just your bangs out. Place your brush beneath your bangs, holding your hair to the side and remembering to hold the tension between your hair and brush. With your blow-dryer on a low setting, apply heat by starting at the roots and make sure to stretch your hair out to the ends. Repeat until your hair is dry.


step 7

Apply some moulding cream to your fingertips and then pull it through the ends of your hair in a downward motion to achieve a textured look.


step 8

Using a small amount of moulding cream, work it through the mid-lengths and ends in a downward motion. For added texture, pinch the ends as you go sparingly.


step 9

Apply moulding cream to your fingertips then gently rake through your bangs, sweeping the hair to the left as you go. Be careful not to use too much product as it can become sticky and clumpy.


step 10

To finish, apply a minimal amount of hairspray from an arms length distance to the top, sides and back. Take care not to use too much or you will end up with a white, flaky residue which looks like dandruff.


Recommended Hairstyles...