Added:
12 Mar 2017
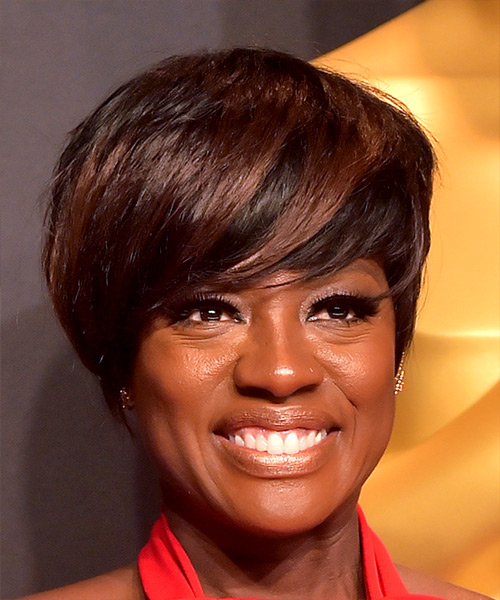
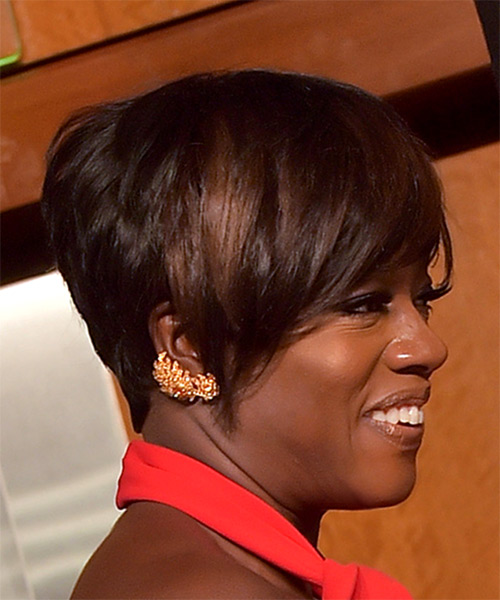
The back and sides of this short sassy 'do is tapered into the head blending into the top layers that are swept to the side for shape and style. The front is swept across the forehead to soften the face and completes the over-all look brilliantly. Product is needed to keep this style in place and regular trims is needed every 4-6 weeks.
Viola Davis is looking elegant here in a short Sixties-inspired hairstyle. It is flattering to her features as the side-swept fringe helps to balance the length of her face and the asymmetrical styling helps to keep a focus on her best features -her bright, expressive eyes and beaming smile. This cut also works well with her thick hair texture and needs little styling thanks to the sculpted layers. The end result is a feminine, modern and sophisticated look.
Viola has naturally dark hair with dark brown eyes and a warm, medium-dark complexion. Here, she goes for a natural looking espresso brown color as her base which sets off her eyes nicely. The added mahogany red highlights on top give her locks an extra dose of style and brightens up her complexion. It also produces a glossy, healthy looking finish for her locks. Touch ups are needed every now and then to keep the color looking vibrant.
Viola Davis is an American actress and producer. She is the only black woman to be nominated for three Academy Awards, winning one, and is the only black actress or actor to win the Triple Crown of Acting.
Viola Davis Dark Brunette Pixie Haircut with Side Swept Bangs and Dark Red Highlights
Images © MediaPunch/TheHairStyler.com
Images © MediaPunch/TheHairStyler.com
Hairstyle Suitability Rating:
Hairstyle Popularity Rating: ★★★★★
Hairstyle Popularity Rating: ★★★★★
Hairstyle Type
Category
Formal
Length
Short
Elasticity
Straight
Hair Color
Dark Brunette and Dark Red Highlights
Haircut Technique
Type
Clipper Cut
Suitability
Gender
Women
Face Shape
round,oval,heart,diamond
Hair Density
Thick
Hair Texture
Medium
Age
21 - 30, 31 - 40, 41 - 50, 51 - 60, and Over 60
Height
Any
Weight
Thin/Average/Large
Forehead Height
Short/Average
Glasses
Yes
Styling
Time
10 minutes
Tip
Smooth this 'do into place with styling wax or pomade.
Products
straightening, moulding cream
Tools
finger dry, blow dry

