Shoulder-Length Seventies Shag Hairstyle


Added: 20 Aug 2017
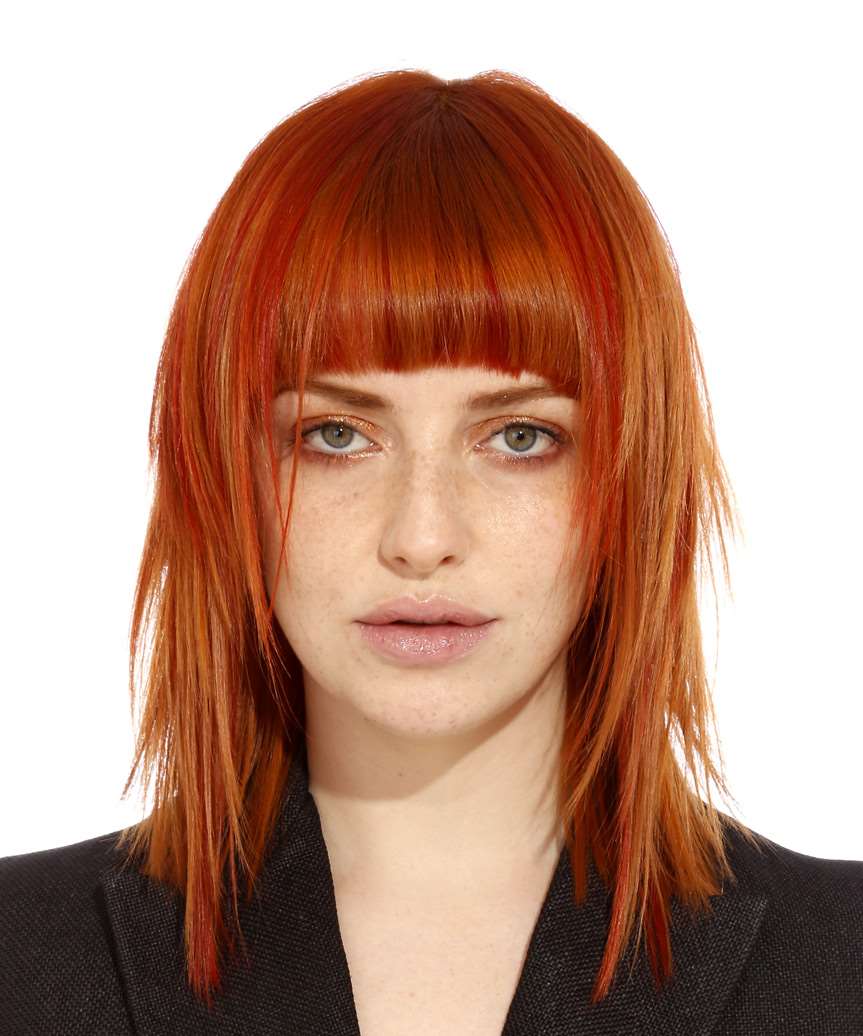
The length and layers of this look are jagged cut to achieve a casual textured Shag hairstyle making it a perfect edgy style to frame a long face. The bangs are blunt cut to frame the eyes and completes the over-all style brilliantly. Product is needed to piece out the ends and keep this 'do in place.

Our model loves to experiment with her hairstyles. Thanks to her oval shaped face and gorgeous bone structure, she can pull off a wide variety of styles with ease, and her latest 'do is no exception. Our model has gone for a rocker chic Shag look here with this Seventies inspired shag cut that makes the most of her stick straight hair texture. The jagged cut ends give her locks lots of movement, while the long blunt fringe brings the focus to the eye area. This is a versatile medium-length hairstyle that can be worn down, or tied up with the heavy fringe and layers around the face left down for a cool, chic look.

Our model has a neutral complexion and green eyes. While she could pull off brunette, caramel and golden brown and blonde tones, she looks best in vibrant red colors that add warmth to her skin tone. Here, she goes for a bright orange tone that is fashion forward yet matches her coloring brilliantly. This color is perfect for ladies with freckled complexions. This rich red tone also gives her strands a healthy looking finish and shine.

Hairstyle Suitability Rating: ★★★★★
Hairstyle Popularity Rating: ★★★★★

Hairstyle Type

Category
Formal
Length
Medium
Elasticity
Straight
Hair Color
Orange

Haircut Technique

Type
Scissor Cut

Suitability

Gender
Women
Face Shape
oval,oblong,heart,diamond,triangular
Hair Density
Medium
Hair Texture
Fine

Age
Under 21, 21 - 30, 31 - 40, and 41 - 50
Height
Any
Weight
Thin/Average/Large

Forehead Height
Long
Glasses
Yes

Styling

Time
10 minutes
Tip
Use wax to twist the ends out, to highlight the layers.
Products
gel wax, hair spray
Tools
blow dry, straightening iron


Similar hairstyles you may be interested in...


step 1

Using the corner of your comb and standing in front of a mirror find the middle of your nose and then drag the comb straight up slowly until you reach your hairline and then continue back in a straight manner to achieve an even middle part. A middle part is a great way to make small, round face shapes appear longer and thinner.


step 2

A medium radial brush is used on medium to long hair types to smooth out wavy or curly hair textures or to add body to straight hair. When selecting a radial brush, always use one with a pure bristle as this will not tear or damage the hair.


step 3

When blow-drying your bangs forward, clip your hair back leaving only your bangs out. Position your bangs evenly in your brush, taking the hair in a forward direction. Blow-dry from roots to ends, keeping the tension consistent, and evenly distribute heat over the whole section of hair that you are working on. Repeat until the hair is dry. This will stop any frizz that may occur.


step 4

A paddle brush is used for detangling the hair and can be used to smooth out straight hair when blow-drying or styling. It is a must have for every household.


step 5

Working in sections starting from the back, place the paddle brush close to the roots and drag it through the strands slowly, taking care not to overheat your hair. Once dry, continue to a new section, completing the back, the sides and then the top section last of all.


step 6

When straightening your hair, first make sure that your hair is completely dry. Then, section your hair off starting from the back/nape using a comb. Straighten your hair starting from the roots and working your way down to the ends using your comb as your guide. Make sure not to leave the straightening iron in one spot for more than 3 seconds. For more information about straightening techniques click here.


step 7

Pinch and drag your hair in an upwards motion using gel-wax. Using gel-wax will give luster and shine with soft texture.


step 8

Apply a small amount of gel-wax to your fingers and then pinch and pull the ends on the right side of your hairstyle forward. This will create shine and texture. Be careful not to use too much product or your hair can look greasy.


step 9

Apply a small amount of gel-wax to your fingers and then pinch and pull the ends on the left side of your hairstyle forward. This will create shine and texture. Be careful not to use too much product or your hair can look greasy.


step 10

Apply a small amount of gel-wax to your fingertips and then using your fingers, rake through your bangs to the ends for shine and texture.


step 11

To finish, apply a minimal amount of hairspray from an arms length distance to the top, sides and back. Take care not to use too much or you will end up with a white, flaky residue which looks like dandruff.


Recommended Hairstyles...