High And Textured Asymmetrical Haircut


Added: 18 May 2011
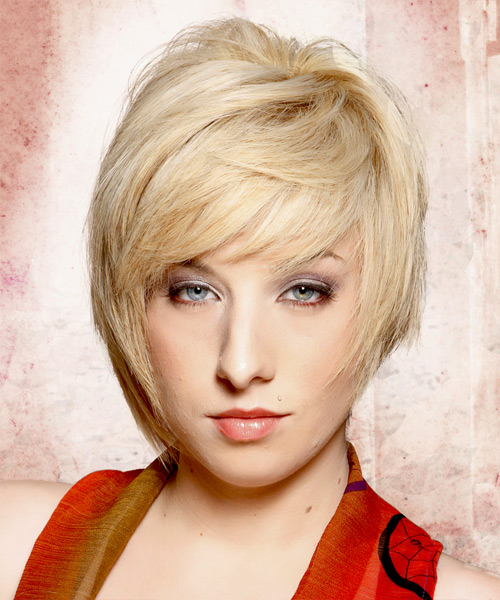
Asymmetrical haircuts are all the rage right now, and for a good reason! They add height and texture to your hair, making you look more trendy and chic. This style is perfect for anyone who wants to add some edge to their look. So if you're looking for a haircut that will add height and texture to your hair, an asymmetrical haircut is a great option.

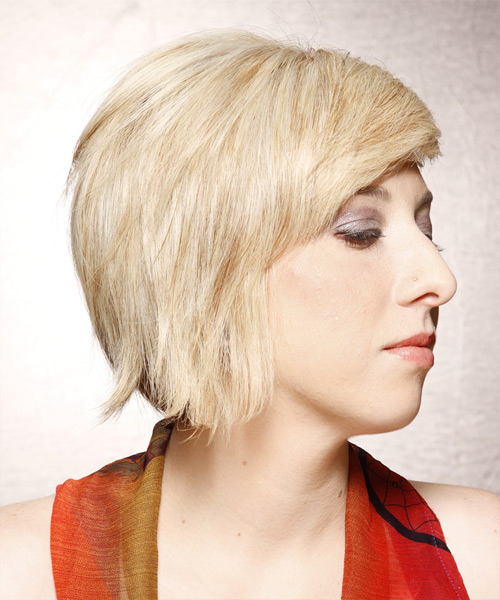
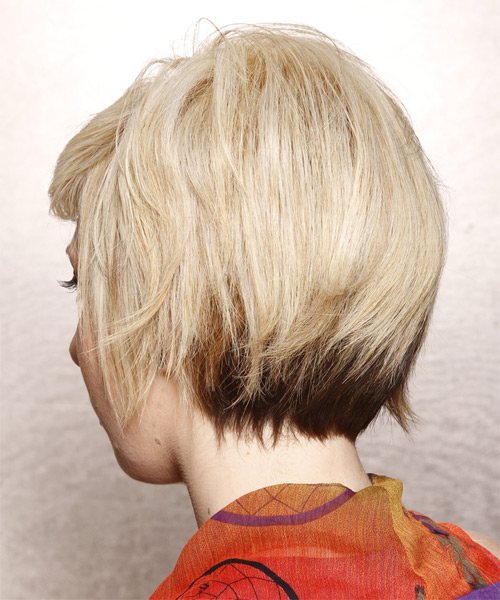
Our model has a substantial side part and choppy layers throughout her hair, giving her some added edge. The makeup artist complemented her features with bronze eye shadow, contoured cheeks and nude lips. This fancy hairstyle is jagged cut all over with the side layers cut asymmetrically to create this bold 'do perfectly for the brave. The top layers add height and texture, which are easy to re-create with a little product. This style is particularly well-suited for women with oval, oblong, square, or diamond-shaped faces, and thin to medium hair density. Fine to medium hair texture is ideal for this style, and the key to achieving this look is to add lots of volume and texture to the hair.

You can maintain this style by trimming your hair after 4 to 6 weeks. Toning treatments are required to maintain the golden tone when your roots turn to their natural color. This hairstyle is great for all occasions and is easy to change with it's versatility as it only needs product for hold and shine.


Visual Story

High And Textured Asymmetrical Haircut- Visual Story


Hairstyle Suitability Rating: ★★★★★
Hairstyle Popularity Rating: ★★★★★

Hairstyle Type

Category
Casual
Length
Short
Elasticity
Straight
Hair Color
Golden

Haircut Technique

Type
Scissor Cut

Suitability

Gender
Women
Face Shape
oval,oblong,square,diamond
Hair Density
Thin/Medium
Hair Texture
Fine/Medium

Age
Under 21, 21 - 30, 31 - 40, and 41 - 50
Height
Any
Weight
Thin/Average/Large

Forehead Height
Short/Average
Neck Length
Short/Average
Ears
Small/Average
Nose
Small/Average
Glasses
No

Styling

Time
30 minutes
Tip
Direct your hair into position while applying the finishing products.
Products
moisturizer, wax, hair spray
Tools
blow dry


Similar hairstyles you may be interested in...


step 1

Apply a small amount of hair moisturizer to the palm of your hand and distribute it evenly through the mid-lengths and the ends. Moisturizer will help your hair to maintain good condition and protect your strands from heat as you style.


step 2

A medium radial brush is used on medium to long hair types to smooth out wavy or curly hair textures or to add body to straight hair. When selecting a radial brush, always use one with a pure bristle as this will not tear or damage the hair.


step 3

Using your brush, blow-dry in small sections starting from the nape/back. Tilting your head forward, place the brush an inch below the roots to hold them taut and aim the dryer above the brush for a few seconds before continuing to the ends.


step 4

To blow-dry the sides, take out a small section of hair from the front and clip the rest of the hair away. Next, place the brush under the section and then pull the brush and hair forward around your face (this curving motion creates body). Place the hair-dryer on top of the brush until you reach the ends and then turn the ends under. Repeat until dry.


step 5

To blow-dry the crown/top sections, take a section of hair no bigger than the diameter of the brush and blow-dry the hair placing the brush under the section of hair. With your blow-dryer in front of the brush, follow the brush in an upwards direction at the roots and an outwards position at the ends for volume and softness. Continue until the section is dry.


step 6

When blow-drying your bangs to the side, section your hair up and clip your hair back to leave only your bangs out. Remember to make sure that your bangs are damp to make blow-drying more effective. Next, take your brush and place it underneath the hair and then blow-dry starting from the roots, adding tension to the hair as you go. Slowly pull your section down to the ends and continue until dry.


step 7

Pick up a small selection of hair from your mid section no bigger than your tail comb. Place your comb at the roots and then comb up and down until the hair is standing up by itself. Continue to the crown and finish at the sides. Repeat this step if you require more volume.


step 8

Apply some wax to your fingertips and then pull through the ends of your hair in a downward motion to achieve a sculptured look. Pinch clumps of hair in different directions for a messier result.


step 9

Using a small amount of wax, work it through the mid-lengths and ends in a downward, pinching motion. For added texture, apply more pinching and more wax.


step 10

Apply wax to your fingertips then drag through your bangs, sweeping the hair to the right as you go. Pinching the ends will create soft texture.


step 11

To finish the look, apply wax to your fingertips, making sure to smooth the wax over all of your fingers, then simply pinch the wax onto the ends of your hair, applying as much or as little as needed.


step 12

Apply some hard wax to your fingertips and then rub it into your roots while lifting your strands for soft volume.


step 13

To finish, apply a minimal amount of hairspray from an arms length distance to the top, sides and back. Take care not to use too much or you will end up with a white, flaky residue which looks like dandruff.


Recommended Hairstyles...