Selena Gomez Medium Straight Dark Brunette Half Up Half Down Hairstyle


Added: 29 Jul 2018
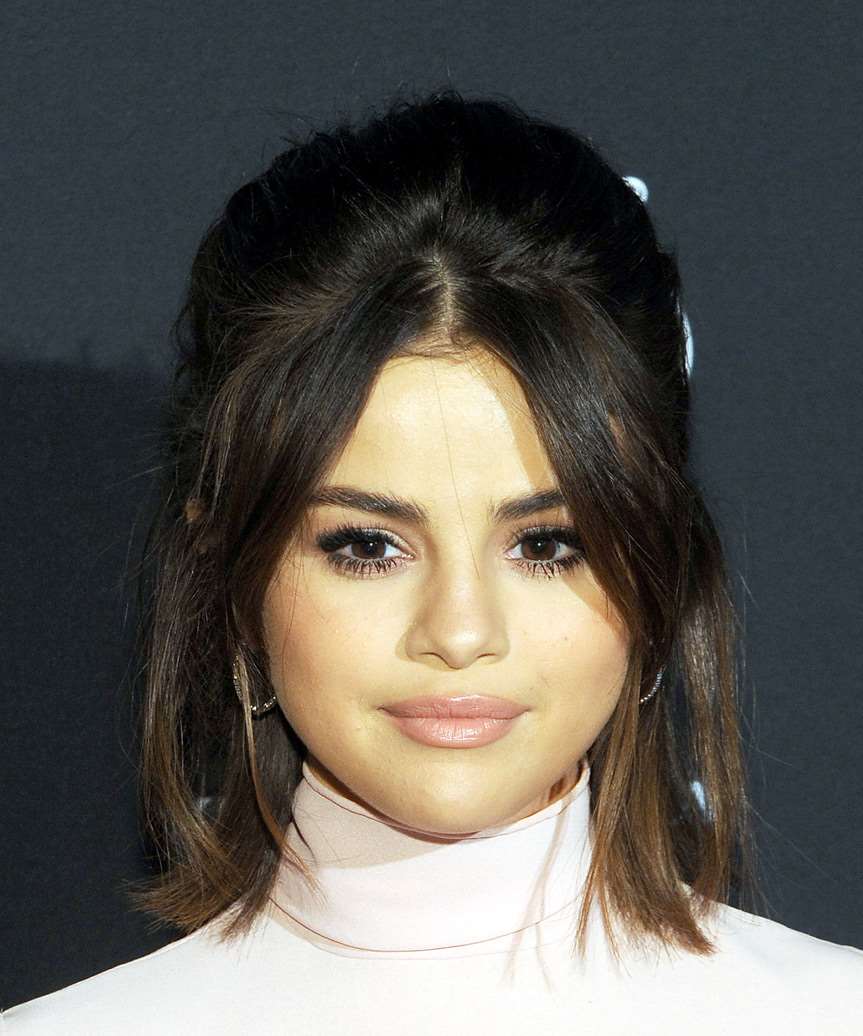
This stunning 'do is pulled back and pinned at the back to create a half up-do that will turn heads at any occasion. The Sixties-inspired hairstyle is ideal for a round face shape and is easy to re-create at home. It needs strong hold product to keep it in place all day or night.

Selena Gomez goes for a lovely half up-do here pinning her locks up at the back and leaving out her long Bardot bangs in the front. Selena usually wears her hair down and in modern, trendy hairstyles, so this retro-inspired bouffant 'do is a welcome departure from her signature style. Here she highlights her cheekbones by wearing long Bardot bangs around her face that sculpts her jawline as well. The center part gives her forehead some coverage while creating a sexy peek-a-boo effect, while the rest of her hair is pinned back at the back, leaving lots of volume at the crown. This is an ideal 'do for ladies with a round face like hers who benefit from high hairstyles that lengthen the face.

Selena has dark eyes and a tanned skin tone which makes her suited to brunette and auburn colors of hair the best. Here, she goes for espresso brown hair that flatters her warm complexion and showcases her striking eyes. The tips are a sun-kissed chestnut brown tone that gives her 'do an extra dose of style and warmth.

Hairstyle Suitability Rating: ★★★★★
Hairstyle Popularity Rating: ★★★★★

Hairstyle Type

Category
Casual
Length
Medium
Elasticity
Straight
Hair Color
Dark Brunette

Haircut Technique

Type
Scissor Cut

Suitability

Gender
Women
Face Shape
round,oval,square,heart,diamond
Hair Density
Hair Texture

Age
21 - 30, 31 - 40, and 41 - 50
Height
Any
Weight
Thin/Average/Large

Forehead Height
Short/Average
Glasses
No

Styling

Time
30 minutes
Tip
Strong hold products and lots of backcombing are needed to create the bouffant in this hairstyle.
Products
mousse, lacquer
Tools
blow dry


Similar hairstyles you may be interested in...


step 1

Apply styling mousse to damp hair, using your palm as a measuring guide, and evenly distribute it along the hair shaft. Styling mousse will add hold and can help achieve better results.


step 2

Using the corner of your comb and standing in front of a mirror find the middle of your nose and then drag the comb straight up slowly until you reach your hairline and then continue back in a straight manner to achieve an even middle part. A middle part is a great way to make small, round face shapes appear longer and thinner.


step 3

A medium radial brush is used on medium to long hair types to smooth out wavy or curly hair textures or to add body to straight hair. When selecting a radial brush, always use one with a pure bristle as this will not tear or damage the hair.


step 4

Starting at the nape/back of the hair, place your brush on top of the section and blow-dryer down starting from the roots and using tension as you go. Next, place the blow-dryer underneath the hair and continue to blow-dry the ends out. Make sure to follow the brush with the blow-dryer in an outwards direction. If you like fuller flicks, hold the ends out and roll them up into the brush and apply the heat for longer.


step 5

To blow-dry the sides, take out your first sections from the front and clip the rest of the hair up. Place your brush on top of the section, and starting from the roots, blow-dry down using tension as you go. Next, place the blow-dryer underneath the hair and continue to blow-dry the ends out. Continue this step until the hair is dry.


step 6

To blow-dry the crown/top sections, take a section of hair no bigger than the diameter of the brush and blow-dry the hair placing the brush under the section of hair. With your blow-dryer in front of the brush, follow the brush in an upwards direction at the roots and an outwards position at the ends for volume and softness. Continue until the section is dry.


step 7

When blow-drying your bangs to the side, section your hair up and clip your hair back to leave only your bangs out. Remember to make sure that your bangs are damp to make blow-drying more effective. Next, take your brush and place it underneath the hair and then blow-dry starting from the roots, adding tension to the hair as you go. Slowly pull your section down to the ends and continue until dry.


step 8

To blow-dry your bangs to the side, clip the back and side sections up, leaving just your bangs out. Place your brush beneath your bangs, holding your hair to the side and remembering to hold the tension between your hair and brush. With your blow-dryer on a low setting, apply heat by starting at the roots and make sure to stretch your hair out to the ends. Repeat until your hair is dry.


step 9

Pick up a small selection of hair from your mid section no bigger than your tail comb. Place your comb at the roots and then comb up and down until the hair is standing up by itself. Continue to the crown and finish at the sides. Repeat this step if you require more volume.


step 10

Take one section of hair from one side and secure it at the back of your head with a pin. Repeat on the other side to form this style.


step 11

Lacquer is great for strong hold. A small amount is all that is required to finish and should be applied from an arms length distance to the entire style.


Recommended Hairstyles...