Long Red Wavy Hairstyle With Large Curls


Added: 17 Dec 2017
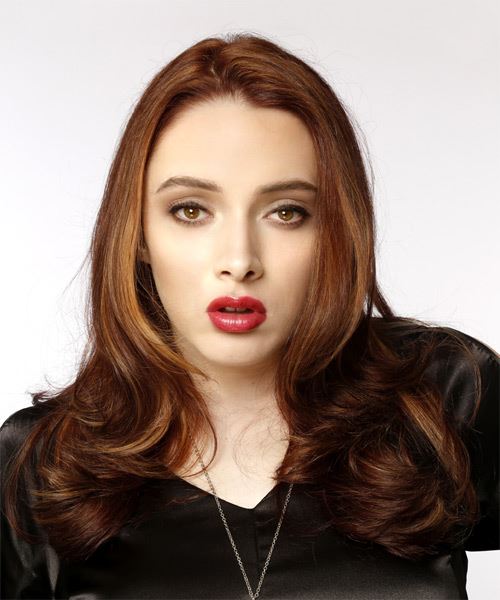
Our model is daring with her confidence in this wavy red hairstyle. She reminds us of a movie star while she flaunts her long curly locks in front of the camera lens. This hairstyle can make you stand out and show off your diva side. It is perfect for the summer season. The soft curls make this style look natural and relaxed. Gorgeous large curls are dressed through the ends of these tresses giving this style plenty of bounce and movement. This style creates volume throughout your mid-lengths to ends and brushes through your curls to mimic a naturally curly look. Long layers frame the face and add movement to her haircut. This chunky chop looks beautiful on red hair color with naturally wavy or curly hair. This hairstyle is ideal for people with medium-density hair and medium texture. For more fullness, flip your hair upside down as you dry it.

This hairstyle is best for oval, oblong, diamond and triangular face shapes. This 'do is easy to re-create with the right tools and needs product to tame fly-away hair. After undergoing regular trim for 4 to 6 weeks, your hairstyle will stay in shape. If your hair is starting to look a little grey and you want to keep it healthy, you may need regular toning treatments to help bring back the red highlights.

Hairstyle Suitability Rating: ★★★★★
Hairstyle Popularity Rating: ★★★★★

Hairstyle Type

Category
Casual
Length
Long
Elasticity
Wavy
Hair Color
Red

Haircut Technique

Type
Scissor Cut

Suitability

Gender
Women
Face Shape
oval,oblong,diamond,triangular
Hair Density
Medium
Hair Texture
Medium

Age
Under 21, 21 - 30, 31 - 40, 41 - 50, and 51 - 60
Height
Any
Weight
Thin/Average/Large

Forehead Height
Short/Average
Glasses
Yes

Styling

Time
20 minutes
Tip
Use a medium round brush to create these curls, or, use hot rollers on hard to curl hair.
Products
moulding cream, smoothing shine, hair spray
Tools
blow dry, velcro rollers


Similar hairstyles you may be interested in...


step 1

Using the corner of your comb and standing in front of a mirror find the middle of your nose and then drag the comb straight up slowly until you reach your hairline and then continue back in a straight manner to achieve an even middle part. A middle part is a great way to make small, round face shapes appear longer and thinner.


step 2

A medium radial brush is used on medium to long hair types to smooth out wavy or curly hair textures or to add body to straight hair. When selecting a radial brush, always use one with a pure bristle as this will not tear or damage the hair.


step 3

To blow-dry under, start at the nape/back and place your brush under the section of hair close to the nape. With the dryer held up over the hair, pull the brush from the roots and continue to the mid length's, keeping the blow-dryer following over the top. Once you reach the ends, curve them under. Repeat this step until the section is completely dry.


step 4

To blow-dry the sides, take out a small section of hair from the front and clip the rest of the hair away. Next, place the brush under the section and then pull the brush and hair forward around your face (this curving motion creates body). Place the hair-dryer on top of the brush until you reach the ends and then turn the ends under. Repeat until dry.


step 5

To blow-dry the crown/top sections, take a section of hair no bigger than the diameter of the brush and blow-dry the hair placing the brush under the section of hair. With your blow-dryer in front of the brush, follow the brush in an upwards direction at the roots and an outwards position at the ends for volume and softness. Continue until the section is dry.


step 6

Take a section of hair no wider than the diameter of the velcro roller and comb it through to ensure there are no knots. Place the roller at the ends of the section of hair, being sure to smooth the ends under, and then twist the roller down the hair shaft to the roots. Continue applying the velcro rollers all the way through the entire hair for a full volume finish throughout the sides. Keep the rollers in your hair for approximately 20 minutes.


step 7

Apply your moulding cream to the ends of your hair and then lightly pinch and scrunch the hair before allowing your moulding cream to set.


step 8

Apply a very small amount of smoothing shine to the palms of your hands and then run it through the mid-lengths and ends of your hair. Be careful not to add any to the roots or a large amount to any section of the hair as smoothing shine can be very heavy on the hair, weighing it down and making it appear oily.


step 9

To finish, apply a minimal amount of hairspray from an arms length distance to the top, sides and back. Take care not to use too much or you will end up with a white, flaky residue which looks like dandruff.


Recommended Hairstyles...