Ellie Goulding Long Wavy Blonde Hairstyle


Added: 08 Aug 2016
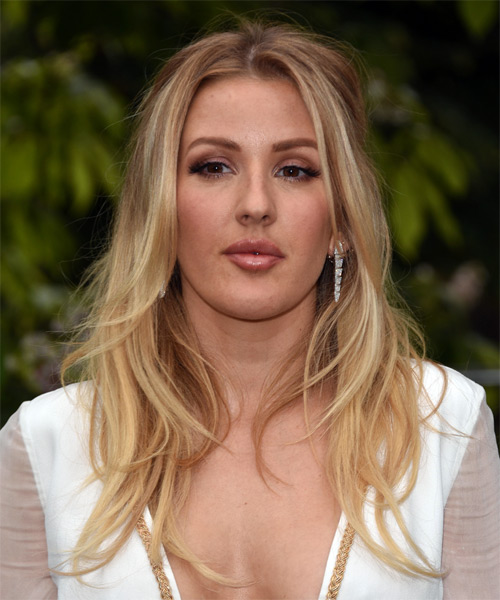
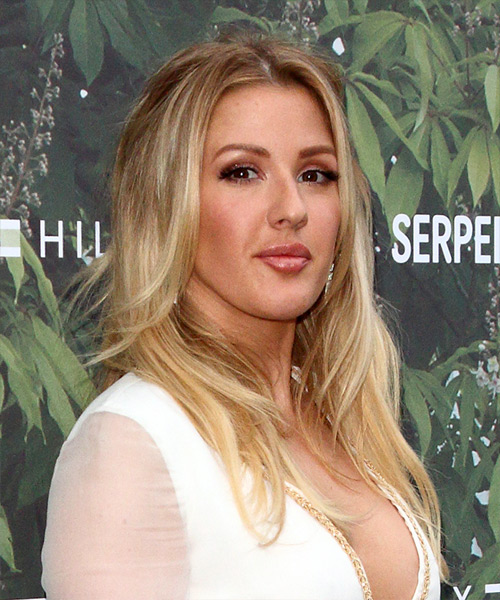
Windblown waves are dressed through the ends of these blonde locks to give the over-all style subtle movement and bounce. This casual style is easy to re-create at home with the right tools and needs a little product to tame fly-away hair. Regular trims is needed to prevent split ends.

Ellie Goulding looks lovely here in a cool, casual hairstyle. Having an oval face shape and low, straight hairline, her face looks best in ‘dos with a grown out fringe and longer layers around the face. This simple layered 'do creates a nice frame for her face and allows her hair’s natural fine texture to do its thing, adding body and bounce all over. The layers in the front of this cut softens up her jaw line area and gives her tresses some movement. This cut also highlights her strong cheekbones thanks to the center part that allows the hair to drape nicely and fall past her shoulders.

Ellie has a warm complexion with golden undertones and brown eyes. This makes her suited to hair colors that have a warm base to them, like the medium golden blonde seen here. This natural-looking shade is ideal for her complexion and it brings out the intensity of her eye color. A darker root area gives her 'do a beachy feel.

Ellie Goulding is an English singer and songwriter. Her career began when she met record producers Starsmith and Frankmusik, and she was later spotted by Jamie Lillywhite, who later became her manager and A&R.


Visual Story

Ellie Goulding Long Wavy    Blonde   Hairstyle- Visual Story


Hairstyle Suitability Rating: ★★★★★
Hairstyle Popularity Rating: ★★★★★

Hairstyle Type

Category
Casual
Length
Long
Elasticity
Wavy
Hair Color
Blonde

Haircut Technique

Type
Scissor Cut

Suitability

Gender
Women
Face Shape
oval,oblong,square,heart
Hair Density
Medium
Hair Texture
Fine

Age
21 - 30, 31 - 40, and 41 - 50
Height
Any
Weight
Thin/Average/Large

Forehead Height
Short/Average
Glasses
Yes

Styling

Time
30 minutes
Tip
Tease the roots for extra lift and volume.
Products
mousse, gel, wax
Tools
blow dry, velcro rollers


Similar hairstyles you may be interested in...


step 1

Apply styling mousse to damp hair, using your palm as a measuring guide, and evenly distribute it along the hair shaft. Styling mousse will add hold and can help achieve better results.


step 2

Using the corner of your comb and standing in front of a mirror find the middle of your nose and then drag the comb straight up slowly until you reach your hairline and then continue back in a straight manner to achieve an even middle part. A middle part is a great way to make small, round face shapes appear longer and thinner.


step 3

A large radial brush is usually used on long straight hair types or to smooth out wavy or curly hair textures. When selecting a radial brush, always use one with a pure bristle as this will not tear or damage the hair.


step 4

To blow-dry the sides, take out your first sections from the front and clip the rest of the hair up. Place your brush on top of the section, and starting from the roots, blow-dry down using tension as you go. Next, place the blow-dryer underneath the hair and continue to blow-dry the ends out. Continue this step until the hair is dry.


step 5

Starting at the nape/back of the hair, place your brush on top of the section and blow-dryer down starting from the roots and using tension as you go. Next, place the blow-dryer underneath the hair and continue to blow-dry the ends out. Make sure to follow the brush with the blow-dryer in an outwards direction. If you like fuller flicks, hold the ends out and roll them up into the brush and apply the heat for longer.


step 6

To blow-dry the crown/top sections, take a section of hair no bigger than the diameter of the brush and blow-dry the hair placing the brush under the section of hair. With your blow-dryer in front of the brush, follow the brush in an upwards direction at the roots and an outwards position at the ends for volume and softness. Continue until the section is dry.


step 7

Take a section of hair no wider than the diameter of the velcro roller and comb it through to ensure there are no knots. Place the roller at the ends of the section of hair, being sure to smooth the ends under, and then twist the roller down the hair shaft to the roots. Continue applying the velcro rollers all the way through the entire hair for a full volume finish throughout the sides. Keep the rollers in your hair for approximately 20 minutes.


step 8

Pick up a small selection of hair from your mid section no bigger than your tail comb. Place your comb at the roots and then comb up and down until the hair is standing up by itself. Continue to the crown and finish at the sides. Repeat this step if you require more volume.


step 9

Apply some gel to your fingertips and then rub it into your roots while lifting your strands for added body.


step 10

Using a small amount of wax, work it through the mid-lengths and ends in a downward, pinching motion. For added texture, apply more pinching and more wax.


Recommended Hairstyles...