Long Brown Hairstyle With Long Layers


Added: 10 Nov 2010
This is a simple and easy hairstyle. The long straight hairstyle is perfect for summer, as it will help keep you cool while on vacation. Make sure you try this curly hairdo out at home! This long hairstyle is perfect for those who want to keep their long locks fashionably straight.

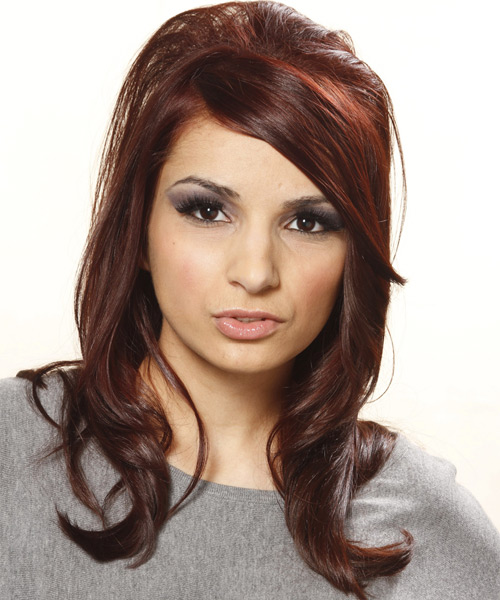
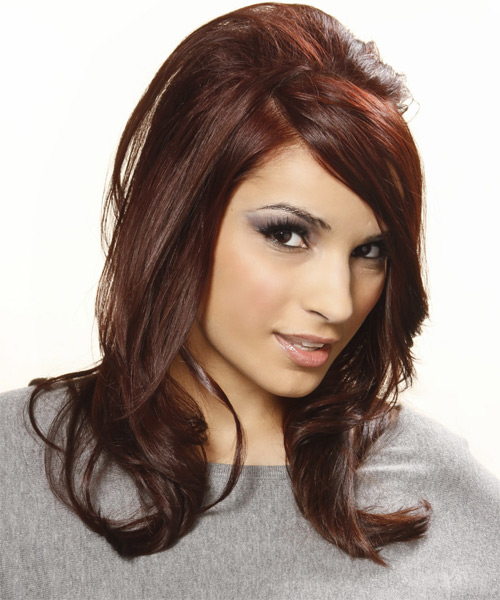
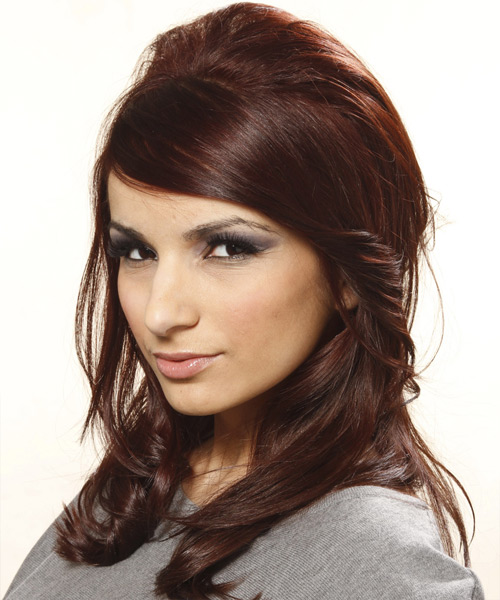
Our model has a long, straight hairstyle that flaunts a dramatic appearance. The model is wearing a heather grey top with smokey smudged eye makeup, which is perfectly accentuating her facial features. For this hair styling, this fab 'do sit over the shoulders to show off the long layers cut around the sides and back for a weightless finish to the edges. The crow is teased at the roots to achieve height and life. The long straight hairstyle is suitable for all faces and hair textures. It is suitable for women with round, oval and heart-shaped face shapes. Thin to medium hair density has the right length to maintain the original shape of your face. If your hair is thick and coarse, then this style will look best on you. You've probably seen it on celebrities, models and other girls as well. The classic look of this hairstyle is sure to turn heads.

With a long hairstyle, you can maintain regular trims to keep your hair healthy and stylish. It's recommended that you trim at least every 4-6 weeks. This hairstyle is a great choice for those with fine hair because it's easy to maintain. It also works well with both long and short faces. Tease your hair at the roots for height and control.


Visual Story

Long Brown Hairstyle With Long Layers- Visual Story


Hairstyle Suitability Rating: ★★★★★
Hairstyle Popularity Rating: ★★★★★

Hairstyle Type

Category
Casual
Length
Long
Elasticity
Straight
Hair Color
Chestnut Brunette

Haircut Technique

Type

Suitability

Gender
Women
Face Shape
round,oval,heart,triangular
Hair Density
Thin/Medium
Hair Texture
Fine/Medium

Age
Under 21, 21 - 30, and 31 - 40
Height
Any
Weight
Thin/Average/Large

Forehead Height
Short/Average
Neck Length
Short/Average
Ears
Small/Average
Nose
Small/Average
Glasses
Yes

Styling

Time
30 minutes
Tip
Tease your hair at the roots for height and control.
Products
mousse, wax, lacquer
Tools
blow dry


Similar hairstyles you may be interested in...


step 1

Apply styling mousse to damp hair, using your palm as a measuring guide, and evenly distribute it along the hair shaft. Styling mousse will add hold and can help achieve better results.


step 2

A medium radial brush is used on medium to long hair types to smooth out wavy or curly hair textures or to add body to straight hair. When selecting a radial brush, always use one with a pure bristle as this will not tear or damage the hair.


step 3

To blow-dry under, start at the nape/back and place your brush under the section of hair close to the nape. With the dryer held up over the hair, pull the brush from the roots and continue to the mid length's, keeping the blow-dryer following over the top. Once you reach the ends, curve them under. Repeat this step until the section is completely dry.


step 4

To blow-dry the sides, take out a small section of hair from the front and clip the rest of the hair away. Next, place the brush under the section and then pull the brush and hair forward around your face (this curving motion creates body). Place the hair-dryer on top of the brush until you reach the ends and then turn the ends under. Repeat until dry.


step 5

To blow-dry the crown/top sections, take a section of hair no bigger than the diameter of the brush and blow-dry the hair placing the brush under the section of hair. With your blow-dryer in front of the brush, follow the brush in an upwards direction at the roots and an outwards position at the ends for volume and softness. Continue until the section is dry.


step 6

To blow-dry your bangs to the side, clip the back and side sections up, leaving just your bangs out. Place your brush beneath your bangs, holding your hair to the side and remembering to hold the tension between your hair and brush. With your blow-dryer on a low setting, apply heat by starting at the roots and make sure to stretch your hair out to the ends. Repeat until your hair is dry.


step 7

Apply a small amount of wax to your fingertips and then lightly piece and pinch the ends of your hair.


step 8

Pick up a small selection of hair from your mid section no bigger than your tail comb. Place your comb at the roots and then comb up and down until the hair is standing up by itself. Continue to the crown and finish at the sides. Repeat this step if you require more volume.


step 9

To finish the look, apply wax to your fingertips, making sure to smooth the wax over all of your fingers, then simply pinch the wax onto the ends of your hair, applying as much or as little as needed.


step 10

Apply some hard wax to your fingertips and then rub it into your roots while lifting your strands for soft volume.


step 11

Lacquer is great for strong hold. A small amount is all that is required to finish and should be applied from an arms length distance to the entire style.


Recommended Hairstyles...