Short Head-Contouring And Face-Framing Hairstyle With Side Swept Bangs


Added: 10 Nov 2010
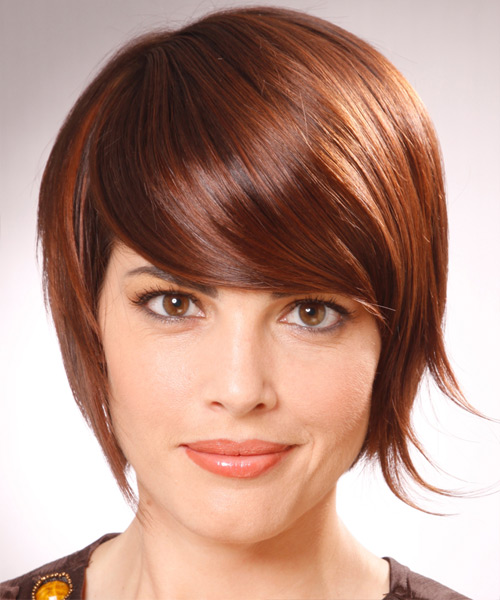
A short hairstyle with superb bangs, this 'do is a fabulous choice for those who want to make an impression. The side-swept bangs along the side of your head will give you a polished look. This hairstyle is full of personality and is suitable for different occasions.

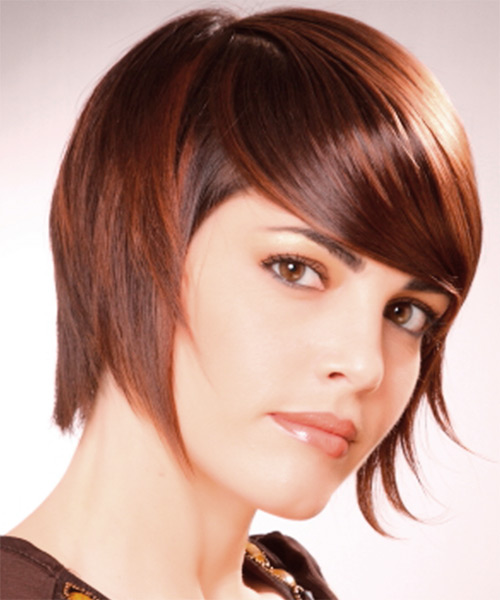
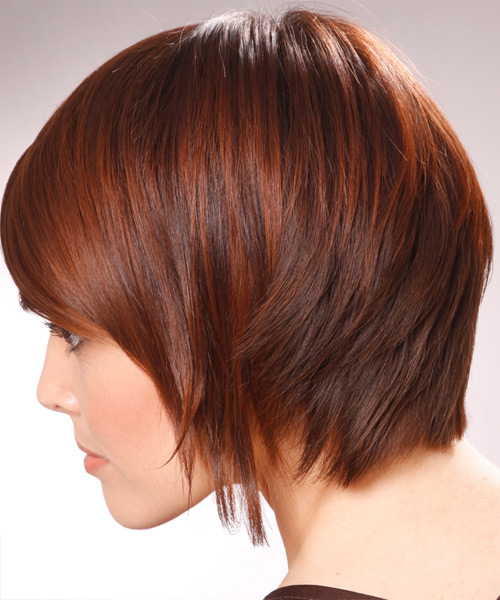
Our gorgeous model is smiling with her stunning short straight light chestnut brunette hairstyle that elegantly compliments her face shape. The jagged layers are effortlessly sweeping across her face! For the hair styling, the back of this hairstyle is jagged cut and shaped down the neck to contour the head, while the top and side layers are cut to sit flat on the head to create a smooth sexy finish. This hairstyle is meant for medium-length hair that has a straight texture and this one can really suit you if you want to highlight the face shape of an oval or square face. The side-swept bangs bring out the heart-shaped face and add depth on top. This hairstyle is inspired by the beauty and style of the 1920s. The sides are swept back to make the center part stand out more. Get ready to be the style star of your next big event in this stunning short hairstyle that is perfect for any occasion. Whether you're attending a party or catching up with your friends, this hairstyle will ensure that you look effortlessly chic. The side-swept bangs can give an even more natural appearance by not making the hairstyle too slim and flat.

Keep your gorgeous hairstyle in prime condition with professional hair trims every 4-6 weeks. Blunt-cut scissors are recommended for this hairstyle and make sure you don't split the hair when trimming it. If you need some more length or thickness, we recommend a texturizing service at least every 4 months.


Visual Story

Short Head-Contouring And Face-Framing Hairstyle With Side Swept Bangs- Visual Story


Hairstyle Suitability Rating: ★★★★★
Hairstyle Popularity Rating: ★★★★★

Hairstyle Type

Category
Alternative
Length
Short
Elasticity
Straight
Hair Color
Light Chestnut Brunette

Haircut Technique

Type
Scissor Cut

Suitability

Gender
Women
Face Shape
oval,oblong,square,diamond
Hair Density
Thin/Medium
Hair Texture
Fine/Medium

Age
Under 21, 21 - 30, and 31 - 40
Height
Any
Weight
Thin/Average/Large

Forehead Height
Short/Average
Neck Length
Short/Average
Ears
Small/Average
Nose
Small/Average
Glasses
No

Styling

Time
30 minutes
Tip
Use your finishing products to smooth down the ends and direct your hair into place.
Products
mousse, wax, lacquer
Tools
blow dry


Similar hairstyles you may be interested in...


step 1

Apply styling mousse to damp hair, using your palm as a measuring guide, and evenly distribute it along the hair shaft. Styling mousse will add hold and can help achieve better results.


step 2

A medium radial brush is used on medium to long hair types to smooth out wavy or curly hair textures or to add body to straight hair. When selecting a radial brush, always use one with a pure bristle as this will not tear or damage the hair.


step 3

To blow-dry the sides, take out a small section of hair from the front and clip the rest of the hair away. Next, place the brush under the section and then pull the brush and hair forward around your face (this curving motion creates body). Place the hair-dryer on top of the brush until you reach the ends and then turn the ends under. Repeat until dry.


step 4

Using your brush, blow-dry in small sections starting from the sides. Tilting your head forward, place the brush an inch below the roots to hold them taut and aim the dryer above the brush for a few seconds before continuing to the ends. Repeat this step on a new section directly above the dry one.


step 5

To blow-dry your bangs to the side, clip the back and side sections up, leaving just your bangs out. Place your brush beneath your bangs, holding your hair to the side and remembering to hold the tension between your hair and brush. With your blow-dryer on a low setting, apply heat by starting at the roots and make sure to stretch your hair out to the ends. Repeat until your hair is dry.


step 6

Apply some wax to your fingertips and then pull through the ends of your hair in a downward motion to achieve a sculptured look. Pinch clumps of hair in different directions for a messier result.


step 7

Using a small amount of wax, work it through the mid-lengths and ends in a downward, pinching motion. For added texture, apply more pinching and more wax.


step 8

Apply wax to the palms of your hands, and then starting at the top-back area, drag your hands forward, flattening your hair down as you go. For a wetter look use more wax.


step 9

Apply wax to your fingertips then drag through your bangs, sweeping the hair to the left as you go. Pinching the ends will create soft texture.


step 10

Apply a small amount of wax to your fingertips, and then starting about halfway down the hair shaft, pinch and drag the hair in a downward motion before flicking the ends out. Remember not to apply too much wax as it will weigh your hair down.


step 11

Lacquer is great for strong hold. A small amount is all that is required to finish and should be applied from an arms length distance to the entire style.


Recommended Hairstyles...