Short Face-Framing Hairstyle With Blue Highlights


Added: 07 Mar 2014
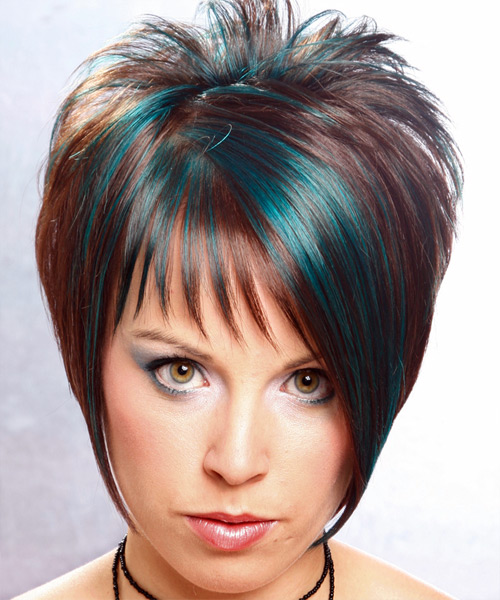
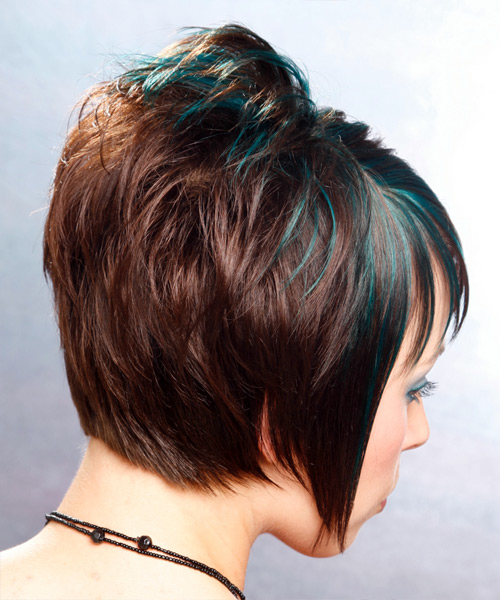
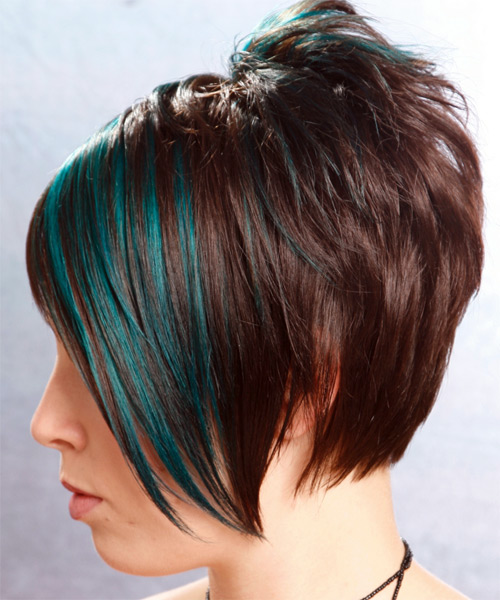
This short hairstyle is the perfect style for women who want to experiment with long layered hair. This hairstyle looks best when worn short but can still be medium textured and creates a casual chic look. Our model looks beautiful in this straight hairstyle. Her shimmery and smoky eyes create a dramatic look. This short 'do has more volume in the crown area and makes your hair look thicker. This is an eye-catching look with plenty of body and shape. The bangs create a light frame for the top of the face, while the back is tapered down to the nape (this avoids leaving a weighted line) and the sides have been left long to give the appearance of an angled jawline. This trendy short hairstyle is ideal for any occasion. If you have medium to fine hair, this style will give you a beautiful look that is natural and easy to manage. This look is incredibly flattering on oval and round face shapes and those with heart-shaped features. It is effortless to maintain and will look good on all occasions, especially when you want a casual look.

This hairstyle is perfect for women who desire something easy to style. It can be maintained with regular trims after 4 to 6 weeks of wear to avoid split ends. You can also direct your hair into position while applying the finishing products.


Visual Story

Short Face-Framing Hairstyle With Blue Highlights- Visual Story


Hairstyle Suitability Rating: ★★★★★
Hairstyle Popularity Rating: ★★★★★

Hairstyle Type

Category
Alternative
Length
Short
Elasticity
Straight
Hair Color
Dark Brunette with Blue Highlights

Haircut Technique

Type

Suitability

Gender
Women
Face Shape
round,oval,heart,triangular
Hair Density
Medium/Thick
Hair Texture
Fine/Medium

Age
Under 21, 21 - 30, 31 - 40, and 41 - 50
Height
Any
Weight
Thin/Average/Large

Forehead Height
Short/Average
Neck Length
Short/Average
Ears
Small/Average
Nose
Small/Average
Glasses
No

Styling

Time
30+ minutes
Tip
Direct your hair into position while applying the finishing products.
Products
straightening, wax, smoothing shine, lacquer
Tools
blow dry


Similar hairstyles you may be interested in...


step 1

Squeeze a small amount of straightening balm into your palms and then rub your hands together before smoothing the product evenly through damp hair.


step 2

Using the corner of your comb and standing in front of a mirror find the middle of your right eye and then drag the comb straight up slowly until you reach your hairline and then continue back in a straight manner to achieve an even right part. A side part is great for longer face shapes because it creates the illusion of width.


step 3

A medium radial brush is used on medium to long hair types to smooth out wavy or curly hair textures or to add body to straight hair. When selecting a radial brush, always use one with a pure bristle as this will not tear or damage the hair.


step 4

To blow-dry under, start at the nape/back and place your brush under the section of hair close to the nape. With the dryer held up over the hair, pull the brush from the roots and continue to the mid length's, keeping the blow-dryer following over the top. Once you reach the ends, curve them under. Repeat this step until the section is completely dry.


step 5

To blow-dry the sides, take out a small section of hair from the front and clip the rest of the hair away. Next, place the brush under the section and then pull the brush and hair forward around your face (this curving motion creates body). Place the hair-dryer on top of the brush until you reach the ends and then turn the ends under. Repeat until dry.


step 6

To blow-dry the crown/top sections, take a section of hair no bigger than the diameter of the brush and blow-dry the hair placing the brush under the section of hair. With your blow-dryer in front of the brush, follow the brush in an upwards direction at the roots and an outwards position at the ends for volume and softness. Continue until the section is dry.


step 7

When blow-drying your bangs forward, clip your hair back leaving only your bangs out. Position your bangs evenly in your brush, taking the hair in a forward direction. Blow-dry from roots to ends, keeping the tension consistent, and evenly distribute heat over the whole section of hair that you are working on. Repeat until the hair is dry. This will stop any frizz that may occur.


step 8

Pick up a small selection of hair from your mid section no bigger than your tail comb. Place your comb at the roots and then comb up and down until the hair is standing up by itself. Continue to the crown and finish at the sides. Repeat this step if you require more volume.


step 9

Apply some wax to your fingertips and then pull through the ends of your hair in a downward motion to achieve a sculptured look. Pinch clumps of hair in different directions for a messier result.


step 10

Using a small amount of wax, work it through the mid-lengths and ends in a downward, pinching motion. For added texture, apply more pinching and more wax.


step 11

Apply a small amount of wax to your fingertips, and then using your fingers, rake through your bangs pinching the ends as you go to create a feathered, textured effect.


step 12

Apply some hard wax to your fingertips and then rub it into your roots while lifting your strands for soft volume.


step 13

Apply a very small amount of smoothing shine to the palms of your hands and then run it through the mid-lengths and ends of your hair. Be careful not to add any to the roots or a large amount to any section of the hair as smoothing shine can be very heavy on the hair, weighing it down and making it appear oily.


step 14

Lacquer is great for strong hold. A small amount is all that is required to finish and should be applied from an arms length distance to the entire style.


Recommended Hairstyles...