Short Two-Tone Light Chocolate And Blonde Hairstyle With Tapered Back


Added: 10 Nov 2010
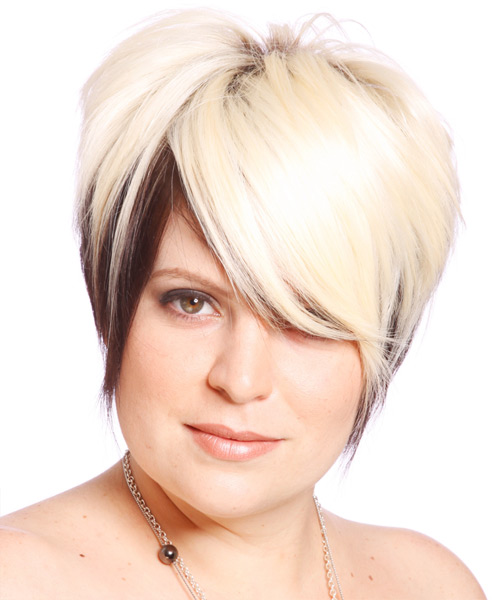
This is a short straight hairstyle that features a soft, light chocolate and blonde tone. This look is perfect for those with a round face shape and includes a full, slightly wavy fringe with long layers on top to add depth and texture. This hairstyle is a cute, natural hairstyle that works well for all ages.

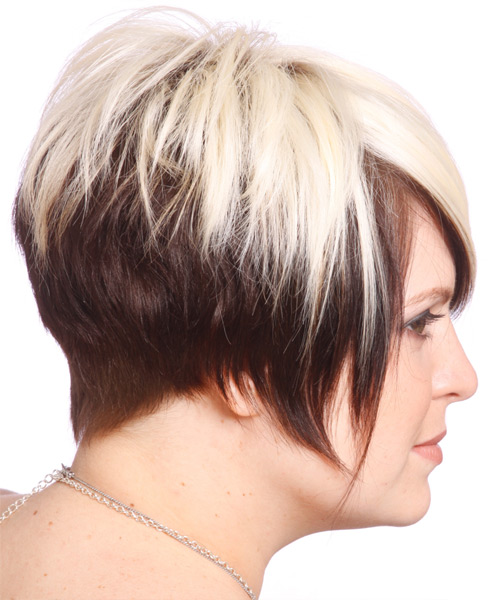
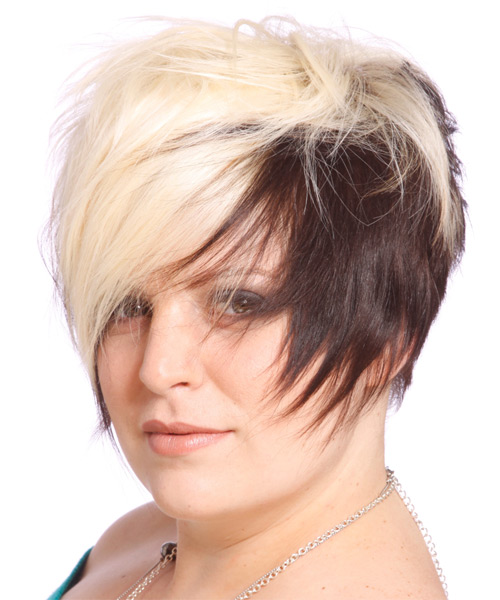
Our model is wearing a sea-green hue topless gown with an eye makeup look to perfectly flaunt this short straight hairstyle. The chocolate and blonde two-tone hairstyle is perfectly flattered by the sea-green hue of her gown. The back of this hairstyle is tapered short into the neck to contour the back of the head. The top layers are jagged cut to enhance the two-tone look which completed this hairstyle perfectly. It is a perfect choice for women with round, oval or heart-shaped faces. It's versatile enough to work on brunettes with medium-density hair or on those with fine and medium-dense hair types. This hairstyle is well suited for the spring and summer seasons. It is very versatile and can adapt to many occasions.

This short straight hairstyle is perfect for highlighting your best features and adding drama to your style. It suits fine hair and is a great way to showcase your beauty. It will keep you looking great from the front of your head to the back and showcase your features! This hairstyle is easy to maintain with regular trims after 4-6 weeks, depending on your hair texture. Fluff the styling products into the ends of your hair and pinch as you go to create textured edges.


Visual Story

Short Two-Tone Light Chocolate And Blonde Hairstyle With Tapered Back- Visual Story


Hairstyle Suitability Rating: ★★★★★
Hairstyle Popularity Rating: ★★★★★

Hairstyle Type

Category
Alternative
Length
Short
Elasticity
Straight
Hair Color
Light Chocolate Blonde

Haircut Technique

Type
Scissor Cut

Suitability

Gender
Women
Face Shape
round,oval,heart,diamond,triangular
Hair Density
Medium/Thick
Hair Texture
Fine/Medium

Age
Under 21, 21 - 30, 31 - 40, and 41 - 50
Height
Any
Weight
Thin/Average/Large

Forehead Height
Short/Average
Neck Length
Short/Average
Ears
Small/Average
Nose
Small/Average
Glasses
No

Styling

Time
30 minutes
Tip
Fluff the styling products into the ends of your hair and pinch as you go to create textured edges.
Products
mousse, moulding cream, hair spray
Tools
blow dry


Similar hairstyles you may be interested in...


step 1

Apply styling mousse to damp hair, using your palm as a measuring guide, and evenly distribute it along the hair shaft. Styling mousse will add hold and can help achieve better results.


step 2

A medium radial brush is used on medium to long hair types to smooth out wavy or curly hair textures or to add body to straight hair. When selecting a radial brush, always use one with a pure bristle as this will not tear or damage the hair.


step 3

Using your brush, blow-dry in small sections starting from the nape/back. Tilting your head forward, place the brush an inch below the roots to hold them taut and aim the dryer above the brush for a few seconds before continuing to the ends.


step 4

To blow-dry the sides, take out a small section of hair from the front and clip the rest of the hair away. Next, place the brush under the section and then pull the brush and hair forward around your face (this curving motion creates body). Place the hair-dryer on top of the brush until you reach the ends and then turn the ends under. Repeat until dry.


step 5

To blow-dry the crown/top sections, take a section of hair no bigger than the diameter of the brush and blow-dry the hair placing the brush under the section of hair. With your blow-dryer in front of the brush, follow the brush in an upwards direction at the roots and an outwards position at the ends for volume and softness. Continue until the section is dry.


step 6

To blow-dry your bangs to the side, clip the back and side sections up, leaving just your bangs out. Place your brush beneath your bangs, holding your hair to the side and remembering to hold the tension between your hair and brush. With your blow-dryer on a low setting, apply heat by starting at the roots and make sure to stretch your hair out to the ends. Repeat until your hair is dry.


step 7

Pick up a small selection of hair from your mid section no bigger than your tail comb. Place your comb at the roots and then comb up and down until the hair is standing up by itself. Continue to the crown and finish at the sides. Repeat this step if you require more volume.


step 8

Apply some moulding cream to your fingertips and then pull it through the ends of your hair in a downward motion to achieve a textured look.


step 9

Using a small amount of moulding cream, work it through the mid-lengths and ends in a downward motion. For added texture, pinch the ends as you go sparingly.


step 10

Apply moulding cream to your fingertips then gently rake through your bangs, sweeping the hair to the left as you go. Be careful not to use too much product as it can become sticky and clumpy.


step 11

Apply moulding cream to your fingertips and then pinch small clumps of hair in an up and forward motion. Pinch the clumps in different directions for a messier look.


step 12

To finish, apply a minimal amount of hairspray from an arms length distance to the top, sides and back. Take care not to use too much or you will end up with a white, flaky residue which looks like dandruff.


Recommended Hairstyles...