Added:
10 Nov 2010
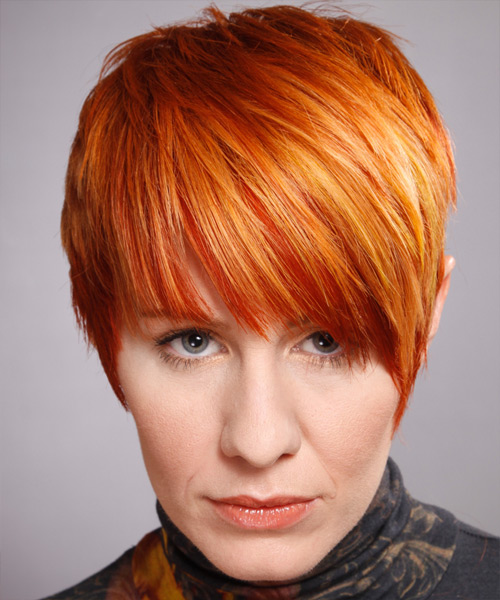
Looking for a new look? This short straight hairstyle is a great way to add some height and definition to your hair. It is all about texture and movement, and you can play with layers in your hair to create the look you desire, or add layers at the top for an elongated look.
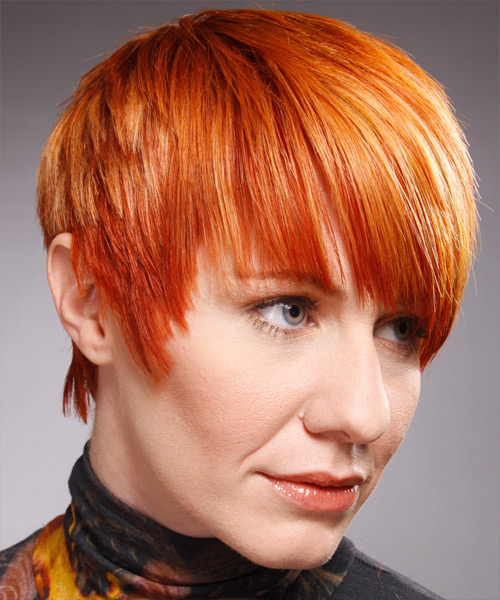
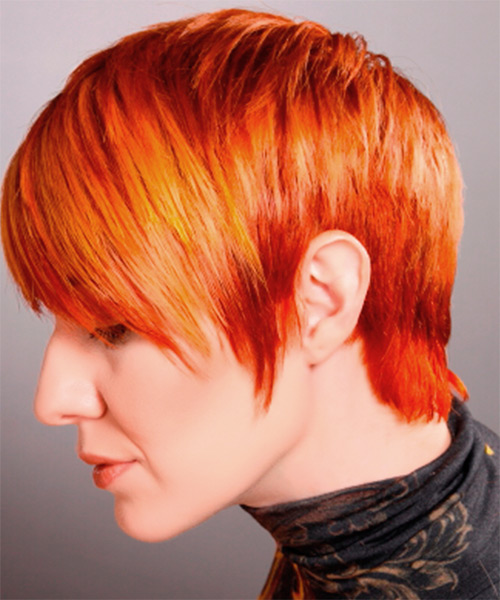
Our alluring model is perfectly flaunting this short hairstyle with bright copper highlights. This cut has been carefully layered and texturized for a finished appearance that looks natural and effortless on her. For the hair styling, this dynamic hairstyle is tapered into the neck through the back blending into the jagged cut layers through the sides and top. To complete this 'do, bright copper highlights were added to the top and sides for a fiery finish. This hairstyle suits people with oval, oblong, square, and diamond face shapes. The hair density is thin to medium and the hair texture is fine to medium. The quick cutting allows for the most natural looking style, with definition on the sides because of the short length of hair. This is a simple, elegant hairstyle that can be worn by every woman.
Achieve a bold look with this elegant hairstyle. Regular trims are recommended to keep your stylist's work in check, but you can maintain this glamorous style without losing a single inch of hair length. After 4 to 6 weeks, your stylist will be able to trim as little or as much as desired for you. Direct your hair into position while applying the finishing products.
Short Copper Hairstyle With Bright Highlights
Images © MediaPunch/TheHairStyler.com
Images © MediaPunch/TheHairStyler.com
Images © MediaPunch/TheHairStyler.com
Hairstyle Suitability Rating:
Hairstyle Popularity Rating: ★★★★★
Hairstyle Popularity Rating: ★★★★★
Hairstyle Type
Category
Alternative
Length
Short
Elasticity
Straight
Haircut Technique
Type
Suitability
Gender
Women
Face Shape
oval,oblong,square,diamond
Hair Density
Thin/Medium
Hair Texture
Fine/Medium
Age
Under 21, 21 - 30, 31 - 40, and 41 - 50
Height
Any
Weight
Thin/Average
Forehead Height
Short/Average
Neck Length
Short/Average
Ears
Small/Average
Nose
Small/Average
Glasses
No
Styling
Time
20 minutes
Tip
Direct your hair into position while applying the finishing products.
Products
straightening, moulding cream, smoothing shine, hair spray
Tools
finger dry

