Added:
30 Jul 2018
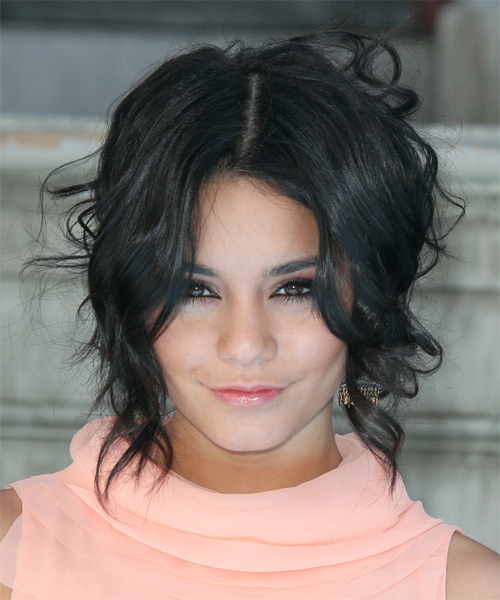
Here, Vanessa Hudgens demonstrates how to work this trend, even on a fancy night out. Her disheveled ‘do looks just as good on the red carpet as it does with a pair of jeans and a t-shirt, so whether you want to go casual or classy, this is definitely one style to try out.
A combination of medium to long layers are jagged cut all through back and sides of this dark hairdo to enhance the body and movement of the textured waves added for shape and and style. This look is easy to maintain with regular trims and needs product for hold and shine. Here’s how to get it:
For this hairstyle you will need wavy locks. For a more formal event, use a curling iron or wand to create gorgeous spirals like Vanessa. For a more casual look, let your natural waves shine though, or use hair rollers to add soft waves if your hair is naturally straight.
2. Create a centre hair part from the forehead to the crown, leaving a few layers out to frame your face.
3. Take the rest of the hair and roll it into a bun or French roll at the back of the head. Secure it with hair pins that are the same color as your hair so they blend in nicely.
4. To get that elegantly disheveled look, take a pick or the end of a comb and tug on small sections of hair at the roots to create looseness. This will also make the hair “bubble†out and look much more voluminous, rather than being tightly pulled back.
5. Finish it off with soft feminine makeup and a great set of earrings!
Vanessa Hudgens Short Wavy Black Hairstyle
Images © MediaPunch/TheHairStyler.com
Hairstyle Suitability Rating:
Hairstyle Popularity Rating: ★★★★★
Hairstyle Popularity Rating: ★★★★★
Hairstyle Type
Category
Casual
Length
Short
Elasticity
Wavy
Hair Color
Black
Haircut Technique
Type
Scissor Cut
Suitability
Gender
Women
Face Shape
round,oval,heart,triangular
Hair Density
Thin/Medium
Hair Texture
Fine/Medium
Age
Under 21, 21 - 30, 31 - 40, and 41 - 50
Height
Any
Weight
Thin/Average/Large
Forehead Height
Short/Average
Neck Length
Short/Average
Ears
Small/Average
Nose
Small/Average
Glasses
No
Styling
Time
20 minutes
Tip
Twist your ends up and out with the product to create this textured look.
Products
mousse, wax, hair spray
Tools
finger dry, curling iron

