Half Up Half Down Hairstyle With Body And Bounce


Added: 10 Nov 2010
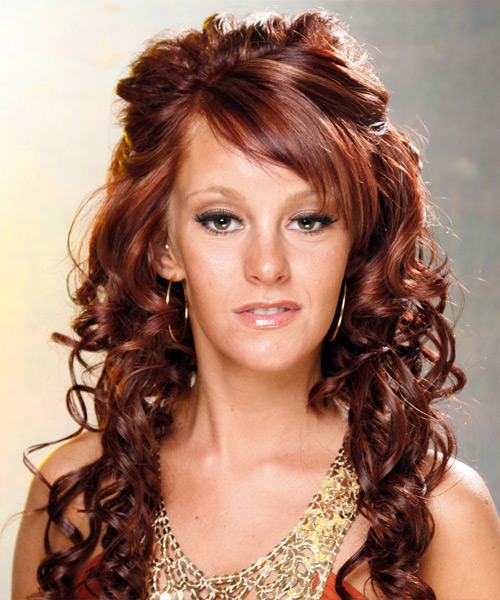
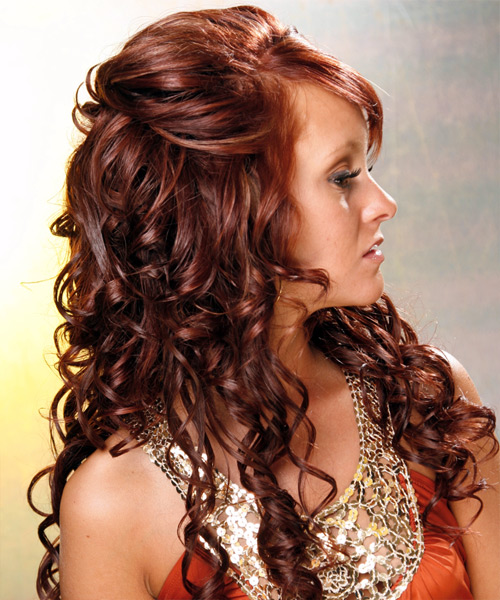
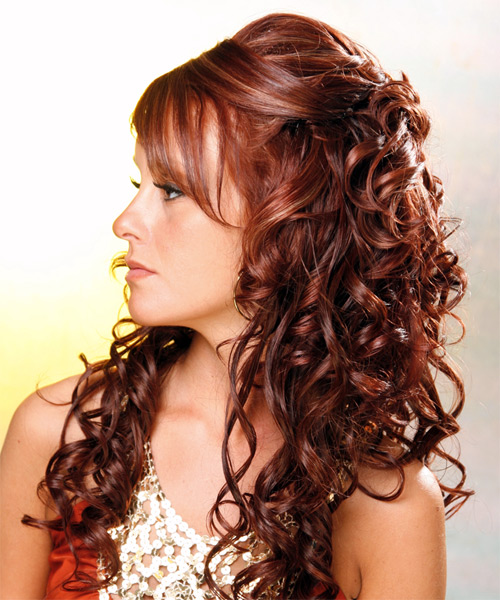
This hairstyle is on fire, and we love everything about it! From the curls to the deep red hair color, this is an overall look you have got to try at least once! This hairstyle is ideal for formal events such as a wedding or an important event but one thing is for sure, it may take some time to get your curls in all the right places. This Half Up Half Down hairstyle definitely has flair and attitude thanks to the body and bounce created by plenty of layers cut through the back and sides. The crown area is teased and tousled for height and control, and the ravishing color finishes this look off ideally. The bangs are good for those who have a bigger forehead as it helps to hide the height and soften the edges of your forehead and cheekbone area. This style is ideal for those with oval, oblong, square, and diamond face shapes because the hair falls and frames your face. A thin to medium hair texture will suit this updo the most because of the way in which the hair is styled up. Just keep in mind that if your hair is too thick, this style will not hold.

This hairdo complements practically any makeup look and is incredibly adaptable. The waves give the face a beautiful shape. Try creating a natural smokey eye with light and warm browns for a more understated appearance. Finish the look with a pink lips and a hint of highlighter. Use a dramatic graphic liner with a glitter lid for a bolder appearance. To complete this daring appearance, don't forget to have a strong contour and a striking lip.


Visual Story

Half Up Half Down Hairstyle With Body And Bounce- Visual Story


Hairstyle Suitability Rating: ★★★★★
Hairstyle Popularity Rating: ★★★★★

Hairstyle Type

Category
Formal
Length
Half Up Long
Elasticity
Curly
Hair Color
Mahogany Red

Haircut Technique

Type

Suitability

Gender
Women
Face Shape
oval,oblong,square,diamond
Hair Density
Medium/Thick
Hair Texture
Fine/Medium

Age
Under 21, 21 - 30, 31 - 40, and 41 - 50
Height
Any
Weight
Thin/Average

Forehead Height
Short/Average
Neck Length
Short/Average
Ears
Small/Average
Nose
Small/Average
Glasses
Yes

Styling

Time
30+ minutes
Tip
Use the curling iron on the very ends of your hair to add extra curl where needed.
Products
mousse, wax, smoothing shine, lacquer
Tools
blow dry, hot rollers


Similar hairstyles you may be interested in...


step 1

Apply styling mousse to damp hair, using your palm as a measuring guide, and evenly distribute it along the hair shaft. Styling mousse will add hold and can help achieve better results.


step 2

A large radial brush is usually used on long straight hair types or to smooth out wavy or curly hair textures. When selecting a radial brush, always use one with a pure bristle as this will not tear or damage the hair.


step 3

Using your brush, blow-dry in small sections starting from the nape/back. Tilting your head forward, place the brush an inch below the roots to hold them taut and aim the dryer above the brush for a few seconds before continuing to the ends.


step 4

To blow-dry the sides, take out a small section of hair from the front and clip the rest of the hair away. Next, place the brush under the section and then pull the brush and hair forward around your face (this curving motion creates body). Place the hair-dryer on top of the brush until you reach the ends and then turn the ends under. Repeat until dry.


step 5

To blow-dry the crown/top sections, take a section of hair no bigger than the diameter of the brush and blow-dry the hair placing the brush under the section of hair. With your blow-dryer in front of the brush, follow the brush in an upwards direction at the roots and an outwards position at the ends for volume and softness. Continue until the section is dry.


step 6

To blow-dry your bangs to the side, clip the back and side sections up, leaving just your bangs out. Place your brush beneath your bangs, holding your hair to the side and remembering to hold the tension between your hair and brush. With your blow-dryer on a low setting, apply heat by starting at the roots and make sure to stretch your hair out to the ends. Repeat until your hair is dry.


step 7

A medium hot roller is used to give your hair looser curls and can also be used for body.


step 8

Take the entire back section of your hair, and then starting from the crown, take a smaller section of hair no wider than the diameter of the hot roller and comb it through to ensure there are no knots. Place the roller at the ends of the section of hair, being sure to smooth the ends under, and then twist the roller down the hair shaft until it meets your head and then secure it in place with a pin or clip. Repeat this step until you have reached the nape of your neck and the entire back section of your hair is completed. Keep the rollers in your hair until they cool.


step 9

Take a section of hair no wider than the diameter of the hot roller and comb it through to ensure there are no knots. Place the roller at the ends of the section of hair, being sure to smooth the ends under, and then twist the roller down the hair shaft towards the roots and secure it with a pin or clip. Continue applying the rollers through your front section down to your ears. Keep the rollers in your hair until they cool.


step 10

Pick up a small selection of hair from your mid section no bigger than your tail comb. Place your comb at the roots and then comb up and down until the hair is standing up by itself. Continue to the crown and finish at the sides. Repeat this step if you require more volume.


step 11

Apply a small amount of wax to your fingertips and then lightly piece and pinch the ends of your hair.


step 12

Apply wax to your fingertips then drag through your bangs, sweeping the hair to the left as you go. Pinching the ends will create soft texture.


step 13

Apply some hard wax to your fingertips and then rub it into your roots while lifting your strands for soft volume.


step 14

Once your hairstyle is complete, hold your hair into place and then pin your hair into your desired direction.


step 15

Apply a very small amount of smoothing shine to the palms of your hands and then run it through the mid-lengths and ends of your hair. Be careful not to add any to the roots or a large amount to any section of the hair as smoothing shine can be very heavy on the hair, weighing it down and making it appear oily.


step 16

Lacquer is great for strong hold. A small amount is all that is required to finish and should be applied from an arms length distance to the entire style.


Recommended Hairstyles...