Short And Sleek Mocha Hairstyle With Messy Top


Added: 10 Nov 2010
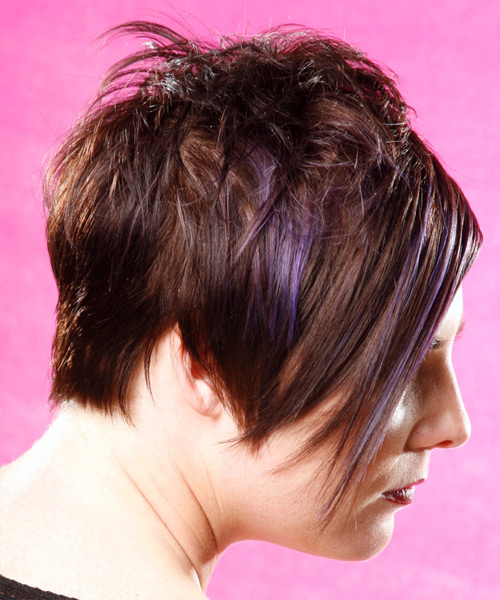
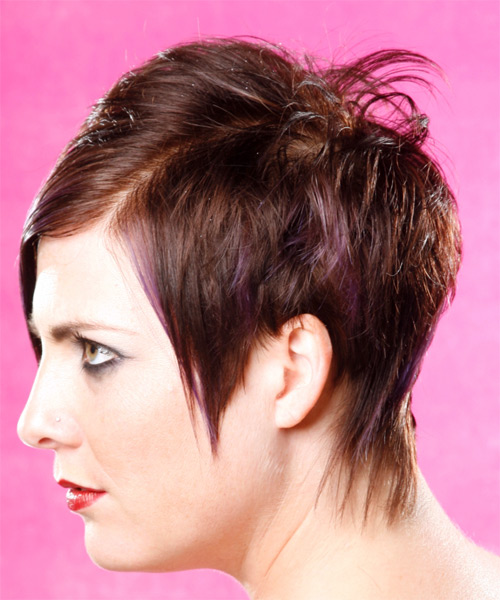
Step up your style with a short, straight hairstyle in a mocha color. With just the right waves and layers, this style is perfect for showing off your natural texture and color. This look is easy to style and maintain, making it an excellent choice for women on the go! Our model in this short hairstyle is gorgeous. Her bold lips, hazel eyes and boosted confidence give us some trendy fashion vibes. Her charm makes this mocha hairdo look even better. It is a fantastic hairstyle with plenty of layers to create height and definition. For the hair styling technique, the short layers through the crown give this style a unique look, blending into the smooth front layers, which makes this look stand out in the crowd. This short mocha 'do is a unique hairstyle that is trendy and for those who want to be noticed. It suits women with oval, oblong, square, diamond or triangular faces, thin to medium hair density and fine to medium hair textures. The hair is cut short and styled elegantly, making it ideal for those who desire to look professional and in fashion.

This mocha hairstyle is a chic look that requires minimal styling. It is easy to manage and looks great. Maintain this style with regular trims every 4 to 6 weeks. You can easily direct your hair into position while applying the finishing products.


Visual Story

Short And Sleek Mocha Hairstyle With Messy Top- Visual Story


Hairstyle Suitability Rating: ★★★★★
Hairstyle Popularity Rating: ★★★★★

Hairstyle Type

Category
Alternative
Length
Short
Elasticity
Straight
Hair Color
Mocha

Haircut Technique

Type
Razor Cut

Suitability

Gender
Women
Face Shape
oval,oblong,square,diamond,triangular
Hair Density
Thin/Medium
Hair Texture
Fine/Medium

Age
Under 21, 21 - 30, 31 - 40, and 41 - 50
Height
Any
Weight
Thin/Average/Large

Forehead Height
Short/Average
Neck Length
Short/Average
Ears
Small/Average
Nose
Small/Average
Glasses
No

Styling

Time
30+ minutes
Tip
Direct your hair into position while applying the finishing products.
Products
straightening, wax, lacquer
Tools
blow dry


Similar hairstyles you may be interested in...


step 1

Squeeze a small amount of straightening balm into your palms and then rub your hands together before smoothing the product evenly through damp hair.


step 2

Using the corner of your comb and standing in front of a mirror find the middle of your left eye and then drag the comb straight up slowly until you reach your hairline and then continue back in a straight manner to achieve an even left part. A side part is great for longer face shapes because it creates the illusion of width.


step 3

A medium radial brush is used on medium to long hair types to smooth out wavy or curly hair textures or to add body to straight hair. When selecting a radial brush, always use one with a pure bristle as this will not tear or damage the hair.


step 4

Using your brush, blow-dry in small sections starting from the nape/back. Tilting your head forward, place the brush an inch below the roots to hold them taut and aim the dryer above the brush for a few seconds before continuing to the ends.


step 5

Using your brush, blow-dry in small sections starting from the sides. Tilting your head forward, place the brush an inch below the roots to hold them taut and aim the dryer above the brush for a few seconds before continuing to the ends. Repeat this step on a new section directly above the dry one.


step 6

Take a section of your hair no wider than the diameter of your brush. Place your brush under and at the roots of your section. Then with your blow-dryer above, drag the brush up through the mid-lengths and ends of the hair following with your blow-dryer and pulling the hair to the right. Repeat until your hair is completely dry.


step 7

To blow-dry the crown/top sections, take a section of hair no bigger than the diameter of the brush and blow-dry the hair placing the brush under the section of hair. With your blow-dryer in front of the brush, follow the brush in an upwards direction at the roots and an outwards position at the ends for volume and softness. Continue until the section is dry.


step 8

Pick up a small selection of hair from your mid section no bigger than your tail comb. Place your comb at the roots and then comb up and down until the hair is standing up by itself. Continue to the crown and finish at the sides. Repeat this step if you require more volume.


step 9

Apply some wax to your fingertips and then pull through the ends of your hair in a downward motion to achieve a sculptured look. Pinch clumps of hair in different directions for a messier result.


step 10

Using a small amount of wax, work it through the mid-lengths and ends in a downward, pinching motion. For added texture, apply more pinching and more wax.


step 11

Apply some hard wax to your fingertips and then rub it into your roots while lifting your strands for soft volume.


step 12

Lacquer is great for strong hold. A small amount is all that is required to finish and should be applied from an arms length distance to the entire style.


Recommended Hairstyles...