Short Face Framing Seventies Shag Hairstyle


Added: 21 May 2017
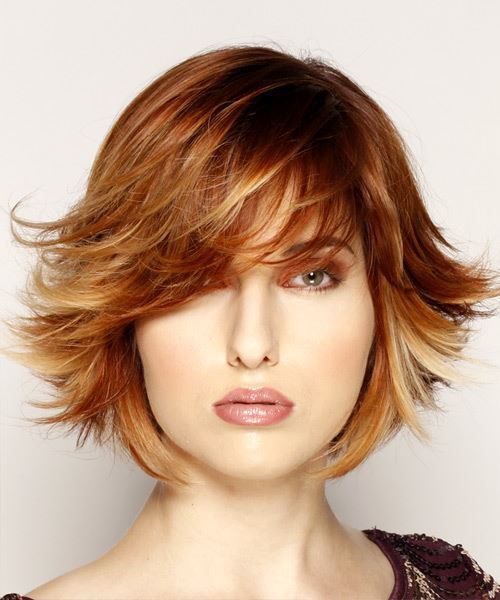
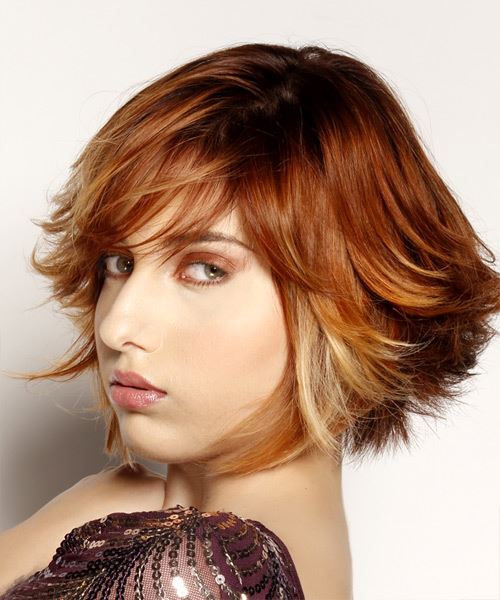
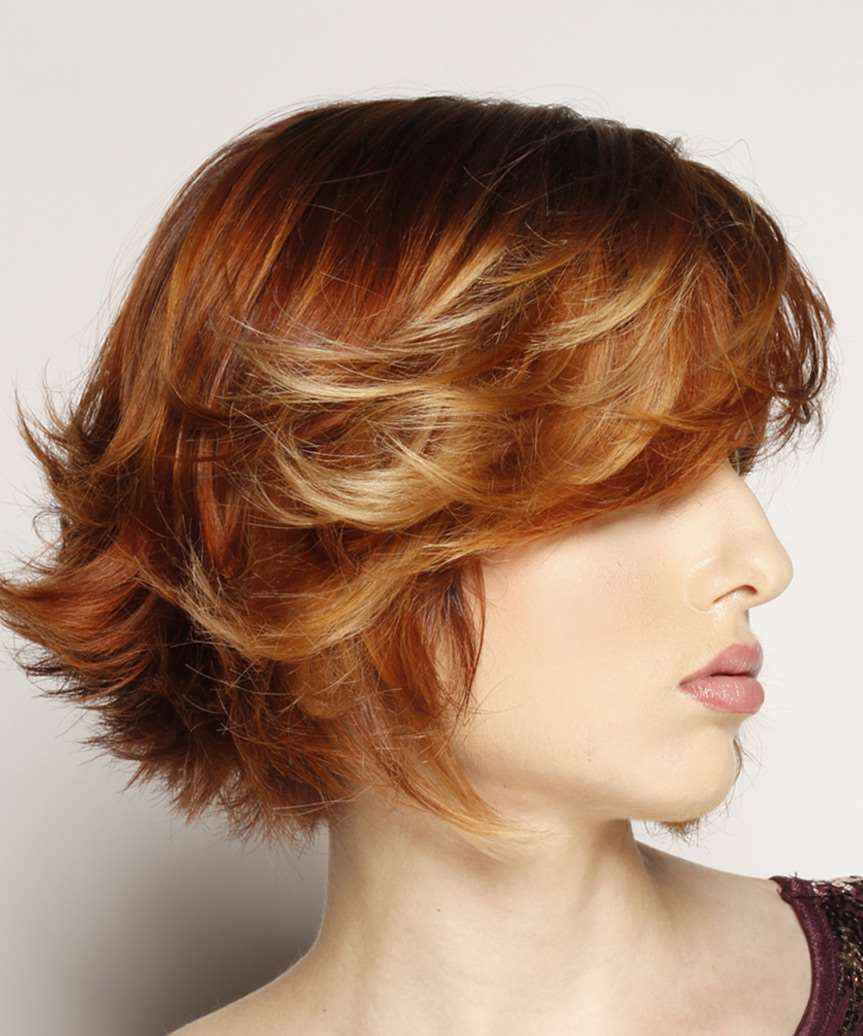
Layers cut all over this short chic Shaggy 'do makes it easy to blow-wave into the shape by smoothing down the top while adding body to the roots and flicking the ends. The swept bangs across the forehead help soften her face and complete the hairstyle brilliantly. Product is needed to tame fly-away hair.

Our model is looking chic with a face framing Shag hairstyle and a side swept fringe. She has an enviable oval shaped face which allows her to try different looks with ease. Her naturally fine hair has been blow dried into place here with a soft flick at the ends for a soft finish. Our model has a high forehead so she needs to be careful of wearing too much height at the top of her head or exposing too much forehead. Here she wisely chooses layered side-swept bangs that not only highlight her green eyes but also camouflages her high forehead. The finished look is chic and polished with a bit of a Seventies feel to it.

Our model has a fair complexion and bright green eyes. She is wearing her hair in a medium copper shade with light blonde tips. The bold highlights enhance her copper locks and also provides a vibrant contrast of color. Overall this hair color complements her eyes well and adds a glow to her skin tone.


Visual Story

Short Face Framing Seventies Shag Hairstyle- Visual Story


Hairstyle Suitability Rating: ★★★★★
Hairstyle Popularity Rating: ★★★★★

Hairstyle Type

Category
Formal
Length
Short
Elasticity
Straight
Hair Color
Red and Light Blonde Highlights

Haircut Technique

Type
Scissor Cut

Suitability

Gender
Women
Face Shape
oval,oblong,heart,diamond,triangular
Hair Density
Medium
Hair Texture
Fine

Age
21 - 30, 31 - 40, 41 - 50, 51 - 60, and Over 60
Height
Any
Weight
Thin/Average/Large

Forehead Height
Long
Glasses
Yes

Styling

Time
20 minutes
Tip
Use gel spray at the roots to lift fine hair before styling.
Products
mousse, wax, hair spray
Tools
blow dry


Similar hairstyles you may be interested in...


step 1

Apply styling mousse to damp hair, using your palm as a measuring guide, and evenly distribute it along the hair shaft. Styling mousse will add hold and can help achieve better results.


step 2

Using the corner of your comb and standing in front of a mirror find the middle of your left eye and then drag the comb straight up slowly until you reach your hairline and then continue back in a straight manner to achieve an even left part. A side part is great for longer face shapes because it creates the illusion of width.


step 3

A medium radial brush is used on medium to long hair types to smooth out wavy or curly hair textures or to add body to straight hair. When selecting a radial brush, always use one with a pure bristle as this will not tear or damage the hair.


step 4

Starting at the nape/back of the hair, place your brush on top of the section and blow-dryer down starting from the roots and using tension as you go. Next, place the blow-dryer underneath the hair and continue to blow-dry the ends out. Make sure to follow the brush with the blow-dryer in an outwards direction. If you like fuller flicks, hold the ends out and roll them up into the brush and apply the heat for longer.


step 5

To blow-dry the sides, take out your first sections from the front and clip the rest of the hair up. Place your brush on top of the section, and starting from the roots, blow-dry down using tension as you go. Next, place the blow-dryer underneath the hair and continue to blow-dry the ends out. Continue this step until the hair is dry.


step 6

To blow-dry the crown/top sections, take a section of hair no bigger than the diameter of the brush and blow-dry the hair placing the brush under the section of hair. With your blow-dryer in front of the brush, follow the brush in an upwards direction at the roots and an outwards position at the ends for volume and softness. Continue until the section is dry.


step 7

Take a section of your hair from your ear to your temple that is the same diameter as the brush. Place your brush on top of the hair starting at the roots and pull the hair slowly in a backward direction with your blow-dryer following in front. Be sure the section is dry and then repeat the step on a new section of hair directly behind.


step 8

Take a section of your hair from your ear to your temple that is the same diameter as the brush. Place your brush on top of the hair starting at the roots and pull the hair slowly in an outwards direction with your blow-dryer following in front. Repeat this step and then once the roots are dry, drag the brush to the mid-lengths and then slowly turn the brush in an inwards direction, flicking it through the ends.


step 9

To finish the look, apply wax to your fingertips, making sure to smooth the wax over all of your fingers, then simply pinch the wax onto the ends of your hair, applying as much or as little as needed.


step 10

Apply a small amount of wax to your fingers, then starting at your roots, apply the wax as you drag your hair in an upwards, to the right, motion.


step 11

To finish, apply a minimal amount of hairspray from an arms length distance to the top, sides and back. Take care not to use too much or you will end up with a white, flaky residue which looks like dandruff.


Recommended Hairstyles...