Short Light Blonde Hairstyle With Textured Layers And Long Bangs


Added: 10 Nov 2010
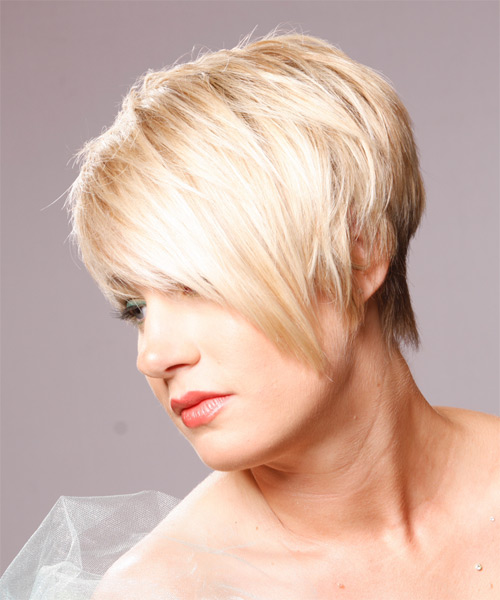
Short hair can be a major style game-changer for the summer. What better way to add some interest to your look than with this short hairstyle? This neat and contemporary short 'do is easy to style and maintain. Perfect for the modern woman who likes a clean, sleek silhouette with layers on top, this style can be worn straight and with hair volume at the crown and back.

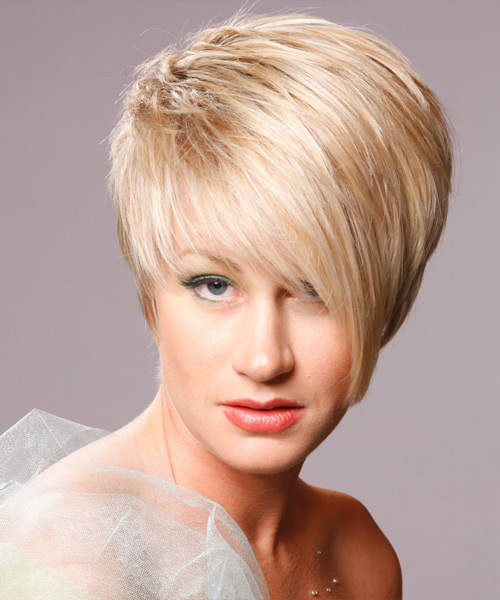
Our chic model is drawing attention with this elegant short hairstyle that has an asymmetrical appearance. With minimalistic makeup, she is bringing funky vibes into the equation! The brilliant shape of this hairstyle is thanks to the textured layers cut throughout the sides, back and top. The front layers are carefully cut to create an asymmetric look which makes this look perfect for the bold and brave. This hairstyle is suitable for thin to medium hair density, and oval, oblong, square and diamond face shapes. This is a very versatile hairstyle that can be worn by most women, can be easily maintained, and it looks elegant and trendy. If you want to achieve an effortless but stylish hairstyle that flatters your face shape and hair texture, then this short hairstyle is for you!

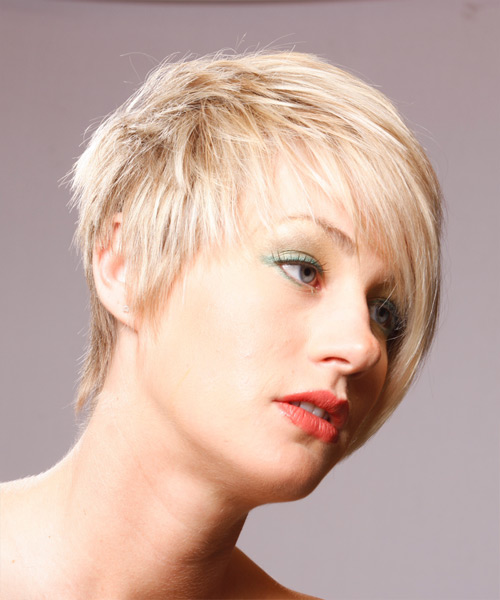
This hairstyle is a great way to showcase your natural hair. It is been swept back at the front and fades out at the back. You can maintain this elegant hairstyle with regular trims after 4 to 6 weeks depending on your hair condition and its growth cycle. Use your fingers to pinch the styling products through to create a textured finish.


Visual Story

Short Light Blonde Hairstyle With Textured Layers And Long Bangs- Visual Story


Hairstyle Suitability Rating: ★★★★★
Hairstyle Popularity Rating: ★★★★★

Hairstyle Type

Category
Formal
Length
Short
Elasticity
Straight
Hair Color
Light Blonde

Haircut Technique

Type

Suitability

Gender
Women
Face Shape
oval,oblong,square,diamond
Hair Density
Thin/Medium
Hair Texture
Fine/Medium

Age
21 - 30, 31 - 40, and 41 - 50
Height
Any
Weight
Thin/Average

Forehead Height
Short/Average
Neck Length
Short/Average
Ears
Small/Average
Nose
Small/Average
Glasses
No

Styling

Time
20 minutes
Tip
Use your fingers to pinch the styling products through to create a textured finish.
Products
mousse, wax
Tools
blow dry


Similar hairstyles you may be interested in...


step 1

Apply styling mousse to damp hair, using your palm as a measuring guide, and evenly distribute it along the hair shaft. Styling mousse will add hold and can help achieve better results.


step 2

A medium radial brush is used on medium to long hair types to smooth out wavy or curly hair textures or to add body to straight hair. When selecting a radial brush, always use one with a pure bristle as this will not tear or damage the hair.


step 3

Using your brush, blow-dry in small sections starting from the nape/back. Tilting your head forward, place the brush an inch below the roots to hold them taut and aim the dryer above the brush for a few seconds before continuing to the ends.


step 4

Using your brush, blow-dry in small sections starting from the sides. Tilting your head forward, place the brush an inch below the roots to hold them taut and aim the dryer above the brush for a few seconds before continuing to the ends. Repeat this step on a new section directly above the dry one.


step 5

Take a section of your hair no wider than the diameter of your brush. Place your brush under and at the roots of your section. Then with your blow-dryer above, drag the brush up through the mid-lengths and ends of the hair following with your blow-dryer and pulling the hair to the left. Repeat until your hair is completely dry.


step 6

Take a section of your hair from your ear to your temple the same diameter as the brush. Place your brush underneath the hair starting at the roots and pull the hair slowly in a forward and downward direction with your blow-dryer above. Be sure the section is dry and then repeat the step on a new section of hair directly above.


step 7

Take a section of your hair from your ear to your temple that is the same diameter as the brush. Place your brush underneath the hair starting at the roots and pull the hair slowly in a forward and downward direction with your blow-dryer above. Be sure the section is dry and then repeat the step on a new section of hair directly above.


step 8

To blow-dry your bangs to the side, clip the back and side sections up, leaving just your bangs out. Place your brush beneath your bangs, holding your hair to the side and remembering to hold the tension between your hair and brush. With your blow-dryer on a low setting, apply heat by starting at the roots and make sure to stretch your hair out to the ends. Repeat until your hair is dry.


step 9

Apply some wax to your fingertips and then pull through the ends of your hair in a downward motion to achieve a sculptured look. Pinch clumps of hair in different directions for a messier result.


step 10

Apply wax to your fingertips and then grip the left section of your hair from the mid-lengths and drag it in a forward and down direction for a wispy and textured result.


step 11

Apply wax to your fingertips and then grip the right section of your hair from the mid-lengths and drag it in a forward and down direction for a wispy and textured result.


step 12

Apply wax to the palms of your hands, and then starting at the top-back area, drag your hands forward, flattening your hair down as you go. For a wetter look use more wax.


step 13

Apply wax to your fingertips then drag through your bangs, sweeping the hair to the left as you go. Pinching the ends will create soft texture.


Recommended Hairstyles...