Deep Side Parted Sixties Look


Added: 30 Aug 2017
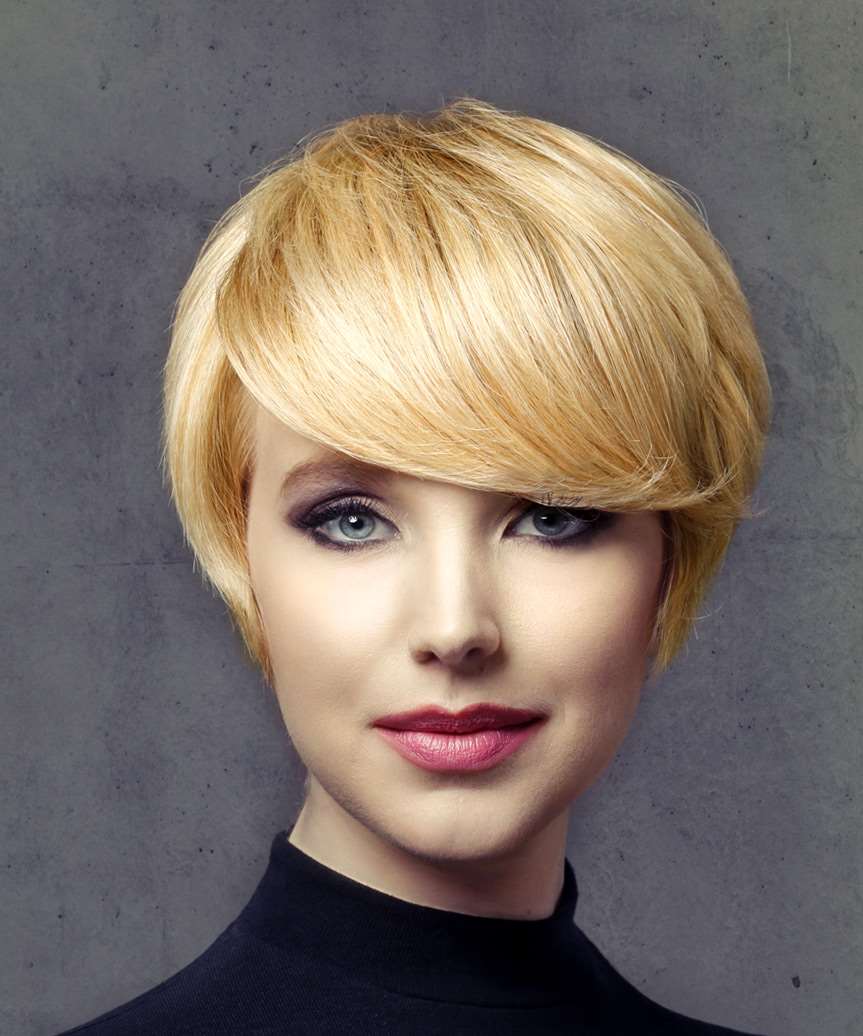
This chic 'do is cut shorter through the sides while the top is smoothed over to one side allowing the front to fall across the forehead to soften the over-all look. This versatile hairstyle needs product for shine and hold and works best on ladies with medium to thick hair that is straight or has some wave to it.

Our model is flaunting a side swept ‘do with a deep side part that creates a sexy peek-a-boo look that has Sixties feel to it. She has a strong bone structure and an oval face shape which means that she can pull off pretty much any hairstyle, especially short ones. This sculpted ‘do gives her tresses extra style and volume throughout and makes the most of her thick locks. The heavy fringe area provides our model with some forehead coverage while creating a sexy Sixties-inspired finish. The bouffant effect at the crown and the flicked ends are a great way to style up this short 'do and give it some extra pizzazz.

Our model has a fair warm complexion and blue eyes. This makes her best suited to caramel and gold hair colors. Here, she is flaunting a light golden blonde shade that brings out her blue eyes nicely. Subtle copper lowlights add dimension and warmth. It also warms up her skin tone to give her a sun-kissed glow. Her hair has an overall healthy and glossy looking finish with this vibrant shade of blonde and it suits the Sixties style of her cut nicely. This color is ideal for ladies who are fair with golden undertones in their skin tone and/or eye color.

Hairstyle Suitability Rating: ★★★★★
Hairstyle Popularity Rating: ★★★★★

Hairstyle Type

Category
Formal
Length
Short
Elasticity
Straight
Hair Color
Light Golden Blonde

Haircut Technique

Type
Scissor Cut

Suitability

Gender
Women
Face Shape
oval,oblong,square,diamond,triangular
Hair Density
Thick
Hair Texture
Medium

Age
21 - 30, 31 - 40, 41 - 50, 51 - 60, and Over 60
Height
Any
Weight
Thin/Average/Large

Forehead Height
Short/Average
Glasses
Yes

Styling

Time
20 minutes
Tip
Apply mousse to towel-dried hair before styling to sculpt this 'do into place.
Products
gel spray, moulding cream, hair spray
Tools
blow dry


Similar hairstyles you may be interested in...


step 1

Hold the gel spray no closer than 3 inches from your hair and then evenly mist the gel spray into the roots to create a stronger hold style. Gel spray will hold well and will not look wet or weigh the hair down. Using your gel spray in this fashion will create added hold and a longer lasting style.


step 2

Using the corner of your comb and standing in front of a mirror find the middle of your right eye and then drag the comb straight up slowly until you reach your hairline and then continue back in a straight manner to achieve an even right part. A side part is great for longer face shapes because it creates the illusion of width.


step 3

A small radial brush is used on shorter hair types to add more body or in longer hair types to create curl. When selecting a radial brush, always use one with a pure bristle as this will not tear or damage the hair.


step 4

To blow-dry under, start at the nape/back and place your brush under the section of hair close to the nape. With the dryer held up over the hair, pull the brush from the roots and continue to the mid length's, keeping the blow-dryer following over the top. Once you reach the ends, curve them under. Repeat this step until the section is completely dry.


step 5

To blow-dry the sides, take out a small section of hair from the front and clip the rest of the hair away. Next, place the brush under the section and then pull the brush and hair forward around your face (this curving motion creates body). Place the hair-dryer on top of the brush until you reach the ends and then turn the ends under. Repeat until dry.


step 6

To blow-dry the crown/top sections, take a section of hair no bigger than the diameter of the brush and blow-dry the hair placing the brush under the section of hair. With your blow-dryer in front of the brush, follow the brush in an upwards direction at the roots and an outwards position at the ends for volume and softness. Continue until the section is dry.


step 7

To blow-dry your bangs to the side, clip the back and side sections up, leaving just your bangs out. Place your brush beneath your bangs, holding your hair to the side and remembering to hold the tension between your hair and brush. With your blow-dryer on a low setting, apply heat by starting at the roots and make sure to stretch your hair out to the ends. Repeat until your hair is dry.


step 8

Take a section of your hair from your ear to your temple that is the same diameter as the brush. Place your brush on top of the hair starting at the roots and pull the hair slowly in an outwards direction with your blow-dryer following in front. Repeat this step and then once the roots are dry, drag the brush to the mid-lengths and then slowly turn the brush in an inwards direction, flicking it through the ends.


step 9

Pick up a small selection of hair from your mid section no bigger than your tail comb. Place your comb at the roots and then comb up and down until the hair is standing up by itself. Continue to the crown and finish at the sides. Repeat this step if you require more volume.


step 10

Apply some moulding cream to your fingertips and then rub it into your roots while lifting your strands for added body. Be sure not to use too much moulding cream at the roots as this can result in a glugy and thick uncomfortable feel.


step 11

Using a small amount of moulding cream, work it through the mid-lengths and ends in a downward motion. For added texture, pinch the ends as you go sparingly.


step 12

Apply moulding cream to your fingertips then gently rake through your bangs, sweeping the hair to the left as you go. Be careful not to use too much product as it can become sticky and clumpy.


step 13

To finish, apply a minimal amount of hairspray from an arms length distance to the top, sides and back. Take care not to use too much or you will end up with a white, flaky residue which looks like dandruff.


Recommended Hairstyles...