Michelle Williams Light Platinum Blonde Pixie Haircut


Added: 05 Feb 2017
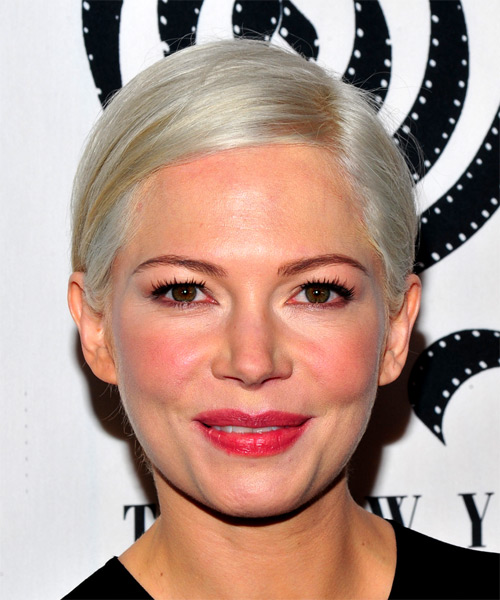
The back and sides of this hairstyle is tapered into the head with subtle layers through the top styled over to the side for a chic look and feel. The bangs are combed to the side to soften the face and completes the over-all 'do brilliantly. Product is needed to keep this hairstyle is in place.

Michelle Williams looks chic and stylish here in a sleek short hairstyle. Michelle suits short hair well, due to her round face shape and high cheekbones. She also looks best in styles with grown out bangs thanks to her short forehead. The tapered sides and back in this cut show off her face nicely, while the sleek finish brings the focus up to her eyes. This ‘do works well with her hair type, which is fine and straight and looks best in cuts that are styled with precision.

As for her color, Michelle has a fair, cool complexion, dark eyes and naturally dark blonde hair. Here she lightens up her locks immensely by going to a platinum, almost silver-blonde tone that looks fabulous with her complexion. This color adds extra style to her simple 'do and is guaranteed to turn heads wherever she goes.

Hairstyle Suitability Rating: ★★★★★
Hairstyle Popularity Rating: ★★★★★

Hairstyle Type

Category
Formal
Length
Short
Elasticity
Straight
Hair Color
Light Platinum Blonde

Haircut Technique

Type
Clipper Cut

Suitability

Gender
Women
Face Shape
round,oval,oblong,square,heart,diamond
Hair Density
Medium
Hair Texture
Fine

Age
Under 21, 21 - 30, 31 - 40, 41 - 50, 51 - 60, and Over 60
Height
Any
Weight
Thin/Average

Forehead Height
Short/Average
Glasses
Yes

Styling

Time
10 minutes
Tip
Come pomade through the locks for extra hold and shine.
Products
gel, hair spray
Tools
blow dry


Similar hairstyles you may be interested in...


step 1

Comb your hair into the desired direction that you require for styling.


step 2

Using the corner of your comb and standing in front of a mirror find the middle of your left eye and then drag the comb straight up slowly until you reach your hairline and then continue back in a straight manner to achieve an even left part. A side part is great for longer face shapes because it creates the illusion of width.


step 3

To blow-dry the crown/top sections, take a section of hair no bigger than the diameter of the brush and blow-dry the hair placing the brush under the section of hair. With your blow-dryer in front of the brush, follow the brush in an upwards direction at the roots and an outwards position at the ends for volume and softness. Continue until the section is dry.


step 4

Using your brush, blow-dry in small sections starting from the nape/back. Tilting your head forward, place the brush an inch below the roots to hold them taut and aim the dryer above the brush for a few seconds before continuing to the ends.


step 5

Take a section of your hair no wider than the diameter of your brush. Place your brush under and at the roots of your section. Then with your blow-dryer above, drag the brush up through the mid-lengths and ends of the hair following with your blow-dryer and pulling the hair to the right. Repeat until your hair is completely dry.


step 6

Take a section of your hair no wider than the diameter of your brush. Place your brush under and at the roots of your section. Then with your blow-dryer above, drag the brush up through the mid-lengths and ends of the hair following with your blow-dryer and pulling the hair to the left. Repeat until your hair is completely dry.


step 7

Apply a small amount of gel to your fingertips, then place it at the roots above your ear and drag it through as you pull your hair behind your ear.


step 8

Apply some some gel to your fingertips and then pull through the ends of your hair in a downward motion to achieve a sculptured look.


step 9

To finish, apply a minimal amount of hairspray from an arms length distance to the top, sides and back. Take care not to use too much or you will end up with a white, flaky residue which looks like dandruff.


Recommended Hairstyles...