Light Platinum Blonde Layered Pixie Haircut With Side Swept Bangs


Added: 23 Mar 2017
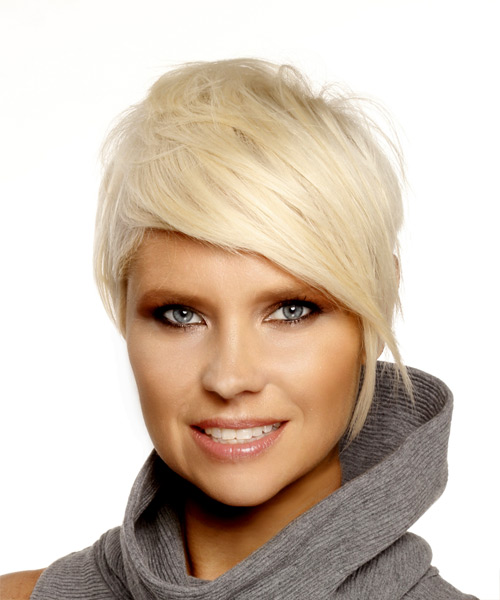
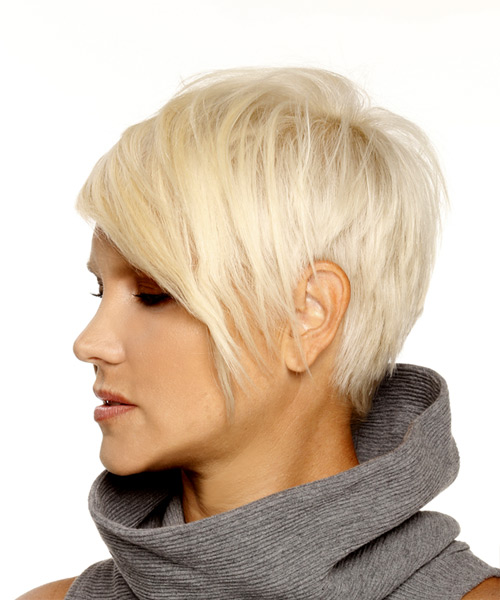
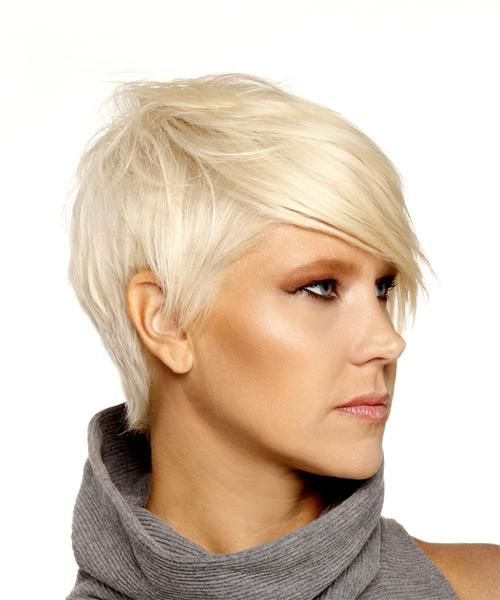
The sides and back of this layered Pixie haircut are tapered into the head while the top is jagged cut for a textured look. The bangs are swept over to soften the face and it completes the style nicely. Regular trims are required every 4 to 6 weeks.

Our model is working a layered Pixie cut here with great results. This jagged cut style is great for women who have petite facial features and a strong bone structure. If you have a square jaw line, short styles like this Pixie will bring the focus upwards. Her fine hair type works well with this 'do too as the layers add texture and body, while giving her high forehead some coverage and framing her eyes. For ladies who like a sassy hairstyle that's easy to maintain, this longer version of a Pixie cut is an great option.

Our model has fair peaches and cream skin that has some pink undertones to it, and light blue eyes. She is best suited to blonde and brown tones that warm up her skin and bring out her eyes. This platinum blonde shade does just that, plus it gives her hair a chic and stylish finish. No highlights are needed here as this Pixie cut looks best in one striking tone, even though low lights could be added for a more natural look.


Visual Story

Light Platinum Blonde Layered Pixie Haircut With Side Swept Bangs- Visual Story


Hairstyle Suitability Rating: ★★★★★
Hairstyle Popularity Rating: ★★★★★

Hairstyle Type

Category
Formal
Length
Short
Elasticity
Straight
Hair Color
Light Platinum Blonde

Haircut Technique

Type
Clipper Cut

Suitability

Gender
Women
Face Shape
round,oval,oblong,heart,diamond
Hair Density
Medium
Hair Texture
Fine

Age
21 - 30, 31 - 40, 41 - 50, 51 - 60, and Over 60
Height
Any
Weight
Thin/Average/Large

Forehead Height
Long
Glasses
Yes

Styling

Time
10 minutes
Tip
Use gel spray at the roots on towel dried hair to amp up the volume of this 'do.
Products
mousse, wax
Tools
finger dry, blow dry


Similar hairstyles you may be interested in...


step 1

Apply styling mousse to damp hair, using your palm as a measuring guide, and evenly distribute it along the hair shaft. Styling mousse will add hold and can help achieve better results.


step 2

Using the corner of your comb and standing in front of a mirror find the middle of your right eye and then drag the comb straight up slowly until you reach your hairline and then continue back in a straight manner to achieve an even right part. A side part is great for longer face shapes because it creates the illusion of width.


step 3

A small radial brush is used on shorter hair types to add more body or in longer hair types to create curl. When selecting a radial brush, always use one with a pure bristle as this will not tear or damage the hair.


step 4

Using a blow-dryer on a low heat setting, use the palm of your hand in slow circular movements to dry off the hair and to create a disorganized effect.


step 5

Use your blow-dryer and your fingers to dry the back of your hair by moving your hair around to allow the heat to pass through it.


step 6

To blow-dry the crown/top sections, take a section of hair no bigger than the diameter of the brush and blow-dry the hair placing the brush under the section of hair. With your blow-dryer in front of the brush, follow the brush in an upwards direction at the roots and an outwards position at the ends for volume and softness. Continue until the section is dry.


step 7

To blow-dry your bangs to the side, clip the back and side sections up, leaving just your bangs out. Place your brush beneath your bangs, holding your hair to the side and remembering to hold the tension between your hair and brush. With your blow-dryer on a low setting, apply heat by starting at the roots and make sure to stretch your hair out to the ends. Repeat until your hair is dry.


step 8

Apply wax to your fingertips then drag through your bangs, sweeping the hair to the left as you go. Pinching the ends will create soft texture.


step 9

To finish the look, apply wax to your fingertips, making sure to smooth the wax over all of your fingers, then simply pinch the wax onto the ends of your hair, applying as much or as little as needed.


Recommended Hairstyles...