Arden Myrin Medium Wavy Hairstyle


Added: 10 Nov 2010
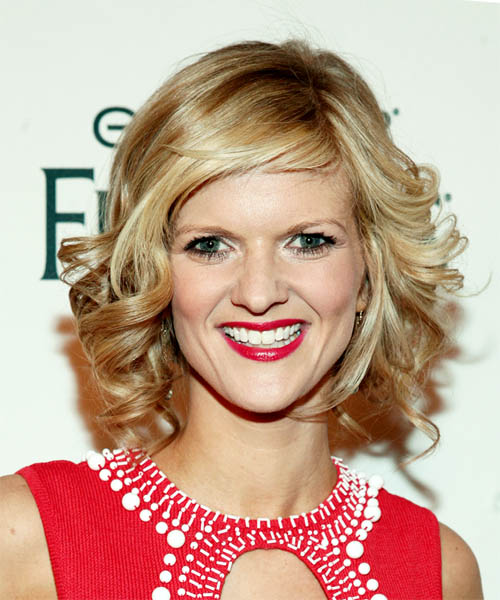
Arden Myrin looked gorgeous on the red-carpet at a function honoring the top 24 Idol contestants. Her sexy hairstyle had plenty of character thanks to layers cut all over to create bounce, which is something she had lots of, and volume through the mid-lengths and ends. This style was simply perfect as it was the best match for her face and personality.

Hairstyle Suitability Rating: ★★★★★
Hairstyle Popularity Rating: ★★★★★

Hairstyle Type

Category
Formal
Length
Medium
Elasticity
Wavy

Haircut Technique

Type

Suitability

Gender
Women
Face Shape
oval,oblong,square,diamond
Hair Density
Thin/Medium
Hair Texture
Fine/Medium

Age
Under 21, 21 - 30, 31 - 40, and 41 - 50
Height
Any
Weight
Thin/Average

Forehead Height
Short/Average
Neck Length
Short/Average
Ears
Small/Average
Nose
Small/Average
Glasses
Yes

Styling

Time
30+ minutes
Tip
Use the curling iron to add curl into the mid-lengths and the ends of your hair.
Products
moisturizer, mousse, wax, smoothing shine, lacquer
Tools
blow dry, curling iron


Similar hairstyles you may be interested in...


step 1

Apply a small amount of hair moisturizer to the palm of your hand and distribute it evenly through the mid-lengths and the ends. Moisturizer will help your hair to maintain good condition and protect your strands from heat as you style.


step 2

Apply styling mousse to damp hair, using your palm as a measuring guide, and evenly distribute it along the hair shaft. Styling mousse will add hold and can help achieve better results.


step 3

A medium radial brush is used on medium to long hair types to smooth out wavy or curly hair textures or to add body to straight hair. When selecting a radial brush, always use one with a pure bristle as this will not tear or damage the hair.


step 4

Starting at the nape/back of the hair, place your brush on top of the section and blow-dryer down starting from the roots and using tension as you go. Next, place the blow-dryer underneath the hair and continue to blow-dry the ends out. Make sure to follow the brush with the blow-dryer in an outwards direction. If you like fuller flicks, hold the ends out and roll them up into the brush and apply the heat for longer.


step 5

To blow-dry the sides, take out your first sections from the front and clip the rest of the hair up. Place your brush on top of the section, and starting from the roots, blow-dry down using tension as you go. Next, place the blow-dryer underneath the hair and continue to blow-dry the ends out. Continue this step until the hair is dry.


step 6

Take a section of your hair no wider than the diameter of your brush. Place your brush under and at the roots of your section. Then with your blow-dryer above, drag the brush up through the mid-lengths and ends of the hair following with your blow-dryer and pulling the hair to the right. Repeat until your hair is completely dry.


step 7

Take a section of your hair no wider than the diameter of your brush. Place your brush under and at the roots of your section. Then with your blow-dryer above, drag the brush up through the mid-lengths and ends of the hair following with your blow-dryer and pulling the hair to the left. Repeat until your hair is completely dry.


step 8

A medium curling iron is used to create medium sized curls.


step 9

Starting from the back, take a small section of hair and place the ends at the base of your curling iron barrel and then wrap the hair up around the barrel until you reach your roots. Hold the hair for 5 to 10 seconds and then release the hair by unwinding the strands backwards. Continue this step until the entire back section of your hair is completed.


step 10

Take a small section of hair and place the ends at the base of your curling iron barrel and then wrap the hair up around the barrel until you reach your mid-lengths. Hold the hair for 5 to 10 seconds and then release the hair by unwinding the strands backwards.


step 11

Apply a small amount of wax to your fingertips and then lightly piece and pinch the ends of your hair.


step 12

Apply a very small amount of smoothing shine to the palms of your hands and then run it through the mid-lengths and ends of your hair. Be careful not to add any to the roots or a large amount to any section of the hair as smoothing shine can be very heavy on the hair, weighing it down and making it appear oily.


step 13

Lacquer is great for strong hold. A small amount is all that is required to finish and should be applied from an arms length distance to the entire style.


Recommended Hairstyles...