Added:
10 Nov 2010
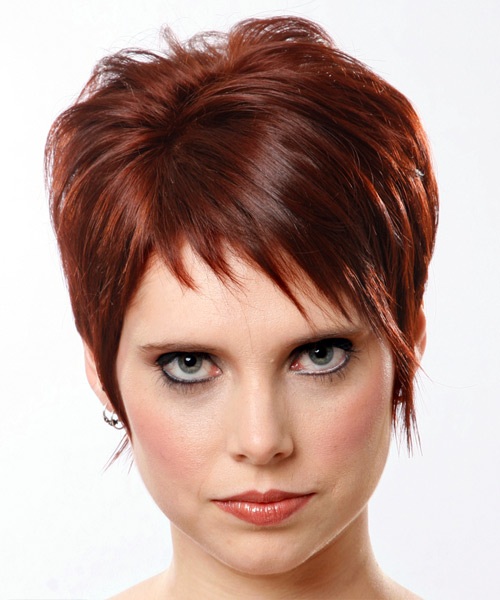
This 'do is perfect for women who want a short, straight style with a pop of mahogany red color. The hair is styled in a sleek, short jaw-length 'do that frames the face and showcases the natural color variation. Mahogany red is a beautiful and unique color that will make you stand out.
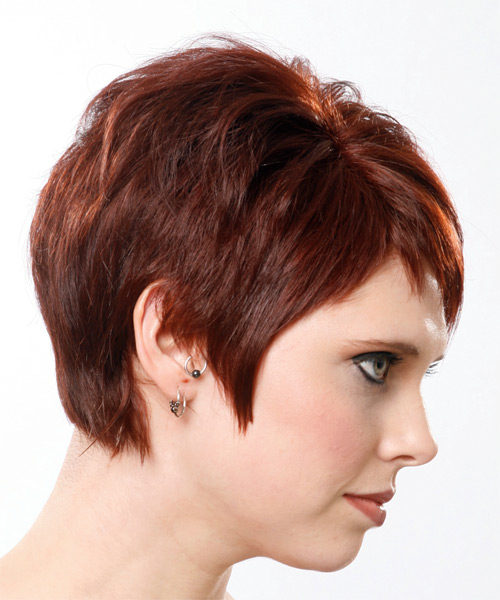
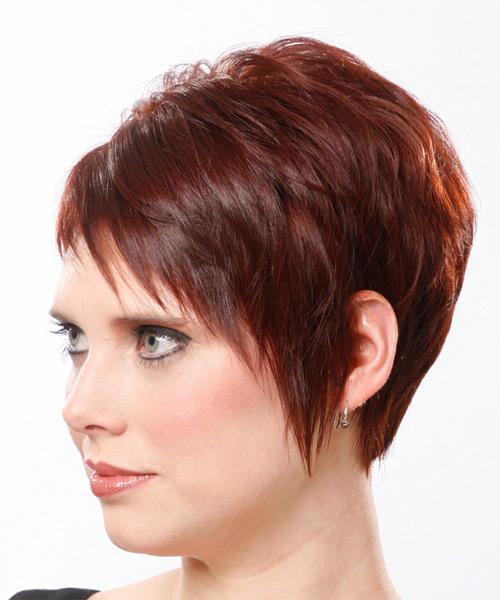
Our model has a hairdo that flatters her youthful features. The mahogany red color complements her skin tone, hazel eyes, and ear piercing nicely. Her bangs are asymmetrical, and part unevenly to create a stylish look that makes her look younger than she is! For the hair styling technique, this short wispy 'do has plenty of attitude with razor-cut layers to achieve texture and definition. It allows height through the crown and softness to the front of the face with uneven stylish bangs. It is a very short hairstyle with mahogany highlights, and is blunt cut at jaw length with no layers. It is best suited for women with round, oval, square, heart or triangular face shapes, and it will work best on thin to medium hair density, and fine to medium hair texture. It is an effortless hairstyle to maintain and always looks neat and polished.
This style is perfect for those who want a low-maintenance look that still packs a style punch. The hair is cut straight across the bottom and styled to frame the face, making it perfect for those with round or oval faces. You can maintain this style with regular trims after 4 to 6 weeks, and it is ideal for those looking for a low-maintenance style with a bit of personality. Fluff the styling products into the ends of your hair and pinch as you go to create textured edges.
Short Jaw-Length Hairstyle With Asymmetrical Bangs
Visual Story
Hairstyle Suitability Rating:
Hairstyle Popularity Rating: ★★★★★
Hairstyle Popularity Rating: ★★★★★
Hairstyle Type
Category
Casual
Length
Short
Elasticity
Straight
Hair Color
Mahogany Red
Haircut Technique
Type
Razor Cut
Suitability
Gender
Women
Face Shape
round,oval,square,heart,triangular
Hair Density
Thin/Medium
Hair Texture
Fine/Medium
Age
Under 21, 21 - 30, 31 - 40, 41 - 50, and 51 - 60
Height
Any
Weight
Thin/Average/Large
Forehead Height
Short/Average
Neck Length
Short/Average
Ears
Small/Average
Nose
Small/Average
Glasses
No
Styling
Time
30+ minutes
Tip
Fluff the styling products into the ends of your hair and pinch as you go to create textured edges
Products
mousse, moulding cream, lacquer
Tools
blow dry

