Short Shiny Hairstyle With Bounce And Texture


Added: 10 Nov 2010
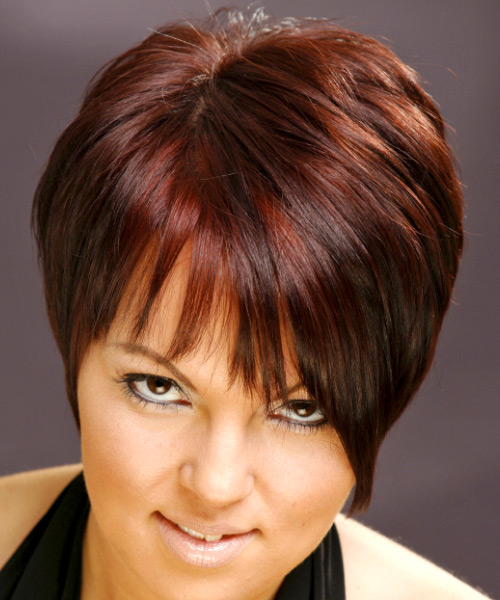
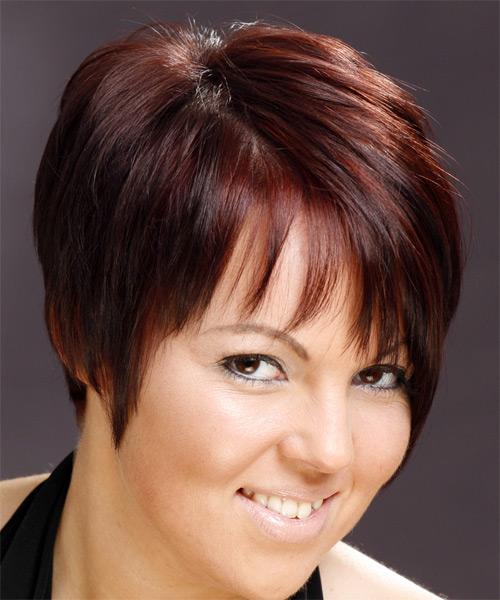
Glamorous and effortless, this short-length straight dark brunette hairstyle has a soft feel with a shiny sheen and plenty of bounce. This 'do is a bold and fun look, and with its bold spikes, this hairstyle will let your natural beauty shine through. 
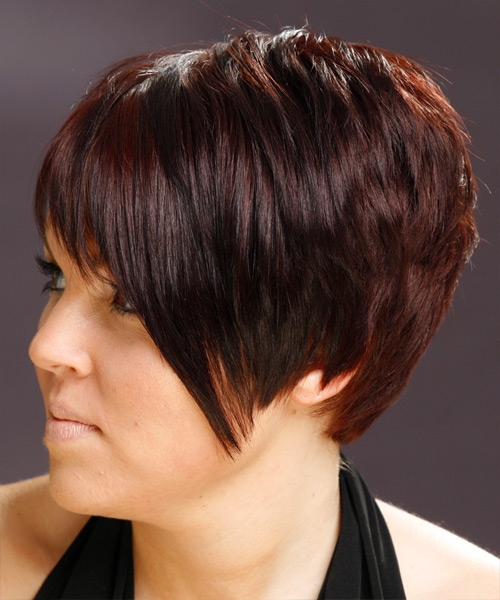
Our lovely model is wearing a black sleeveless top and flattening this hairstyle with her severe glare. Her thin sharp eyes and brows complements the look with nude lips. For the styling, this fun 'do is recommended for women who love to show off their perfect tresses. The style has been cut with layering to the top to mainly create this elevated look through the crown. Razored bangs have also been cut to create a textured look. The sides have been thinned out, cut to the cheekbones, and flattened around the face. The back has been angle layered and shaped around the nape for a soft finish. This short hairstyle will suit your long face shape and hair density. Recommended for women with medium to thick hair who want to give their face a round or oval shape, this hairstyle for brunette women is a smart choice for everyday wear.

This cuts' gorgeous and super shiny texture is achieved through a flat-iron technique that straightens without creating any damage to the hair. It lasts 4 to 6 weeks and can be maintained using regular trims. This hairstyle is ideal for those with straight hair and has a tight, high-maintenance style. Use a heat protectant spray before styling to keep hair healthy and shiny.


Visual Story

Short Shiny Hairstyle With Bounce And Texture- Visual Story


Hairstyle Suitability Rating: ★★★★★
Hairstyle Popularity Rating: ★★★★★

Hairstyle Type

Category
Casual
Length
Short
Elasticity
Straight
Hair Color
Dark Brunette

Haircut Technique

Type

Suitability

Gender
Women
Face Shape
round,oval,heart,diamond
Hair Density
Medium/Thick
Hair Texture
Medium/Coarse

Age
Under 21, 21 - 30, 31 - 40, and 41 - 50
Height
Any
Weight
Thin/Average/Large

Forehead Height
Short/Average
Neck Length
Long
Ears
Small/Average
Nose
Small/Average
Glasses
No

Styling

Time
30 minutes
Tip
Use your fingers to add height and texture into this style.
Products
moisturizer, sculpture lotion, wax, hair spray
Tools
blow dry


Similar hairstyles you may be interested in...


step 1

Apply a small amount of hair moisturizer to the palm of your hand and distribute it evenly through the mid-lengths and the ends. Moisturizer will help your hair to maintain good condition and protect your strands from heat as you style.


step 2

Apply sculpture lotion to the palm of the hand and then place it evenly throughout the hair. Sculpture lotion can be used as an alternative to mousse for messy hair, as a styling aid when blow-drying for volume, and for a stronger hold.


step 3

Using the corner of your comb and standing in front of a mirror find the middle of your right eye and then drag the comb straight up slowly until you reach your hairline and then continue back in a straight manner to achieve an even right part. A side part is great for longer face shapes because it creates the illusion of width.


step 4

It is always a good idea to work in sections. This will help to make your hair styling quicker, easier to follow and more orderly. Comb your hair out and place your hair up into four equal sections, two in front and two in back, starting from ear to ear.


step 5

A small radial brush is used on shorter hair types to add more body or in longer hair types to create curl. When selecting a radial brush, always use one with a pure bristle as this will not tear or damage the hair.


step 6

To blow-dry under, start at the nape/back and place your brush under the section of hair close to the nape. With the dryer held up over the hair, pull the brush from the roots and continue to the mid length's, keeping the blow-dryer following over the top. Once you reach the ends, curve them under. Repeat this step until the section is completely dry.


step 7

To blow-dry the sides, take out a small section of hair from the front and clip the rest of the hair away. Next, place the brush under the section and then pull the brush and hair forward around your face (this curving motion creates body). Place the hair-dryer on top of the brush until you reach the ends and then turn the ends under. Repeat until dry.


step 8

To blow-dry the crown/top sections, take a section of hair no bigger than the diameter of the brush and blow-dry the hair placing the brush under the section of hair. With your blow-dryer in front of the brush, follow the brush in an upwards direction at the roots and an outwards position at the ends for volume and softness. Continue until the section is dry.


step 9

When blow-drying your bangs forward, clip your hair back leaving only your bangs out. Position your bangs evenly in your brush, taking the hair in a forward direction. Blow-dry from roots to ends, keeping the tension consistent, and evenly distribute heat over the whole section of hair that you are working on. Repeat until the hair is dry. This will stop any frizz that may occur.


step 10

Pick up a small selection of hair from your mid section no bigger than your tail comb. Place your comb at the roots and then comb up and down until the hair is standing up by itself. Continue to the crown and finish at the sides. Repeat this step if you require more volume.


step 11

Apply some wax to your fingertips and then pull through the ends of your hair in a downward motion to achieve a sculptured look. Pinch clumps of hair in different directions for a messier result.


step 12

Using a small amount of wax, work it through the mid-lengths and ends in a downward, pinching motion. For added texture, apply more pinching and more wax.


step 13

Apply some hard wax to your fingertips and then rub it into your roots while lifting your strands for soft volume.


step 14

Apply a small amount of wax to your fingertips, and then using your fingers, rake through your bangs pinching the ends as you go to create a feathered, textured effect.


step 15

To finish, apply a minimal amount of hairspray from an arms length distance to the top, sides and back. Take care not to use too much or you will end up with a white, flaky residue which looks like dandruff.


Recommended Hairstyles...