Pamela Horton Elegant Black Pixie Haircut with Side Swept Bangs


Added: 05 Mar 2017
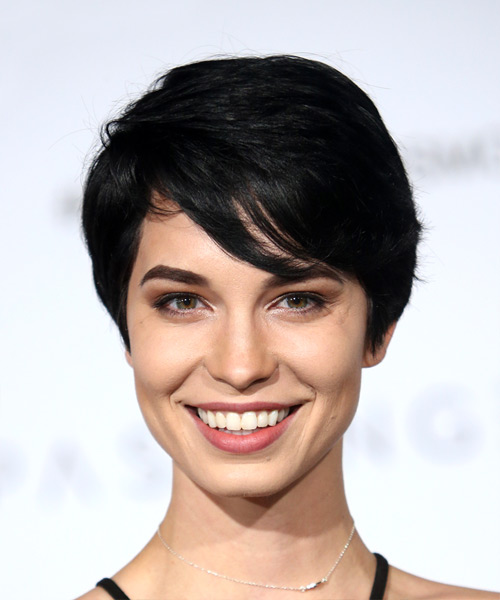
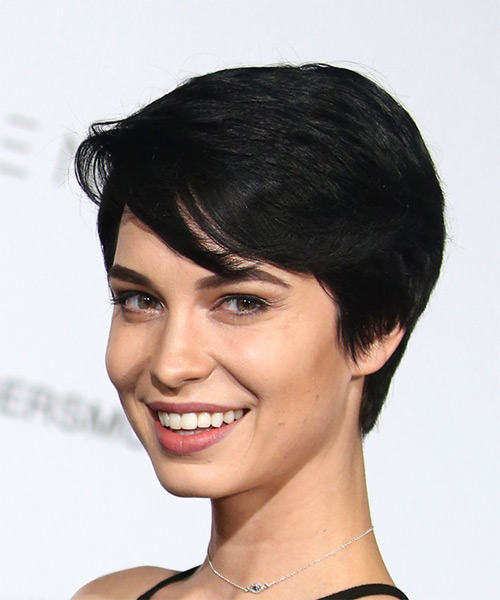
The back and sides of this short sassy 'do is tapered into the head blending into the top layers that are swept to the side for shape and style. The front is swept across the forehead to soften the face and completes the over-all look brilliantly. Product is needed to keep this style in place and regular trims is needed every 4-6 weeks.

Pamela Horton is looking elegant here in a short hairstyle. It is flattering to her features as the side-swept fringe helps to balance the length of her face and the asymmetrical styling helps to keep a focus on her best features -her bright, expressive eyes and beaming smile. Her facial features are complimented by this short’ do and her side swept bangs focus the attention on her beautiful eyes. The end result is a feminine, modern and sophisticated look.

Pamela is a natural brunette with dark brown eyes and an olive complexion. Here, she goes for a natural looking espresso brown color all over. No highlights are needed here as this color shows off her cut nicely and harmonizes well with her eye color, skin tone and eyebrows. It also produces a glossy, healthy looking finish for her locks. Touch ups are needed every now and then to keep the color looking vibrant.

Pamela Horton is a Playboy playmate who now hosts Gamer Next Door.

Hairstyle Suitability Rating: ★★★★★
Hairstyle Popularity Rating: ★★★★★

Hairstyle Type

Category
Casual
Length
Short
Elasticity
Straight
Hair Color
Black

Haircut Technique

Type
Clipper Cut

Suitability

Gender
Women
Face Shape
oval,oblong,diamond,triangular
Hair Density
Medium
Hair Texture
Medium

Age
21 - 30, 31 - 40, 41 - 50, 51 - 60, and Over 60
Height
Any
Weight
Thin/Average/Large

Forehead Height
Long
Glasses
Yes

Styling

Time
10 minutes
Tip
Smooth down flyaways with pomade for a glossy finish.
Products
mousse, wax
Tools
blow dry


Similar hairstyles you may be interested in...


step 1

Apply styling mousse to damp hair, using your palm as a measuring guide, and evenly distribute it along the hair shaft. Styling mousse will add hold and can help achieve better results.


step 2

Using the corner of your comb and standing in front of a mirror find the middle of your right eye and then drag the comb straight up slowly until you reach your hairline and then continue back in a straight manner to achieve an even right part. A side part is great for longer face shapes because it creates the illusion of width.


step 3

A medium radial brush is used on medium to long hair types to smooth out wavy or curly hair textures or to add body to straight hair. When selecting a radial brush, always use one with a pure bristle as this will not tear or damage the hair.


step 4

To blow-dry under, start at the nape/back and place your brush under the section of hair close to the nape. With the dryer held up over the hair, pull the brush from the roots and continue to the mid length's, keeping the blow-dryer following over the top. Once you reach the ends, curve them under. Repeat this step until the section is completely dry.


step 5

To blow-dry the crown/top sections, take a section of hair no bigger than the diameter of the brush and blow-dry the hair placing the brush under the section of hair. With your blow-dryer in front of the brush, follow the brush in an upwards direction at the roots and an outwards position at the ends for volume and softness. Continue until the section is dry.


step 6

To blow-dry your bangs to the side, clip the back and side sections up, leaving just your bangs out. Place your brush beneath your bangs, holding your hair to the side and remembering to hold the tension between your hair and brush. With your blow-dryer on a low setting, apply heat by starting at the roots and make sure to stretch your hair out to the ends. Repeat until your hair is dry.


step 7

To blow-dry the sides, take out a small section of hair from the front and clip the rest of the hair away. Next, place the brush under the section and then pull the brush and hair forward around your face (this curving motion creates body). Place the hair-dryer on top of the brush until you reach the ends and then turn the ends under. Repeat until dry.


step 8

Apply a small amount of wax to your fingertips, then place it at the roots above your ear and drag it through as you pull your hair behind your ear.


step 9

Apply some wax to your fingertips and then pull through the ends of your hair in a downward motion to achieve a sculptured look. Pinch clumps of hair in different directions for a messier result.


Recommended Hairstyles...