Ingrid Hoffmann Long Straight Hairstyle


Added: 11 Nov 2010
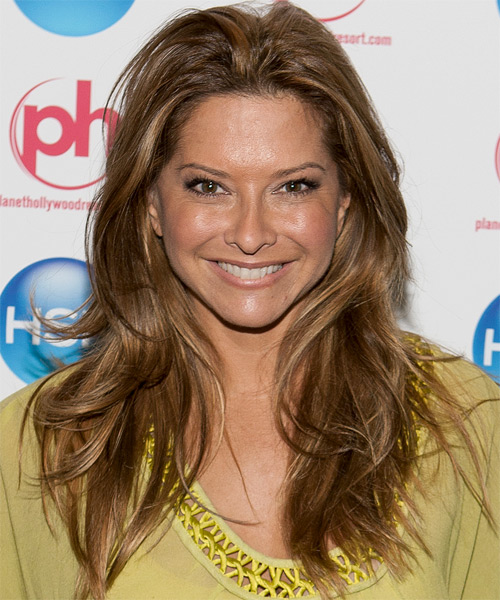
Textured layers cut through the mid-lengths to ends of this long casual hairstyle allows the ends to flick out softly to create a light and wispy look and feel. This 'do is easy to re-create on fine to medium hair and will need regular trims to maintain shape and avoid split ends.

Hairstyle Suitability Rating: ★★★★★
Hairstyle Popularity Rating: ★★★★★

Hairstyle Type

Category
Casual
Length
Long
Elasticity
Straight

Haircut Technique

Type

Suitability

Gender
Women
Face Shape
round,oval,square,heart,triangular
Hair Density
Thin/Medium
Hair Texture
Fine/Medium

Age
Under 21, 21 - 30, and 31 - 40
Height
Any
Weight
Thin/Average/Large

Forehead Height
Short/Average
Neck Length
Short/Average
Ears
Small/Average
Nose
Small/Average
Glasses
Yes

Styling

Time
20 minutes
Tip
Use your fingers to pinch the styling products through to create a textured finish.
Products
mousse, moulding cream, smoothing shine, hair spray
Tools
blow dry


Similar hairstyles you may be interested in...


step 1

Apply styling mousse to damp hair, using your palm as a measuring guide, and evenly distribute it along the hair shaft. Styling mousse will add hold and can help achieve better results.


step 2

A large radial brush is usually used on long straight hair types or to smooth out wavy or curly hair textures. When selecting a radial brush, always use one with a pure bristle as this will not tear or damage the hair.


step 3

To blow-dry under, start at the nape/back and place your brush under the section of hair close to the nape. With the dryer held up over the hair, pull the brush from the roots and continue to the mid length's, keeping the blow-dryer following over the top. Once you reach the ends, curve them under. Repeat this step until the section is completely dry.


step 4

To blow-dry the sides, take out a small section of hair from the front and clip the rest of the hair away. Next, place the brush under the section and then pull the brush and hair forward around your face (this curving motion creates body). Place the hair-dryer on top of the brush until you reach the ends and then turn the ends under. Repeat until dry.


step 5

To blow-dry the crown/top sections, take a section of hair no bigger than the diameter of the brush and blow-dry the hair placing the brush under the section of hair. With your blow-dryer in front of the brush, follow the brush in an upwards direction at the roots and an outwards position at the ends for volume and softness. Continue until the section is dry.


step 6

To blow-dry the top section back you will need to take your brush and firstly make sure that the section is no wider than the diameter of the brush. Next, place your brush on top of your head and under your section. Using your blow-dryer on a medium setting, blow-dry your hair from the roots, slowly lifting your hair up and working your way to the ends. Make sure to keep the blow-dryer in front of the brush at all times. Continue this step until the top section is completely dry.


step 7

Apply some moulding cream to your fingertips and then pull it through the ends of your hair in a downward motion to achieve a textured look.


step 8

To get your sides to sit out, apply a small amount of moulding cream to your fingertips and then working mainly on the ends, pinch them while dragging the hair in an out and upwards motion. The more moulding cream and the more pinching that you apply, the more textured and pasty the result.


step 9

Apply some moulding cream to your fingertips and then rub it into your roots while lifting your strands for added body. Be sure not to use too much moulding cream at the roots as this can result in a glugy and thick uncomfortable feel.


step 10

Apply moulding cream to your fingertips and then pinch small clumps of hair in an up and forward motion. Pinch the clumps in different directions for a messier look.


step 11

Apply a very small amount of smoothing shine to the palms of your hands and then run it through the mid-lengths and ends of your hair. Be careful not to add any to the roots or a large amount to any section of the hair as smoothing shine can be very heavy on the hair, weighing it down and making it appear oily.


step 12

To finish, apply a minimal amount of hairspray from an arms length distance to the top, sides and back. Take care not to use too much or you will end up with a white, flaky residue which looks like dandruff.


Recommended Hairstyles...